Create a Policy
This guide walks you through creating a Policy to govern how your Agents operate.
For background on how Policies govern Agent behavior, see AI Agents.
Open the Policies page
-
From the left sidebar, navigate to the Agent Fleet application.
-
Switch to the Policies tab.
-
Click Create in the top-right corner to open the Create New Policy form.
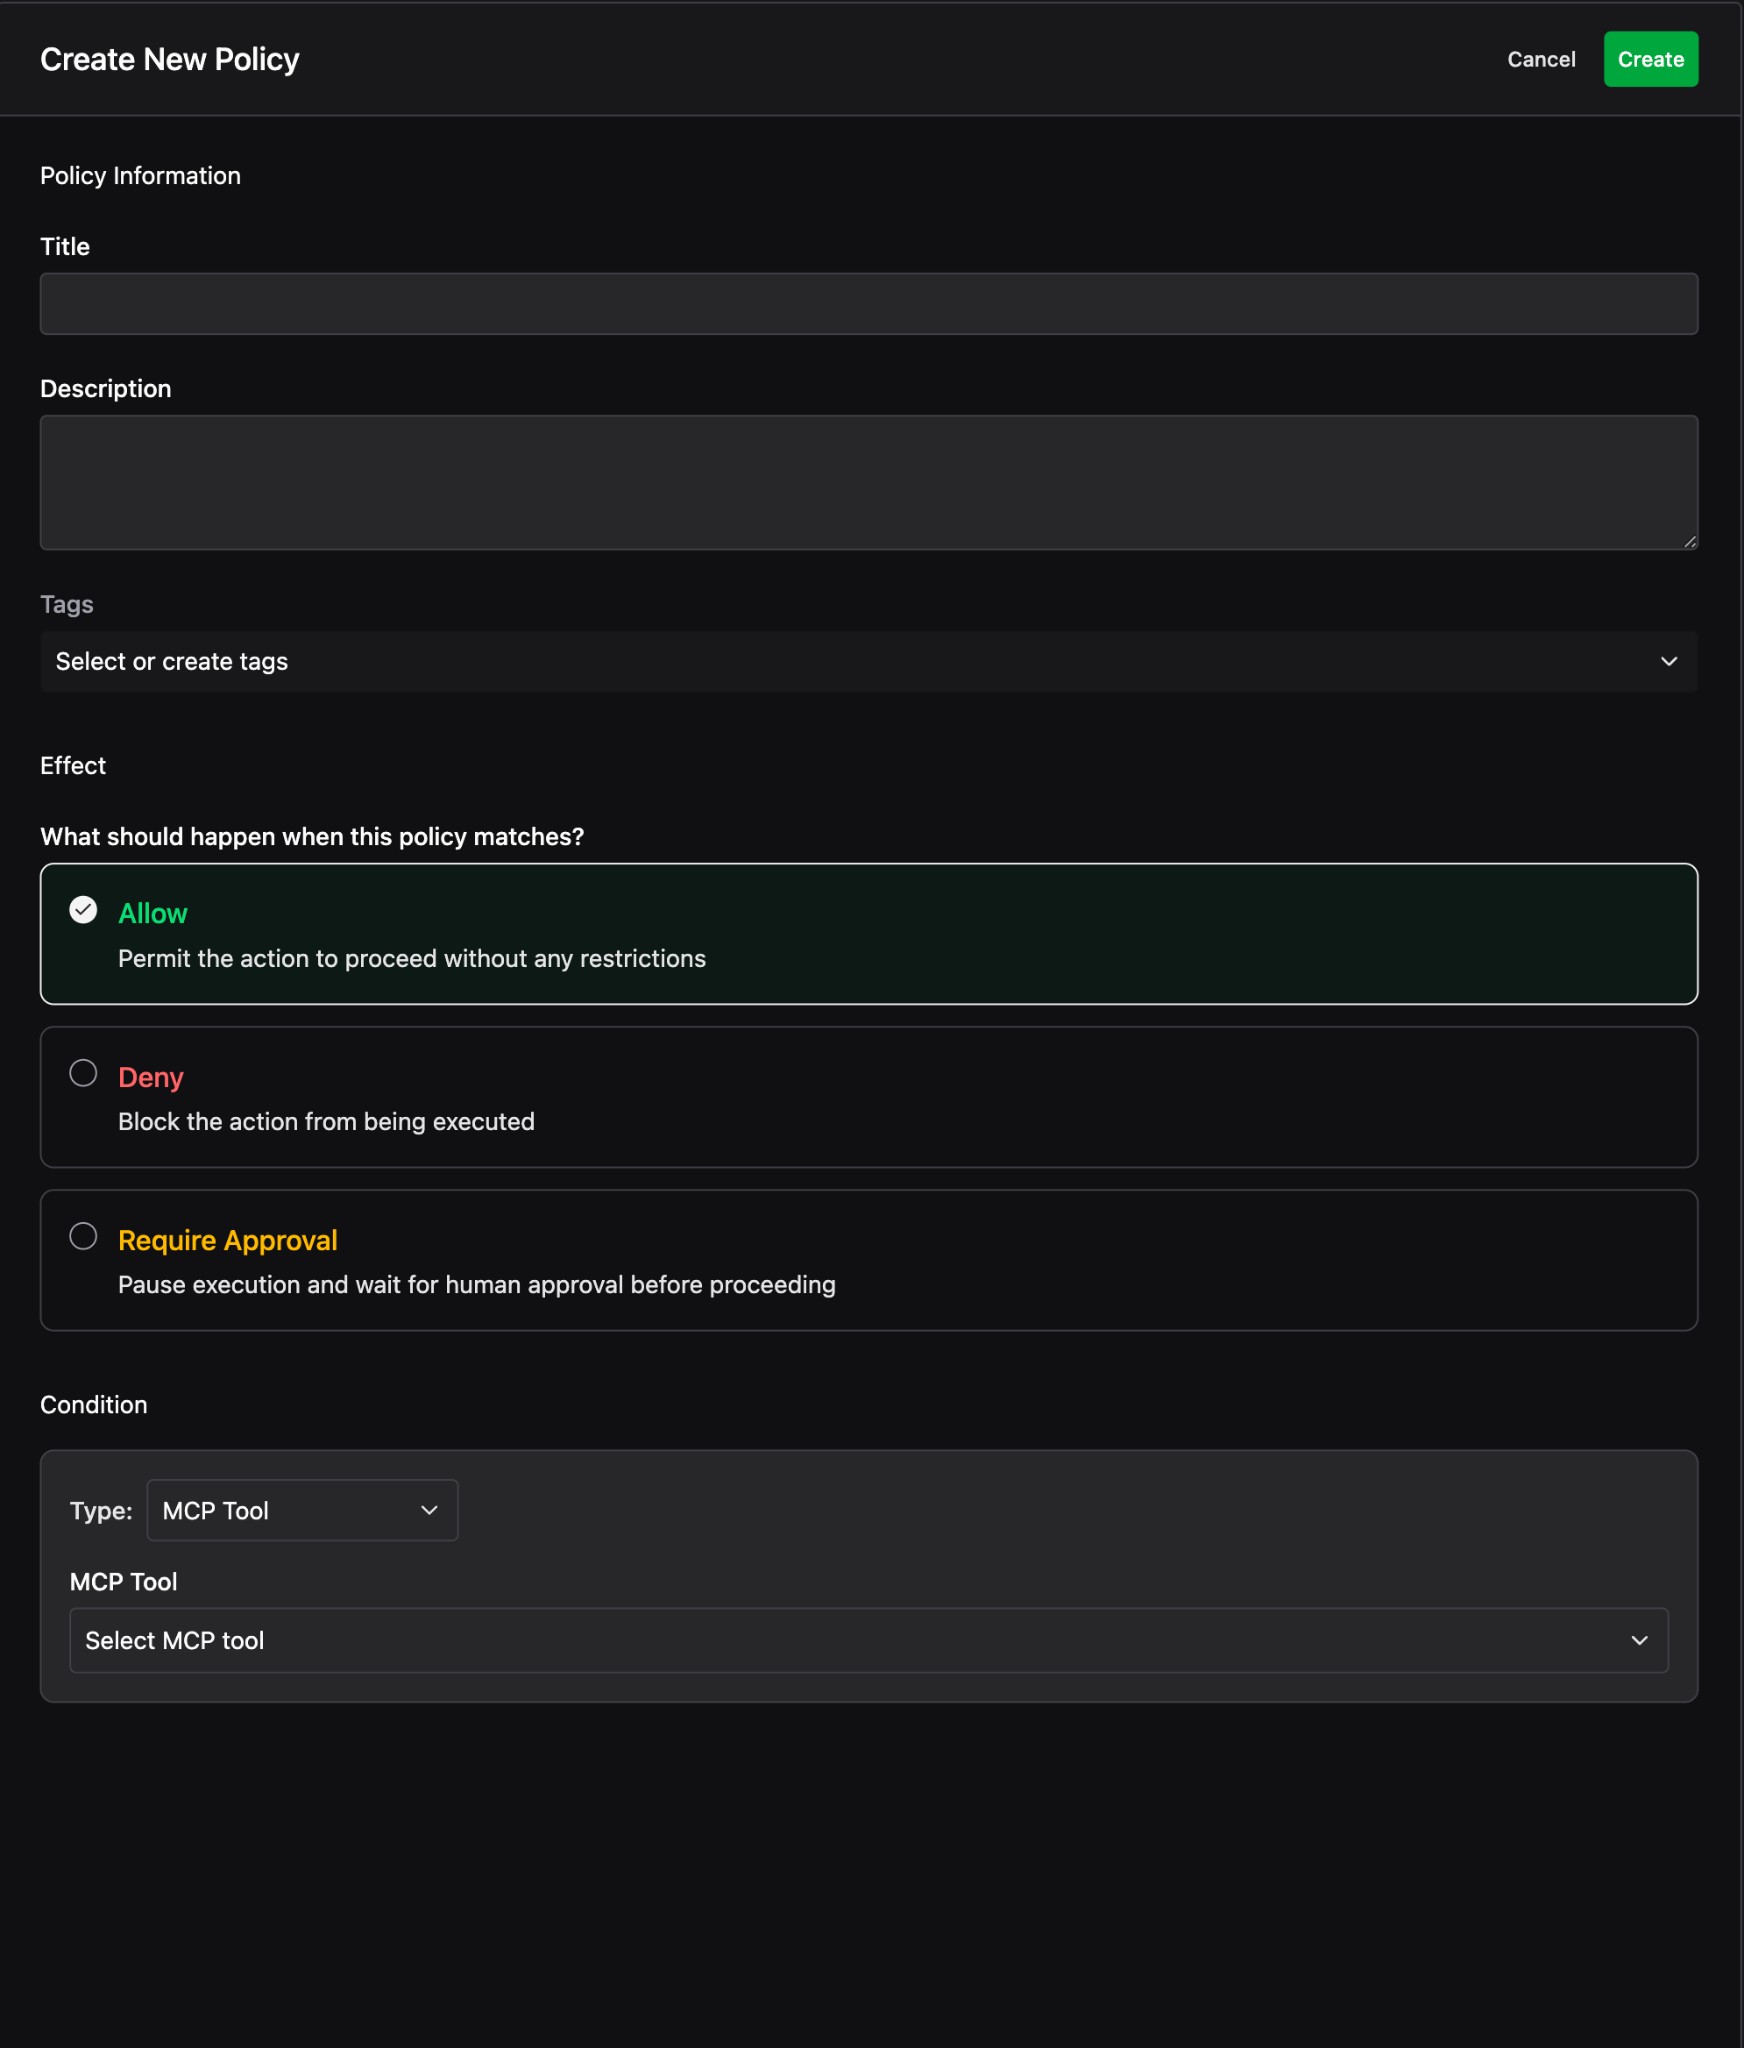
Policy Information
Start by filling in the policy’s identity.
- Title – A short, descriptive name. Choose something that makes the policy’s intent clear at a glance (e.g. “Require Approval For Netcat Client”).
- Description – A longer explanation of why this policy exists and what it governs.
Effect
Choose what should happen when this policy matches.
- Allow – Permit the action to proceed without any restrictions.
- Deny – Block the action from being executed.
- Require Approval – Pause execution and wait for human approval before proceeding.
When multiple policies apply to the same action, Deny takes precedence over Allow, and Require Approval can be used to gate sensitive actions. Design your policies so the combination of effects matches your security requirements.
Condition
Define when this policy applies by adding one or more conditions. Each condition has a Type that determines what the policy is scoped to:
- Agent – Scope the policy to a specific Agent.
- Environment – Scope the policy to a specific environment.
- MCP Tool – Scope the policy to a specific tool the Agent can call.
- Agent Session – Scope the policy to an individual session.
You can add multiple conditions. When a policy has more than one condition, they are combined with Any of (OR) logic — the policy matches if any condition is satisfied.
Create the Policy
Once all fields are configured, click Create in the top-right corner. Your new policy will appear in the Policies list.
Examples
Below are two example policies that illustrate common patterns.
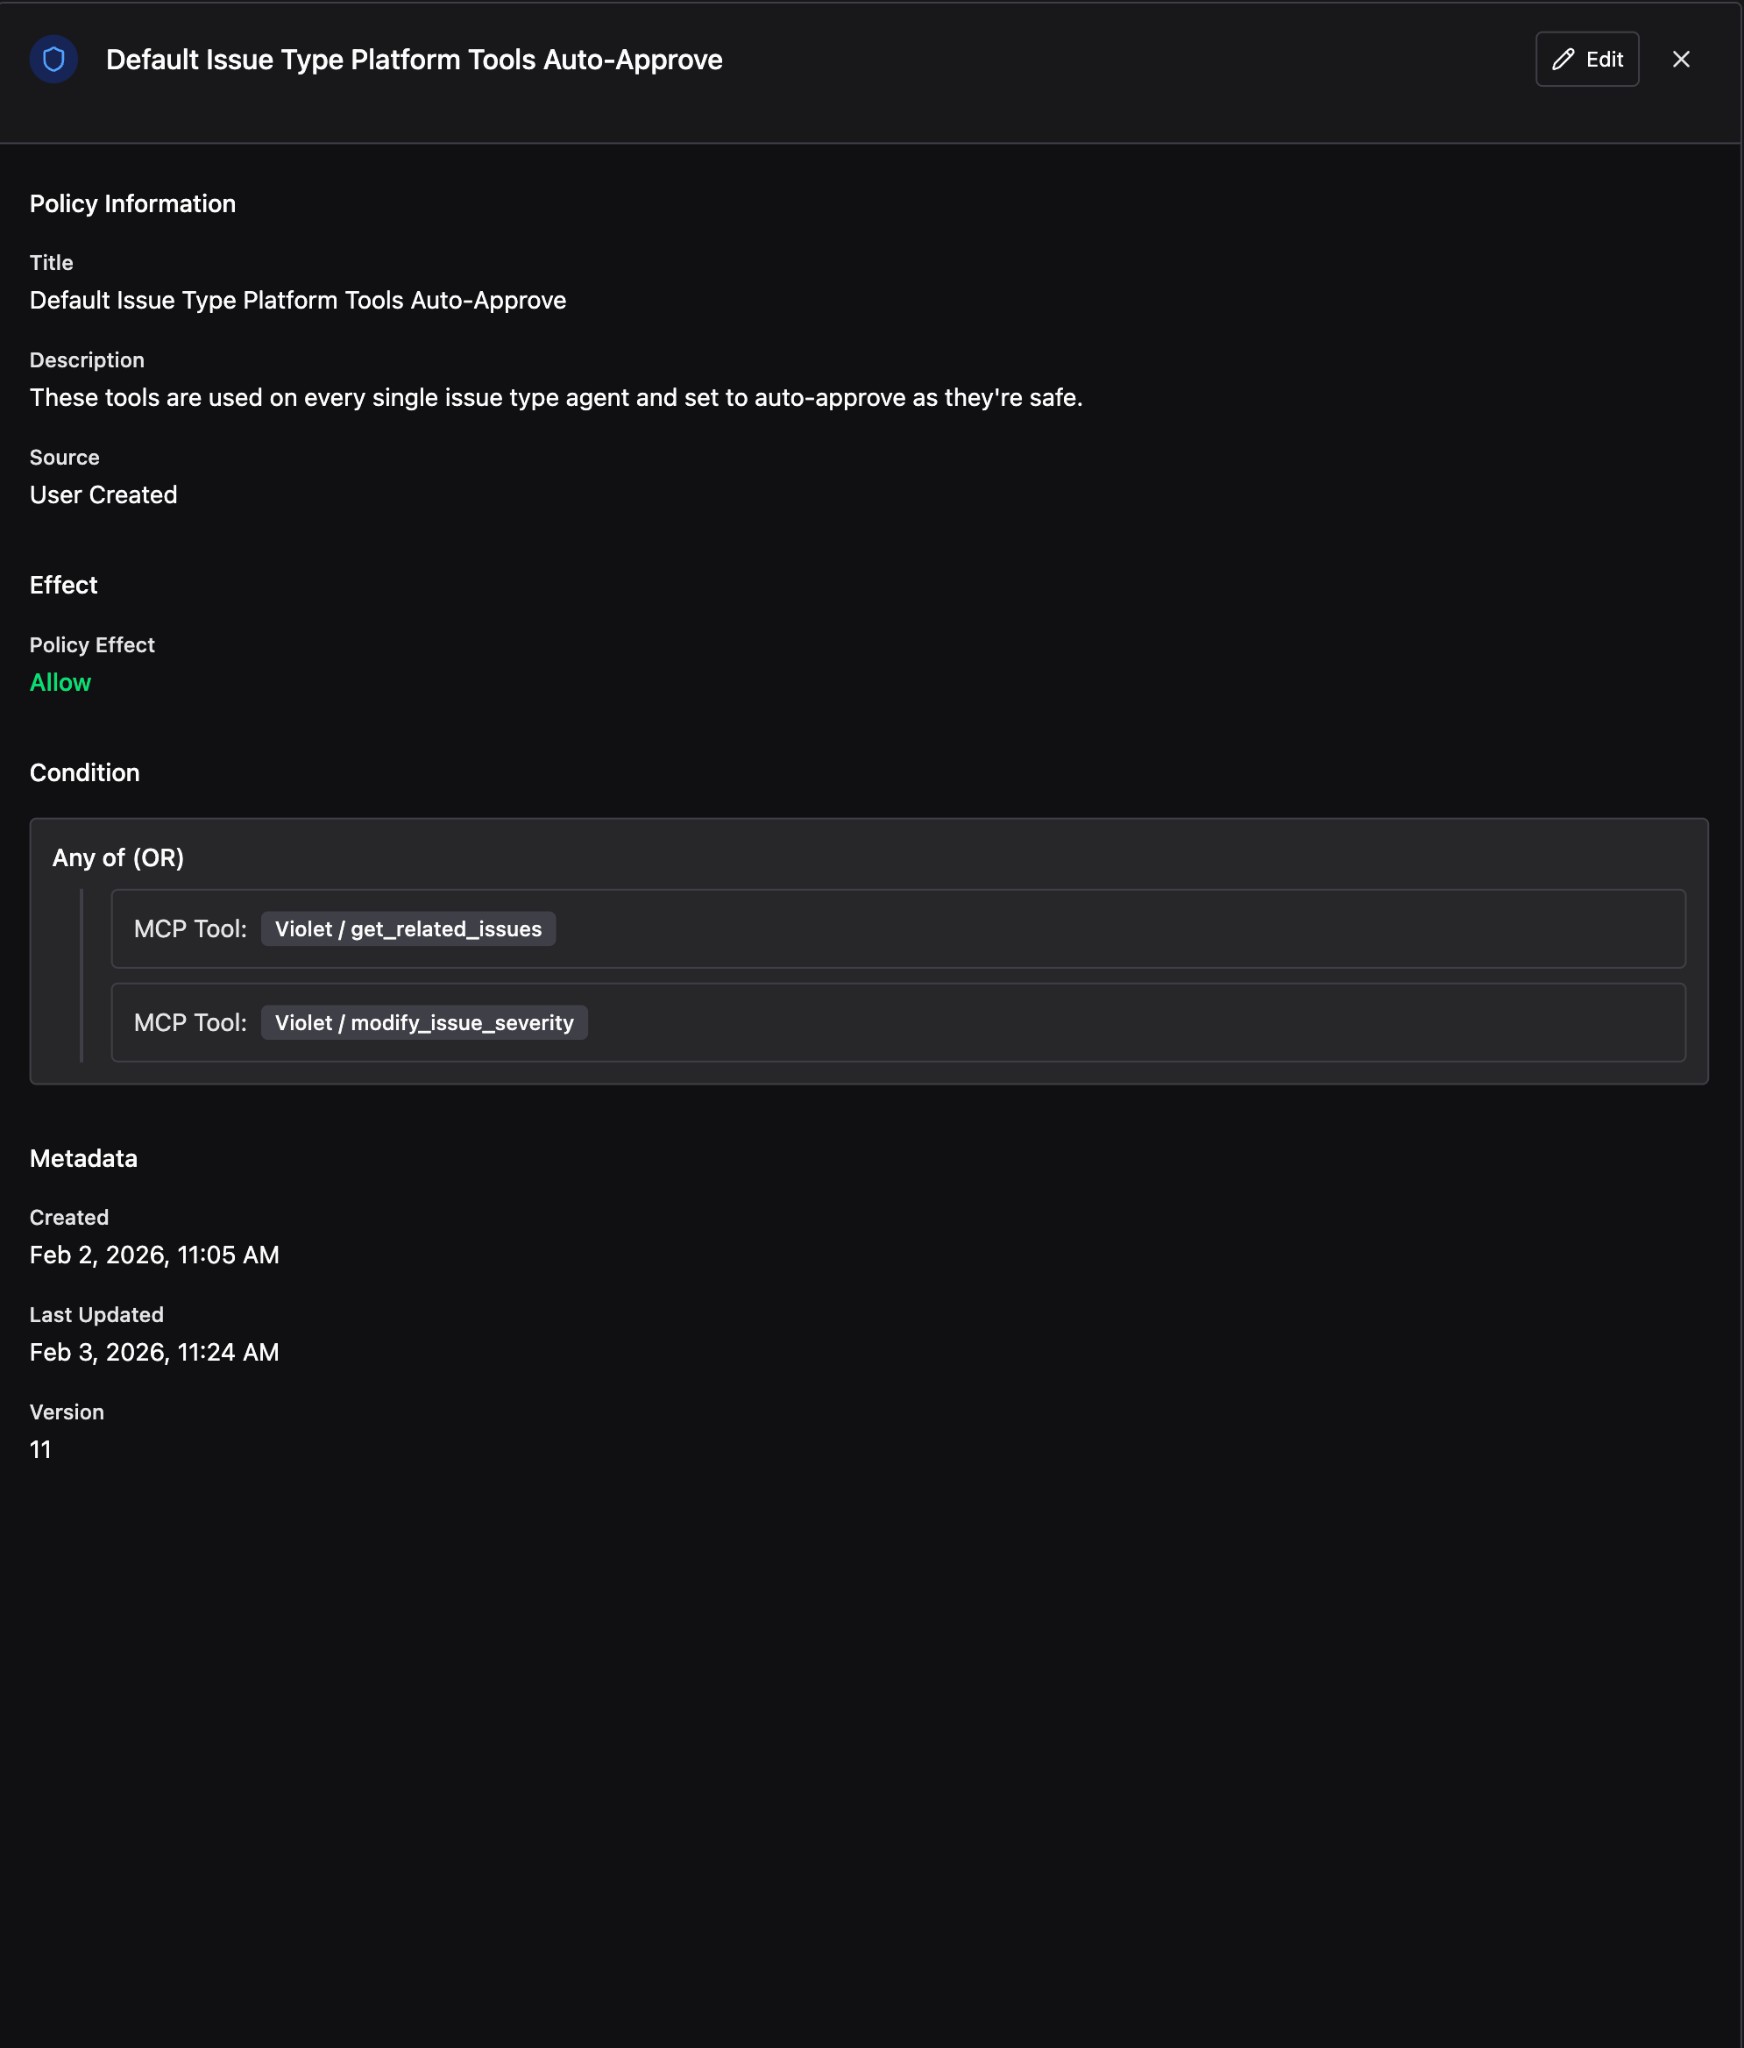
Example: Auto-approve safe tools
This policy allows a set of platform tools to run without requiring approval. It uses an Allow effect with multiple MCP Tool conditions combined with OR logic, so any of the listed tools will be automatically approved.
- Title: Default Issue Type Platform Tools Auto-Approve
- Description: These tools are used on every single issue type Agent and set to auto-approve as they’re safe.
- Effect: Allow
- Conditions: MCP Tool:
Violet / get_related_issues, MCP Tool:Violet / modify_issue_severity
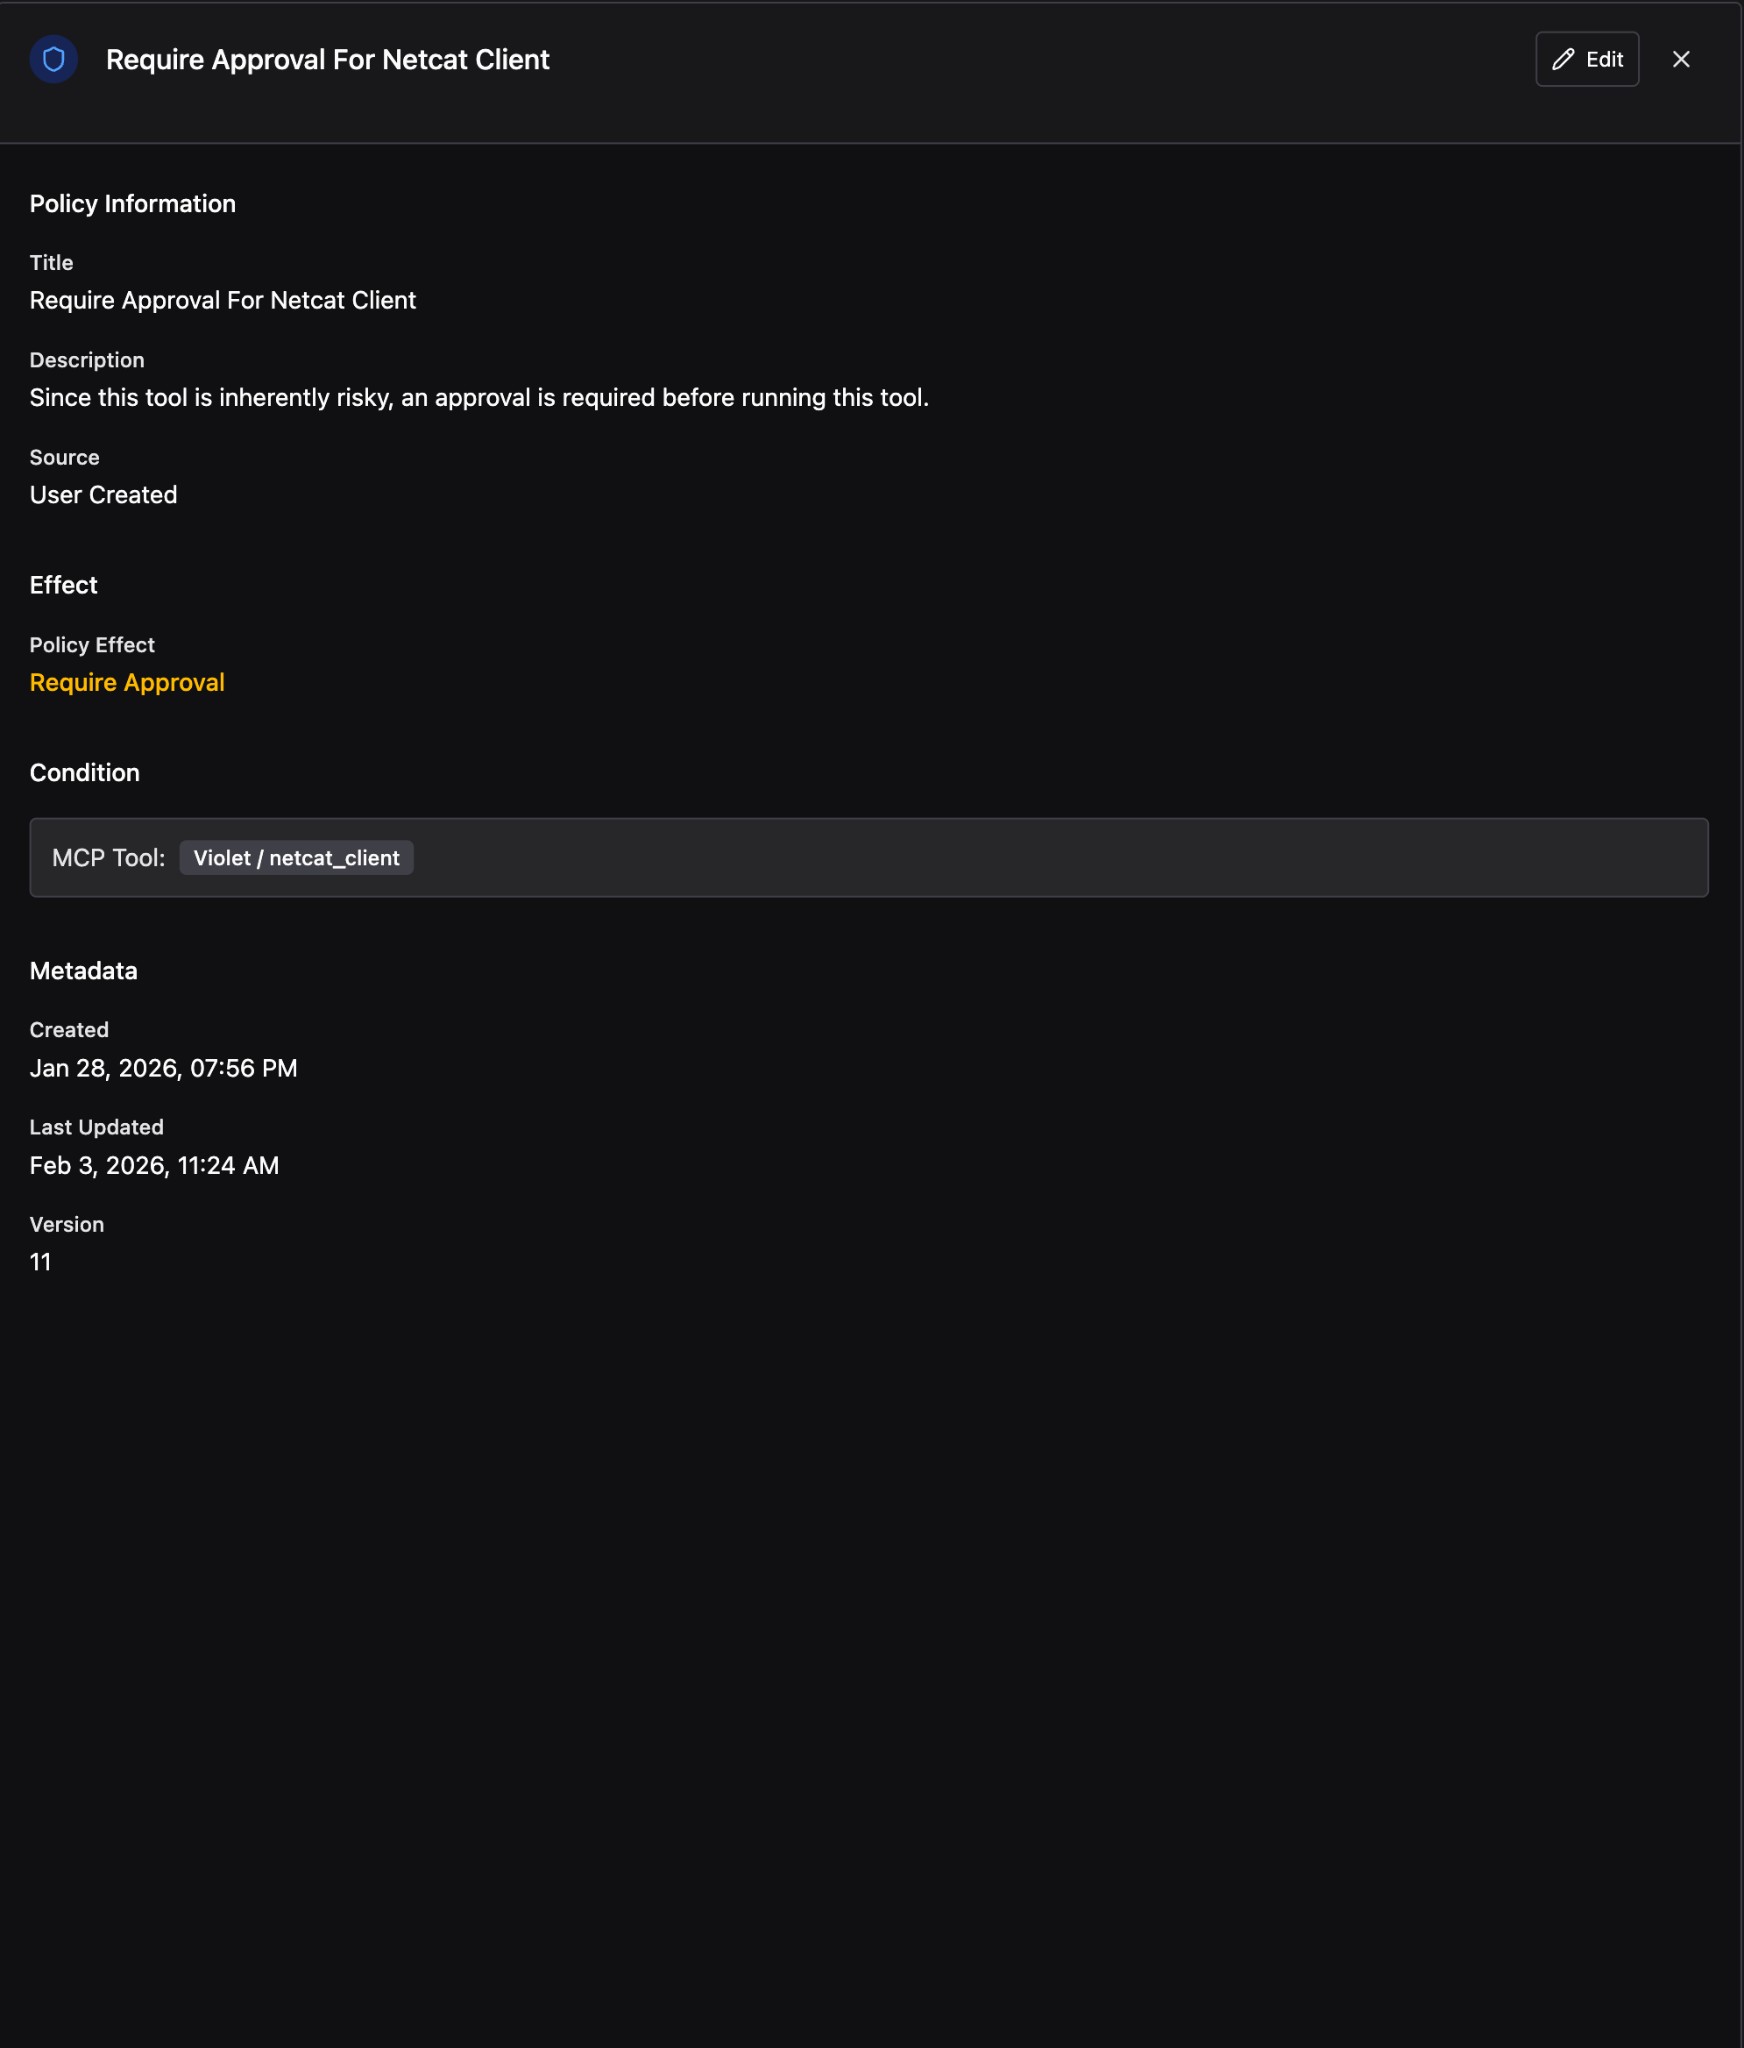
Example: Require approval for a risky tool
This policy gates a powerful tool behind human approval. Any time an Agent attempts to use this tool, execution pauses until a user explicitly approves it.
- Title: Require Approval For Netcat Client
- Description: Since this tool is inherently risky, an approval is required before running this tool.
- Effect: Require Approval
- Condition: MCP Tool:
Violet / netcat_client
Next steps
With Agents and Policies in place, your AI workflows are governed and auditable. Revisit the AI Agents platform page to learn more about how Agents and Policies work together.