Using Filters to query data in Explorer
This guide will help you build complex queries in Explorer so you can find exactly the objects, object sets, or issues relevant to your work.
Basic filtering
In this section, we’ll learn how to quickly set up basic filters in Explorer.
When you land on the Explorer homepage, you will see the Explorer zero state.
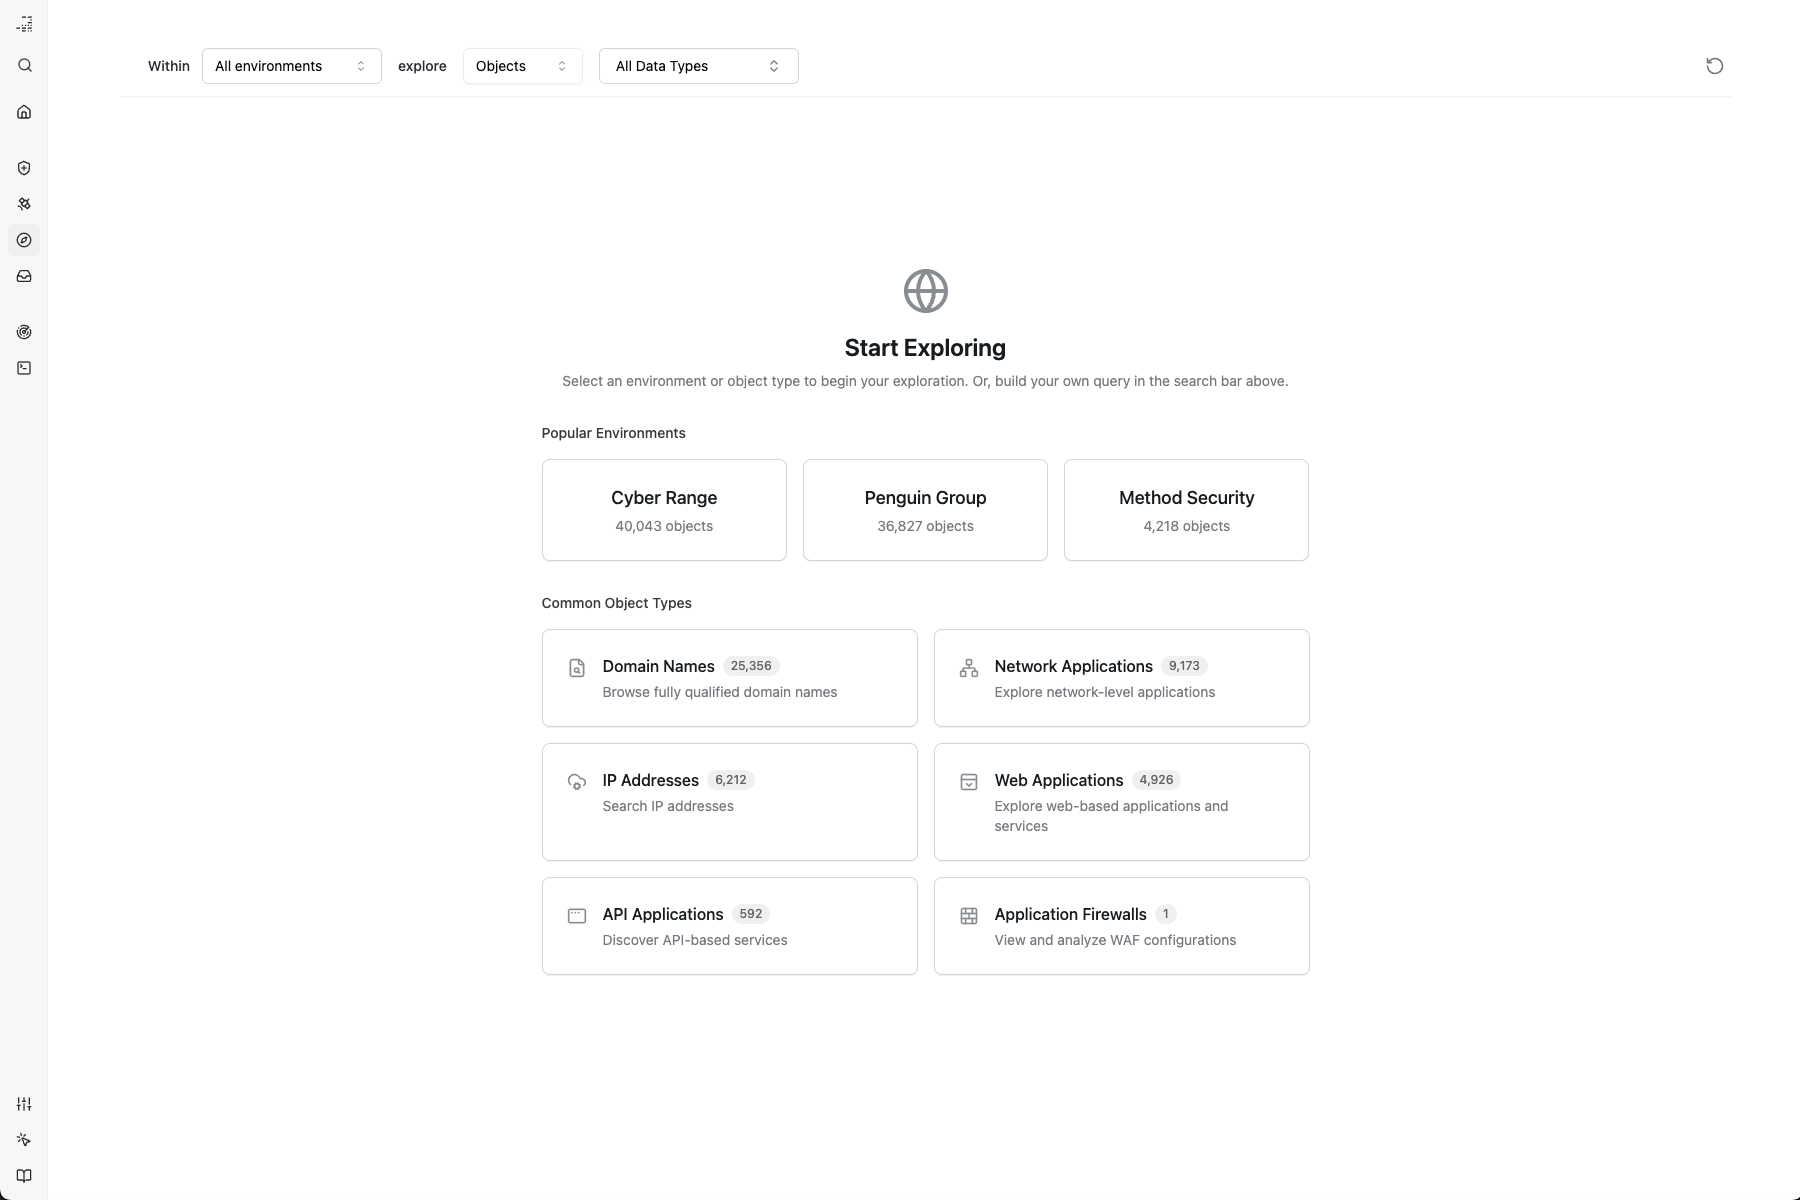
In the center of the screen, you’ll see the filtering quickstart cards, which show popular environments and common object types within those environments.
At the top of the page, you’ll see the basic filters: Environment selector, Objects or Issues selector, and the Object/Issue Type selector.
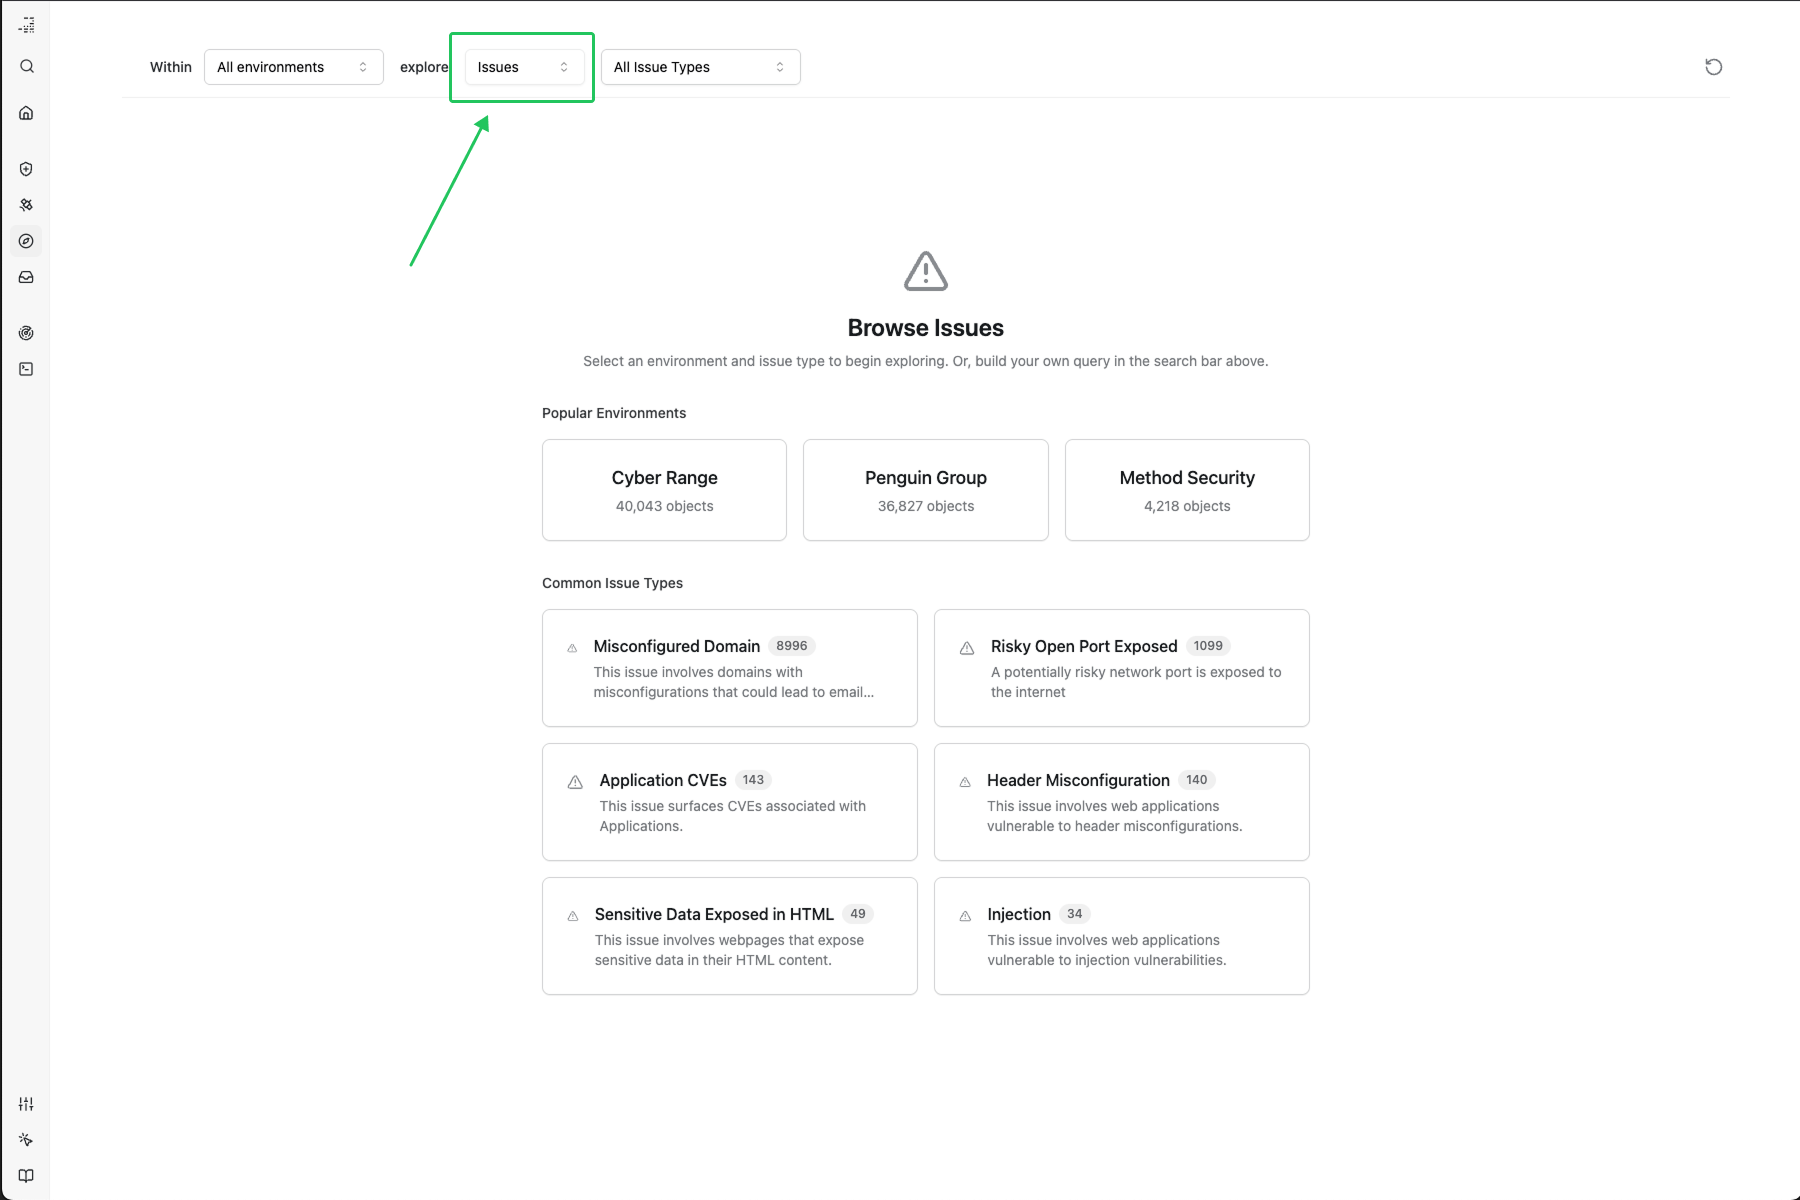
By default, this zero state lets you start filtering Objects quickly. You can switch this view to show you the Issue zero state by clicking on the explore: Objects dropdown at the top of the page and changing it to Issues.
To start filtering from the zero state, the only requirement is to select an Object Type or Issue Type. You can optionally select to filter by an environment.
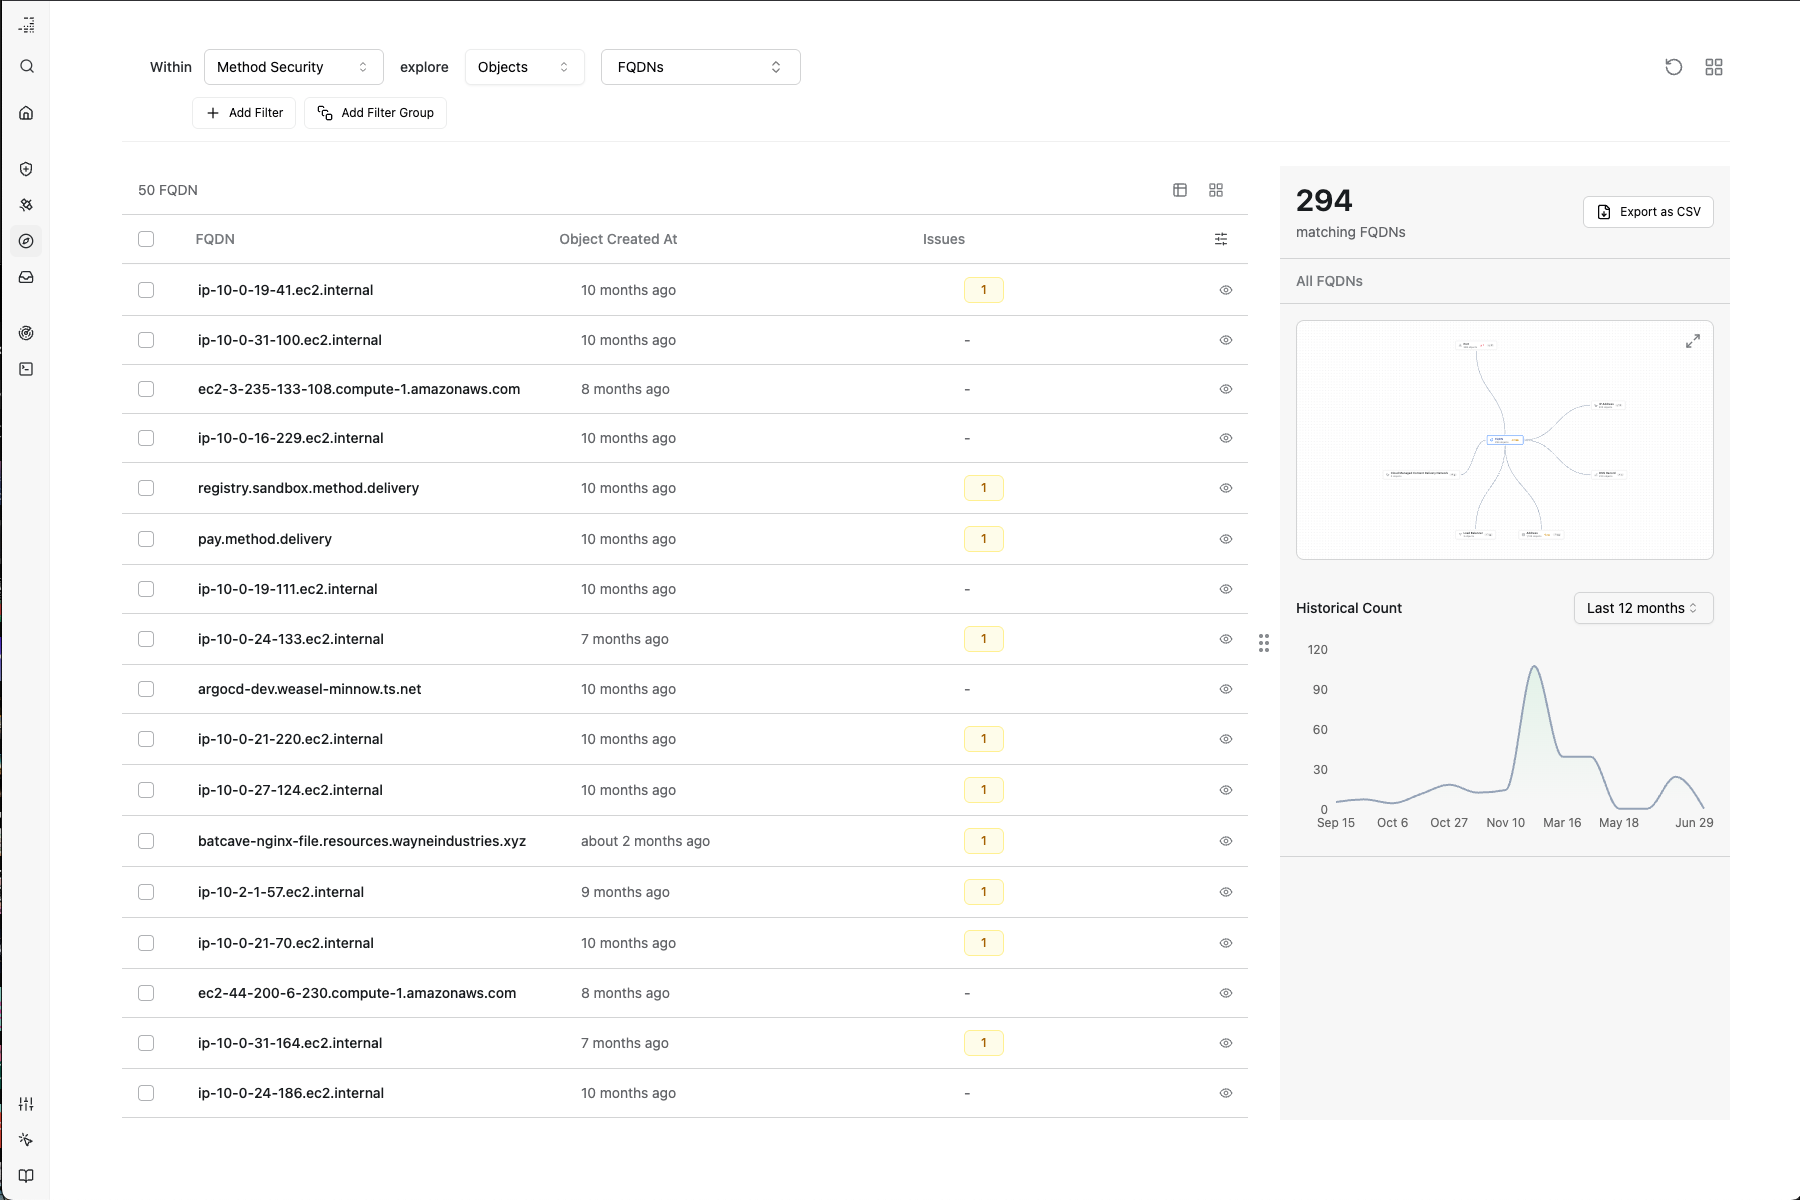
After you make your selection, the screen will update to show you the first set of results. At the top of the page you’ll see the filters you’ve applied thus far.
Complex Filtering
For this section, we’ll create some increasingly complex queries to explore our SaaS Application objects.
Once you’ve chosen your environment, issues or objects, and then issue or object types, you can add additional filters by clicking on Add Filter or Add Filter Group.

Add Filter
Let’s assume you want to identify your SaaS applications that may be misconfigured because they allow plaintext communication.
Clicking Add Filter will add another filter beneath your existing basic filters. This filter will be interpreted as an AND filter with your top-level filters. This means that if your top-filter is All Environments where Objects are SaaS Applications and your second filter is Property search where TLS Configured is False, Explorer will interpret this query as:
“In All Environments, return Objects that: are SaaS Applications AND their TLS Configured is False”.

Once you add your second or further filter, you’ll see a new dropdown that says AND by default. You can use this to change subsequent filters to use either AND or OR logic. This allows you to set up increasingly complex filters.

Let’s say you want to further narrow down your vulnerable SaaS applications to those that are running on Apache 2.2, which is end-of-life. You can add a second filter like so, then peruse your results for old Apache versions.

Add Filter Group
Filter Groups are useful for chunking your querying logic.
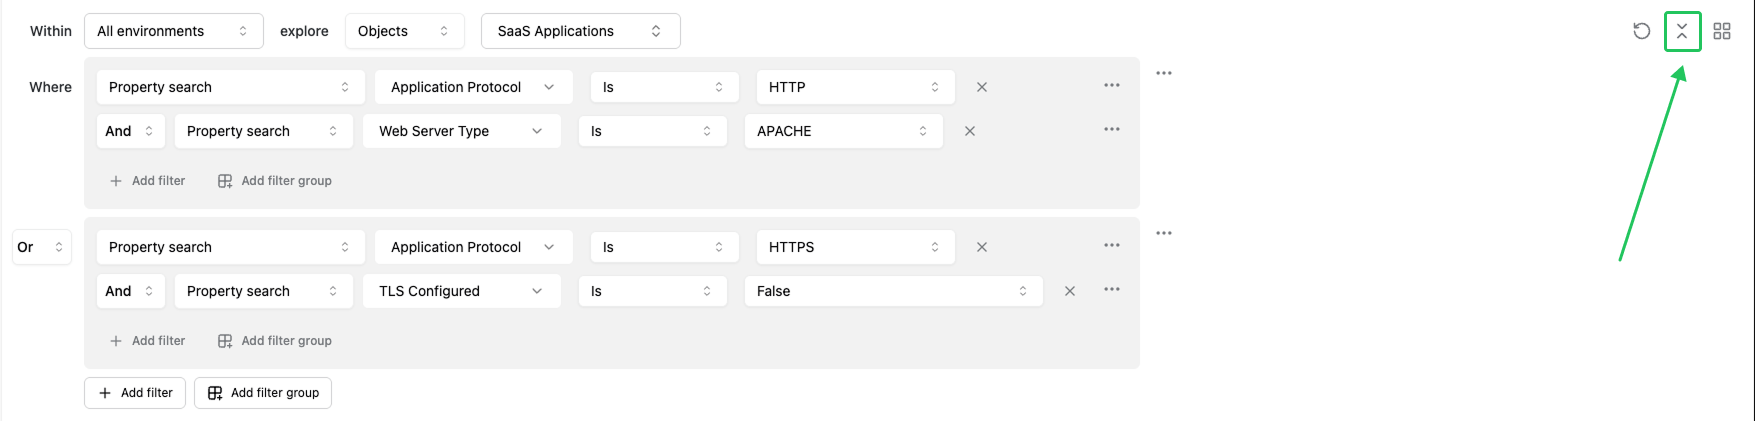
Let’s create a query that lets you find SaaS applications that are either:
- Application Protocol HTTP running on an Apache server, or
- Application Protocol HTTPS but without TLS configuration
You can set up two filter groups that are separated by an OR logic operator, like so:
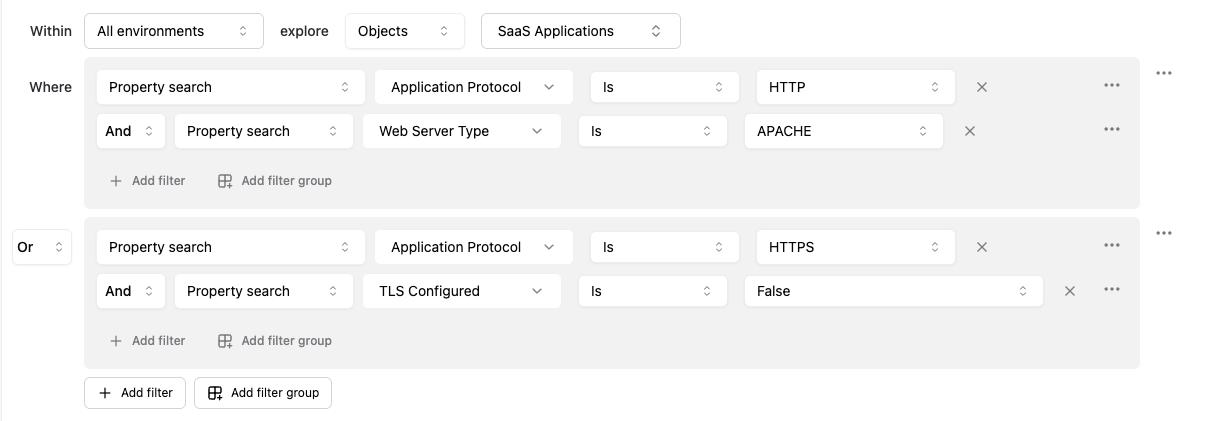
Notice how the filter groups in the image have AND logic within them, but are separated by an OR statement. This flexibility allows you to construct increasingly complex queries.
Nested Filter Groups
You can also nest filter groups by clicking the Add Filter Group button within a filter group. The same logic operators that apply at the top-level, described above, apply when dealing with nested filter groups.
Collapsing the filter panel
Complex filtering queries can take up a lot of vertical space. You can reclaim this space to explore your results by collapsing the filter view into a more compact state, which frees up real estate on your screen for your results.