Create your first Task
The following guides will show you how to create a Task.
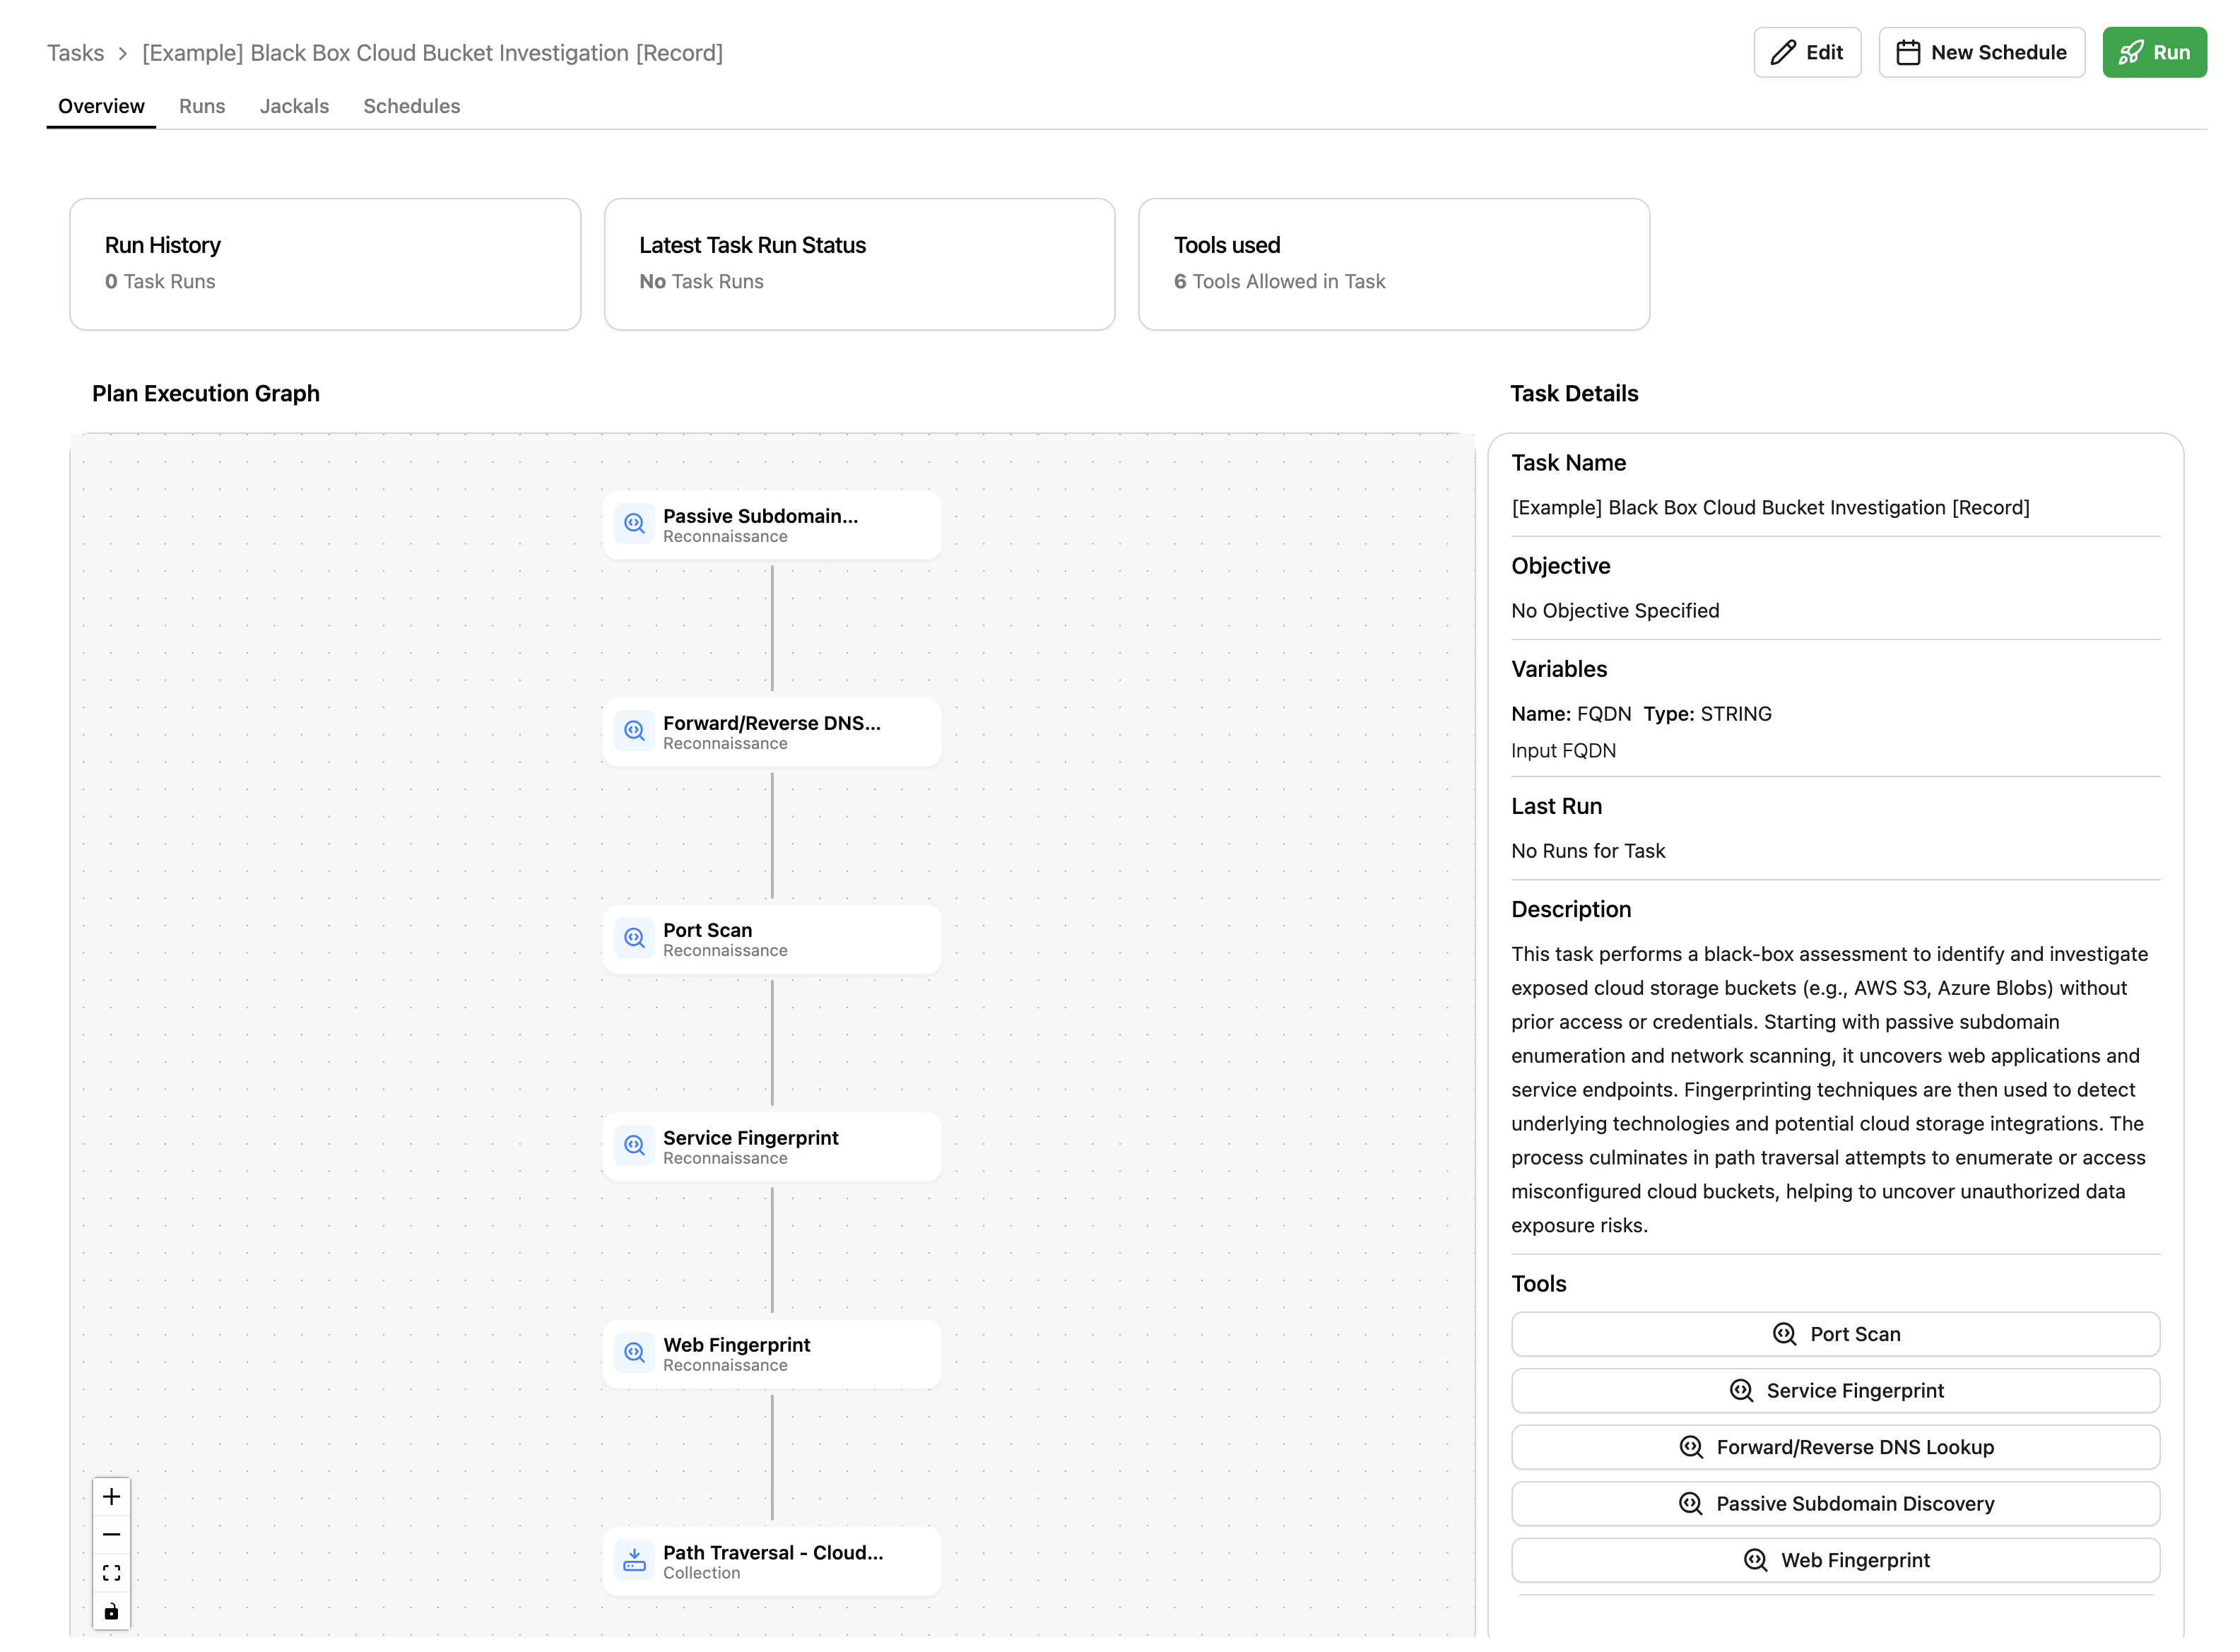
In this guide, we’ll recreate the Black Box Cloud Bucket Investigation [Record] example file to learn how Tasks are created.
Confirm Testing Environment is ready
For this guide and your other guides, we recommend creating an Environment specifically for yourself, so you can keep your tutorial data separate from production data.
See how to do so by following the Create an Environment guide.
Get started
-
From the left sidebar, navigate to the Automator app.
-
In the top-right corner, click
New Task.

- You will now be on a form titled Create Task. There are four steps in this form: (1) Metadata, (2) Parameters, (3) Tools, and (4) Plan.
Adding Metadata
Next, add Metadata for your Task.
Guidelines to follow for good metadata are:
- Title: make this short, unique, and descriptive, so it can be easily recognized when it appears in other parts of the platform later.
- Verified Icon: you can toggle this on or off to indicate whether a Task is a “verified” Task. Verified means that this Task is endorsed such that others can use and rely on in their workflows. Keep this off if you are unsure.
- Tags: you can add tags to make identifying this Task easier later on.
- Description: add the long-form explanation of the intent of this Task so that future users can understand it.
For our example file, populate with the following information:
- Title: [Example] Black Box Cloud Bucket Investigation [Record]
- Verified Icon: off
- Tags: None
- Description: This task performs a black-box assessment to identify and investigate exposed cloud storage buckets (e.g., AWS S3, Azure Blobs) without prior access or credentials. Starting with passive subdomain enumeration and network scanning, it uncovers web applications and service endpoints. Fingerprinting techniques are then used to detect underlying technologies and potential cloud storage integrations. The process culminates in path traversal attempts to enumerate or access misconfigured cloud buckets, helping to uncover unauthorized data exposure risks.
Then click Next to continue.

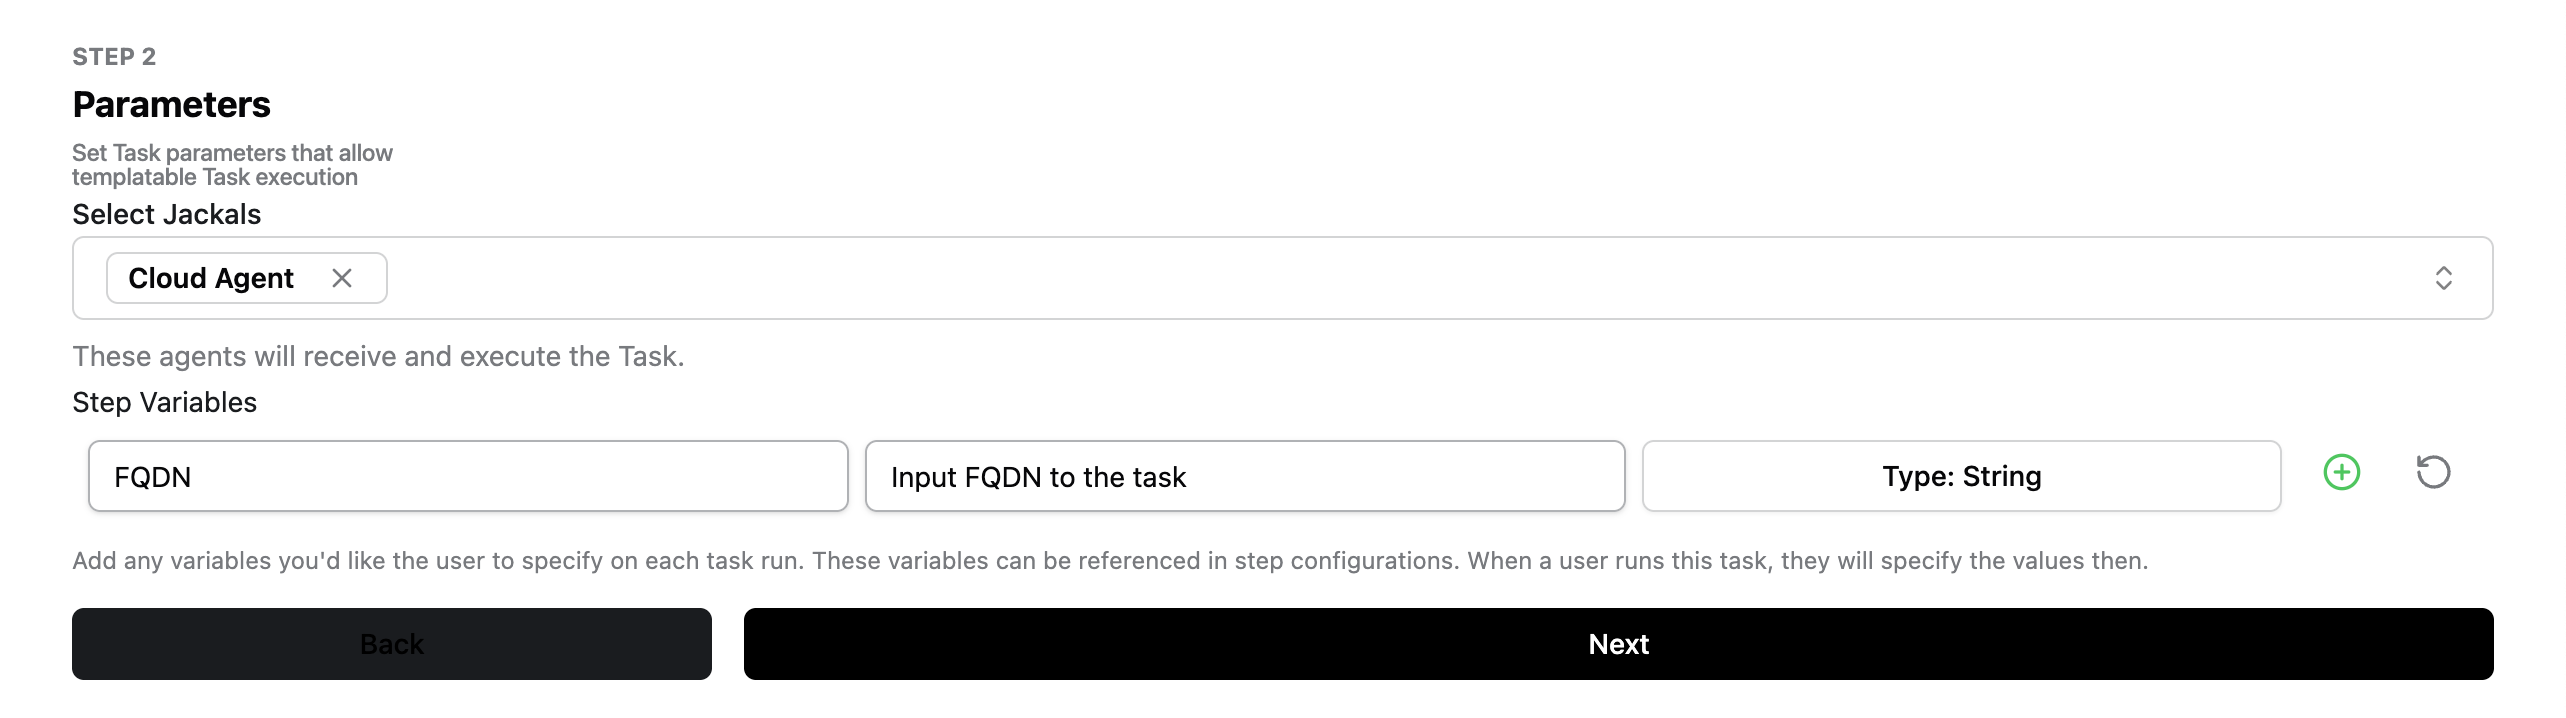
Adding Parameters
Here you’ll set up the parameters for your Task.
In this step, you’ll:
- Choose which agents will run the Task.
- Set up step variables. These are inputs that the user must specify when they run this Task. They can be used as inputs into the tools you will use on this Task.
If you ever aren’t sure what variables you need yet, skip this step for now. Once you set up your task workflow in Steps 3 and 4, you’ll be able to see which tools require inputs from the user. You can configure input variables from the Plan step.
For our example file, choose the following:
- Cloud Agent
- Step variable name: FQDN
- Step variable description: Input FQDN to the task
Then click Next to continue.
Adding Tools
In this step, select the tools you want this Task to run.
By default, all of the tools are selected. You can restrict the available tools to only the ones that you want in-scope for this task. In the next step, you will sequence the tools together into an execution path to be followed.

For our example file, unselect all tools, then select only:
- Passive Subdomain Discovery
- Forward Reverse DNS Lookup
- Port Scan
- Service Fingerprint
- Web Fingerprint
- Path Traversal - Cloud Bucket
Then click Next to continue.
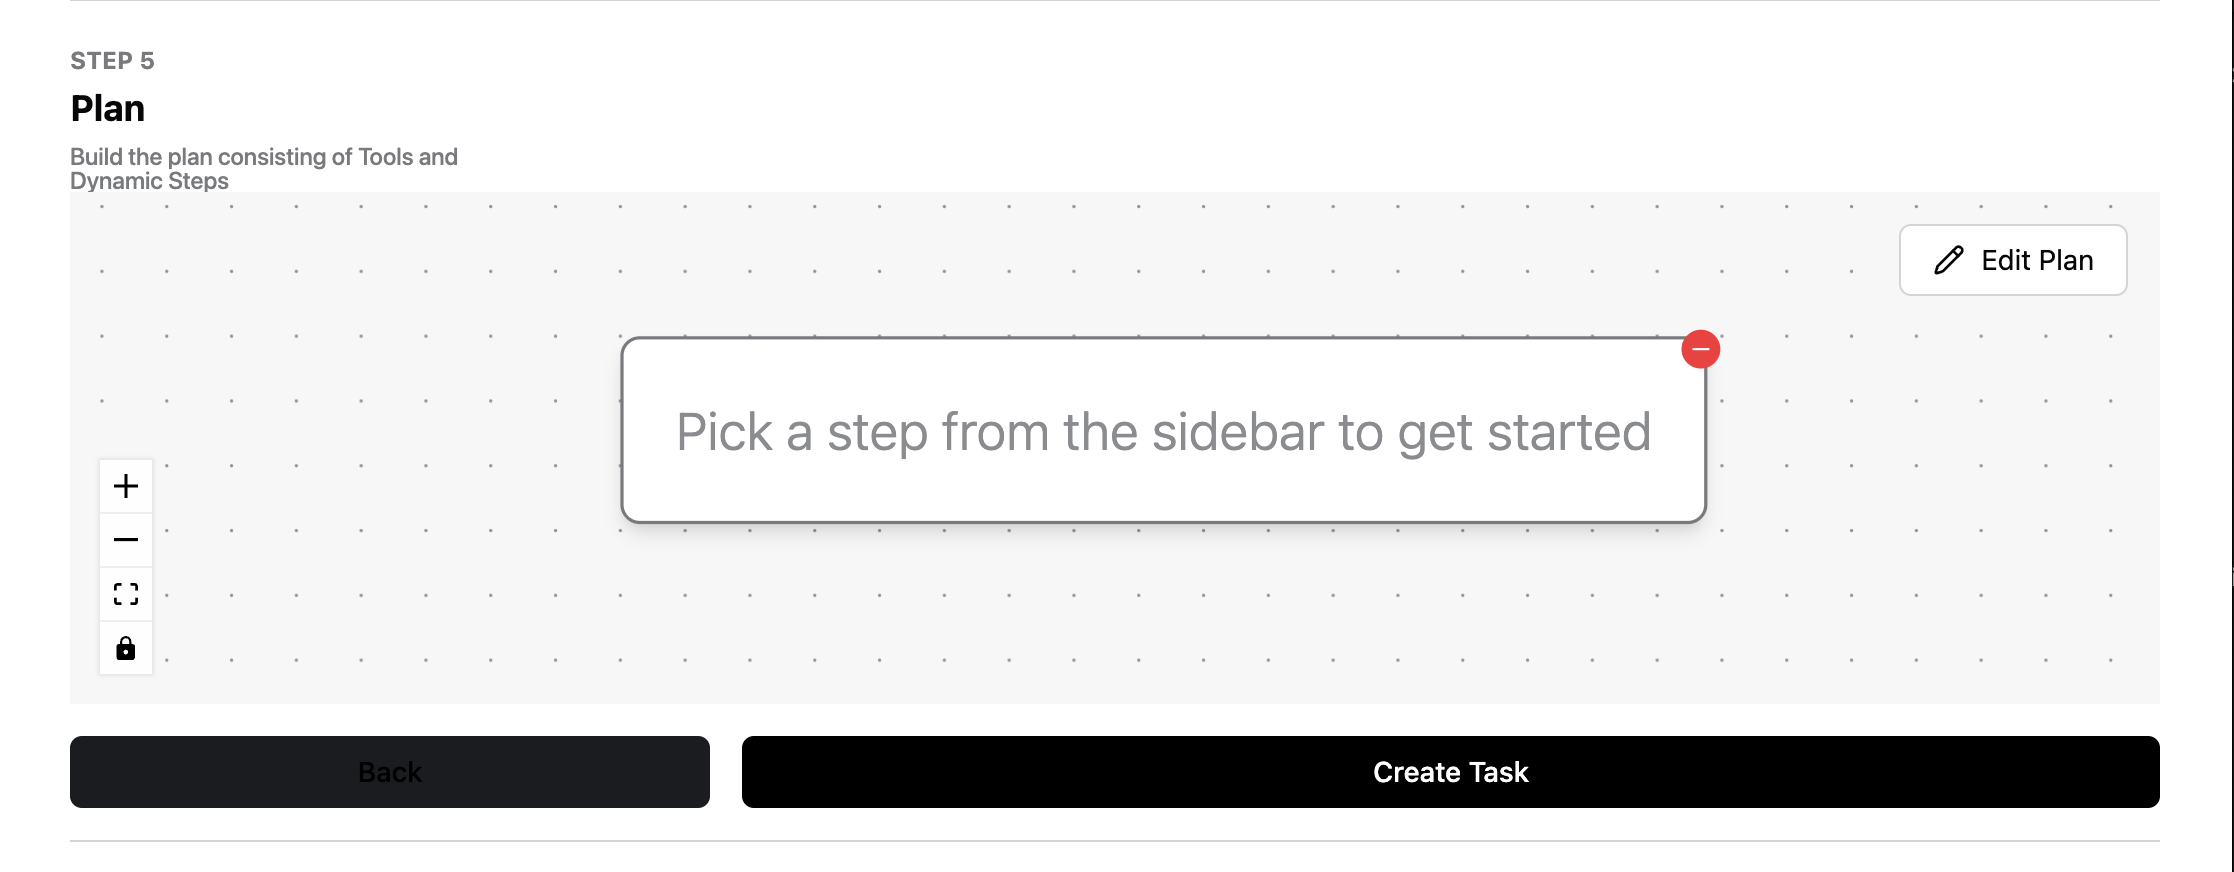
Creating the Plan
Finally, you’ll configure the Task graph, which will sequence the selected tools into your desired execution workflow.
To start, click on Edit Plan. This will take you to a full-page graph configuration view.
The Task Graph page has a large canvas where you can configure your task’s execution. On the right, you’ll see options to add Templates or Tools.
Templates are re-usable tasks that you can embed in other Tasks. They make it easy to re-use logic you’ve already constructed without having to rebuild it.
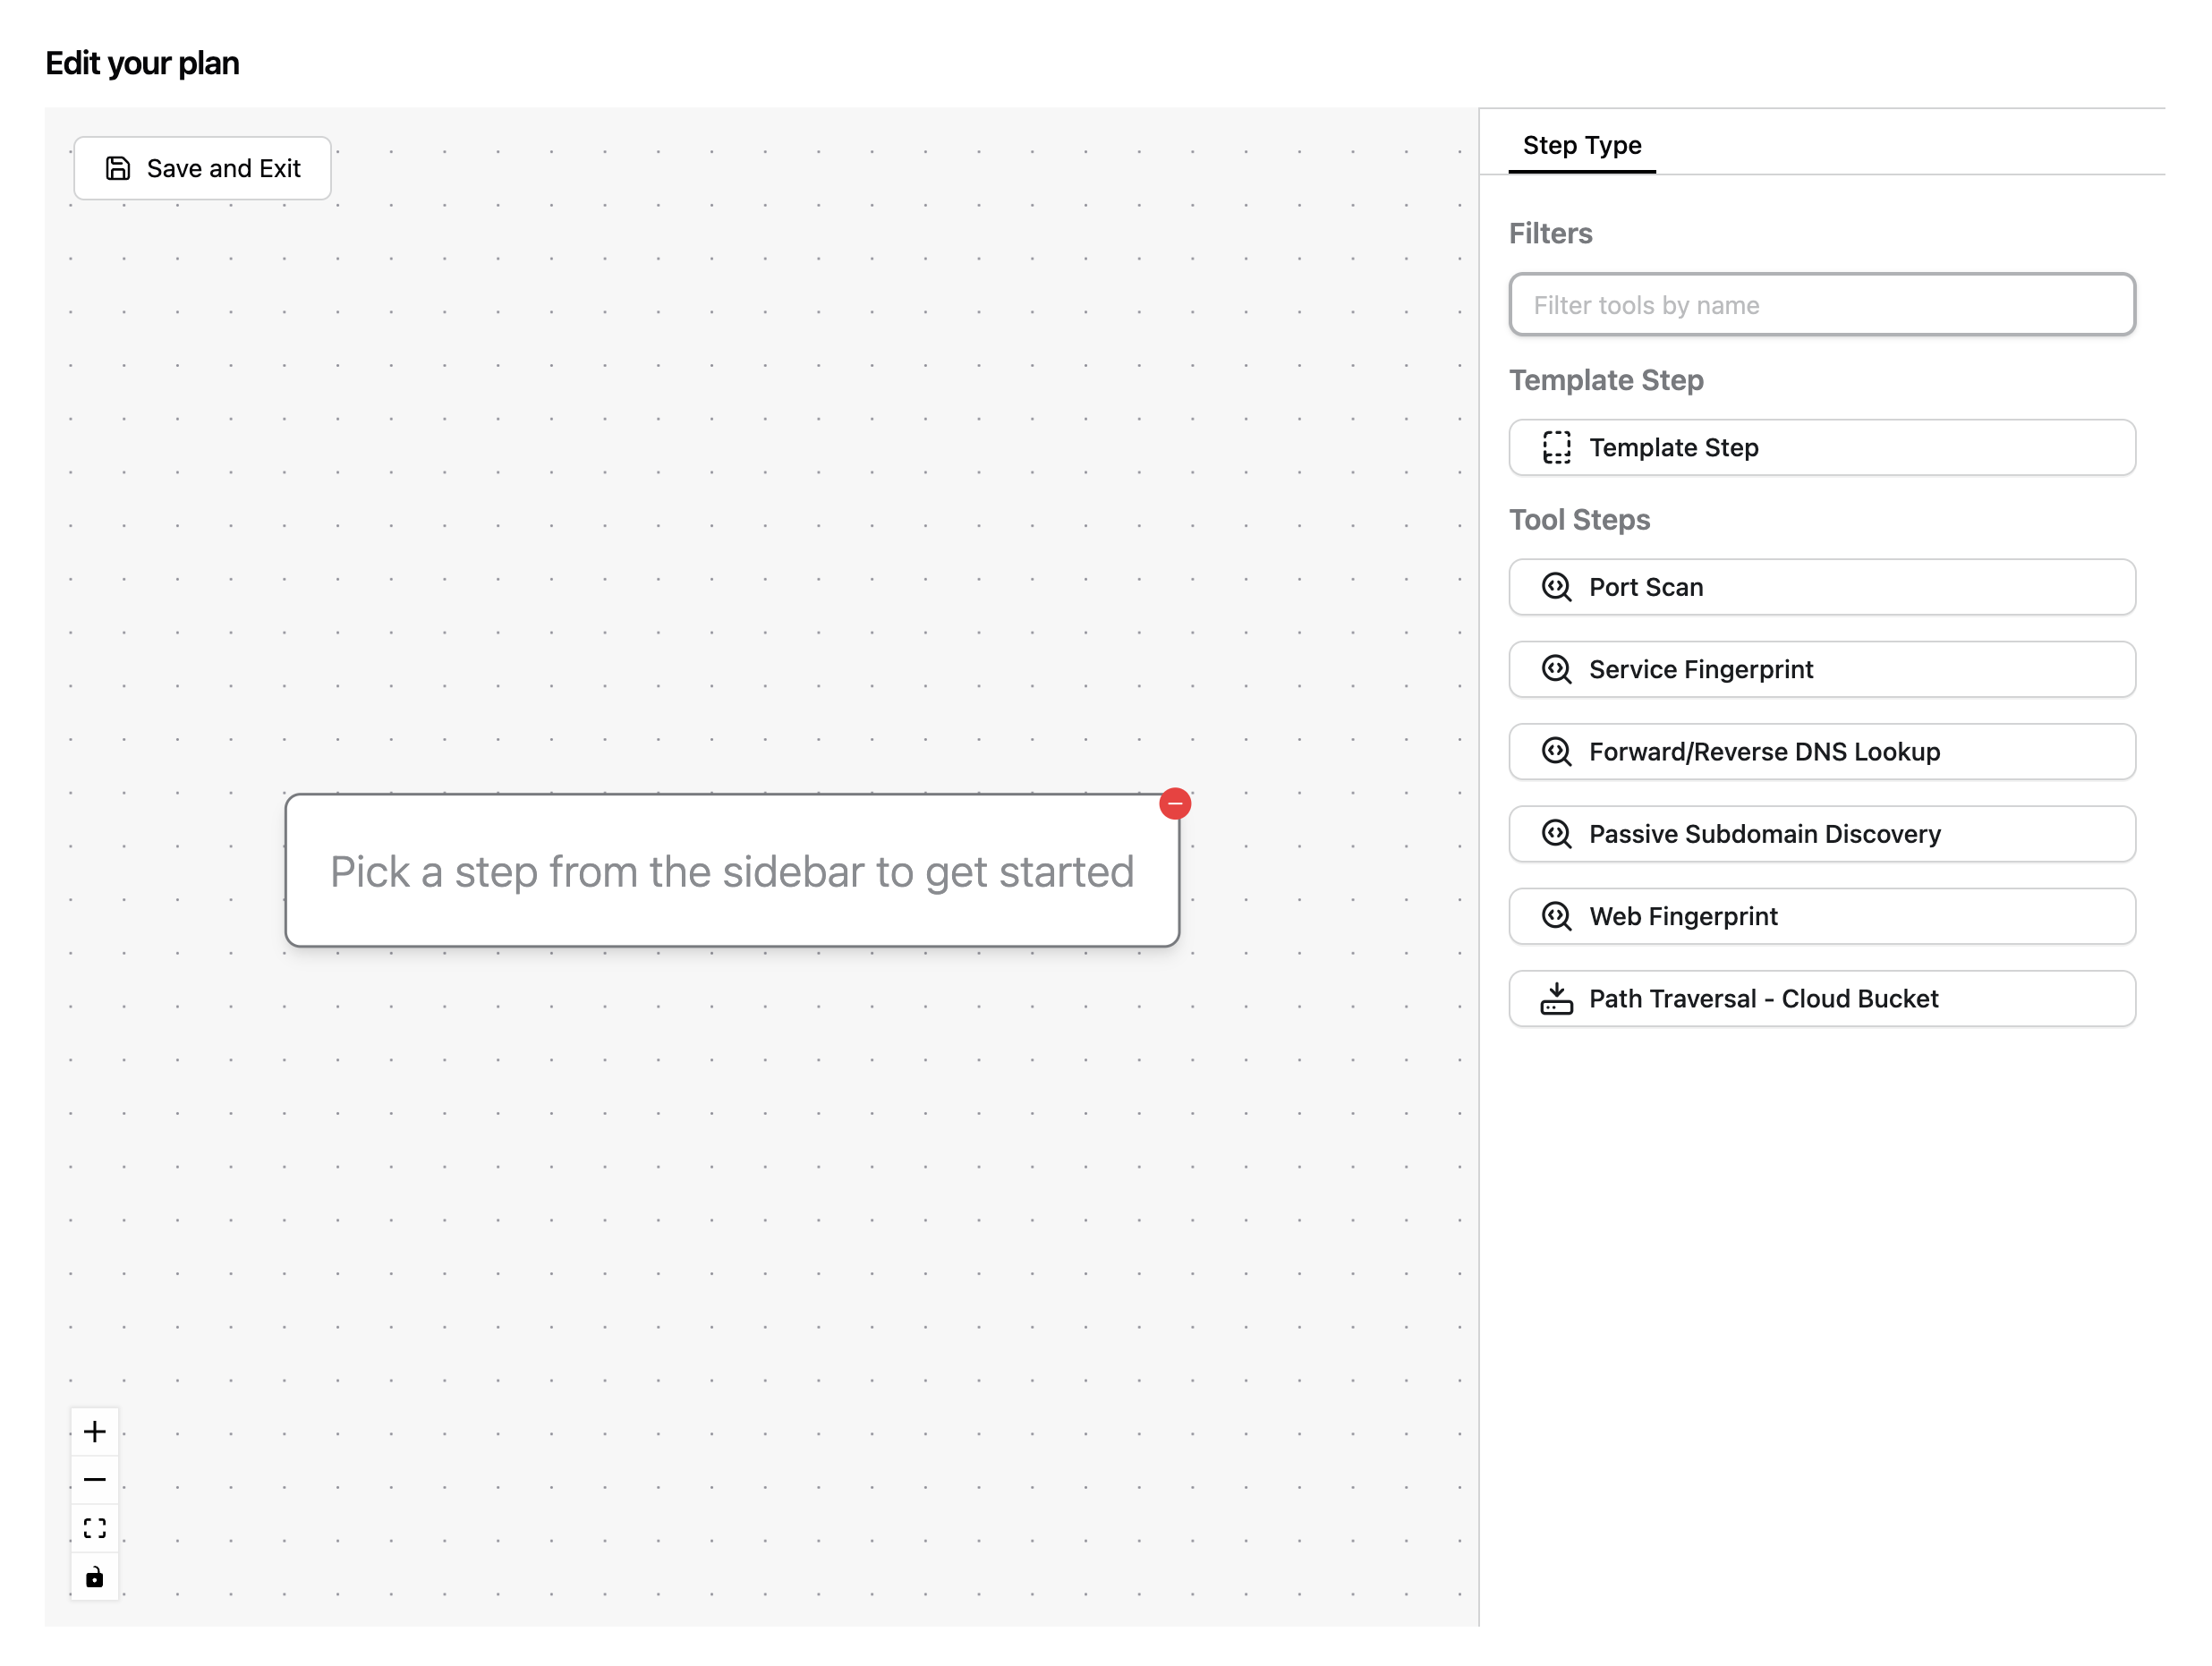
Start by selecting the Passive Subdomain Discovery tool. Notice the right-panel where you can configure the tool. Click Submit to confirm the default configuration.

Continue by clicking on the small black plus icon at the bottom of the node currently on the graph.
Then continue by adding Forward Reverse DNS Lookup to your plan. In the config, you’ll need to change from the default option (Exclude Object Type) to Scoped, which will allow you to choose whether you want input objects from the parent node or entire lineage.
- Selecting
Parentmeans that this tool will only accept objects of the correct type discovered by the node directly before it. - Selecting
Lineagemeans that this tool will accept any objects of the correct type discovered by any tool before it.
Since this is our second tool in the plan, both Parent and Lineage have the same function.
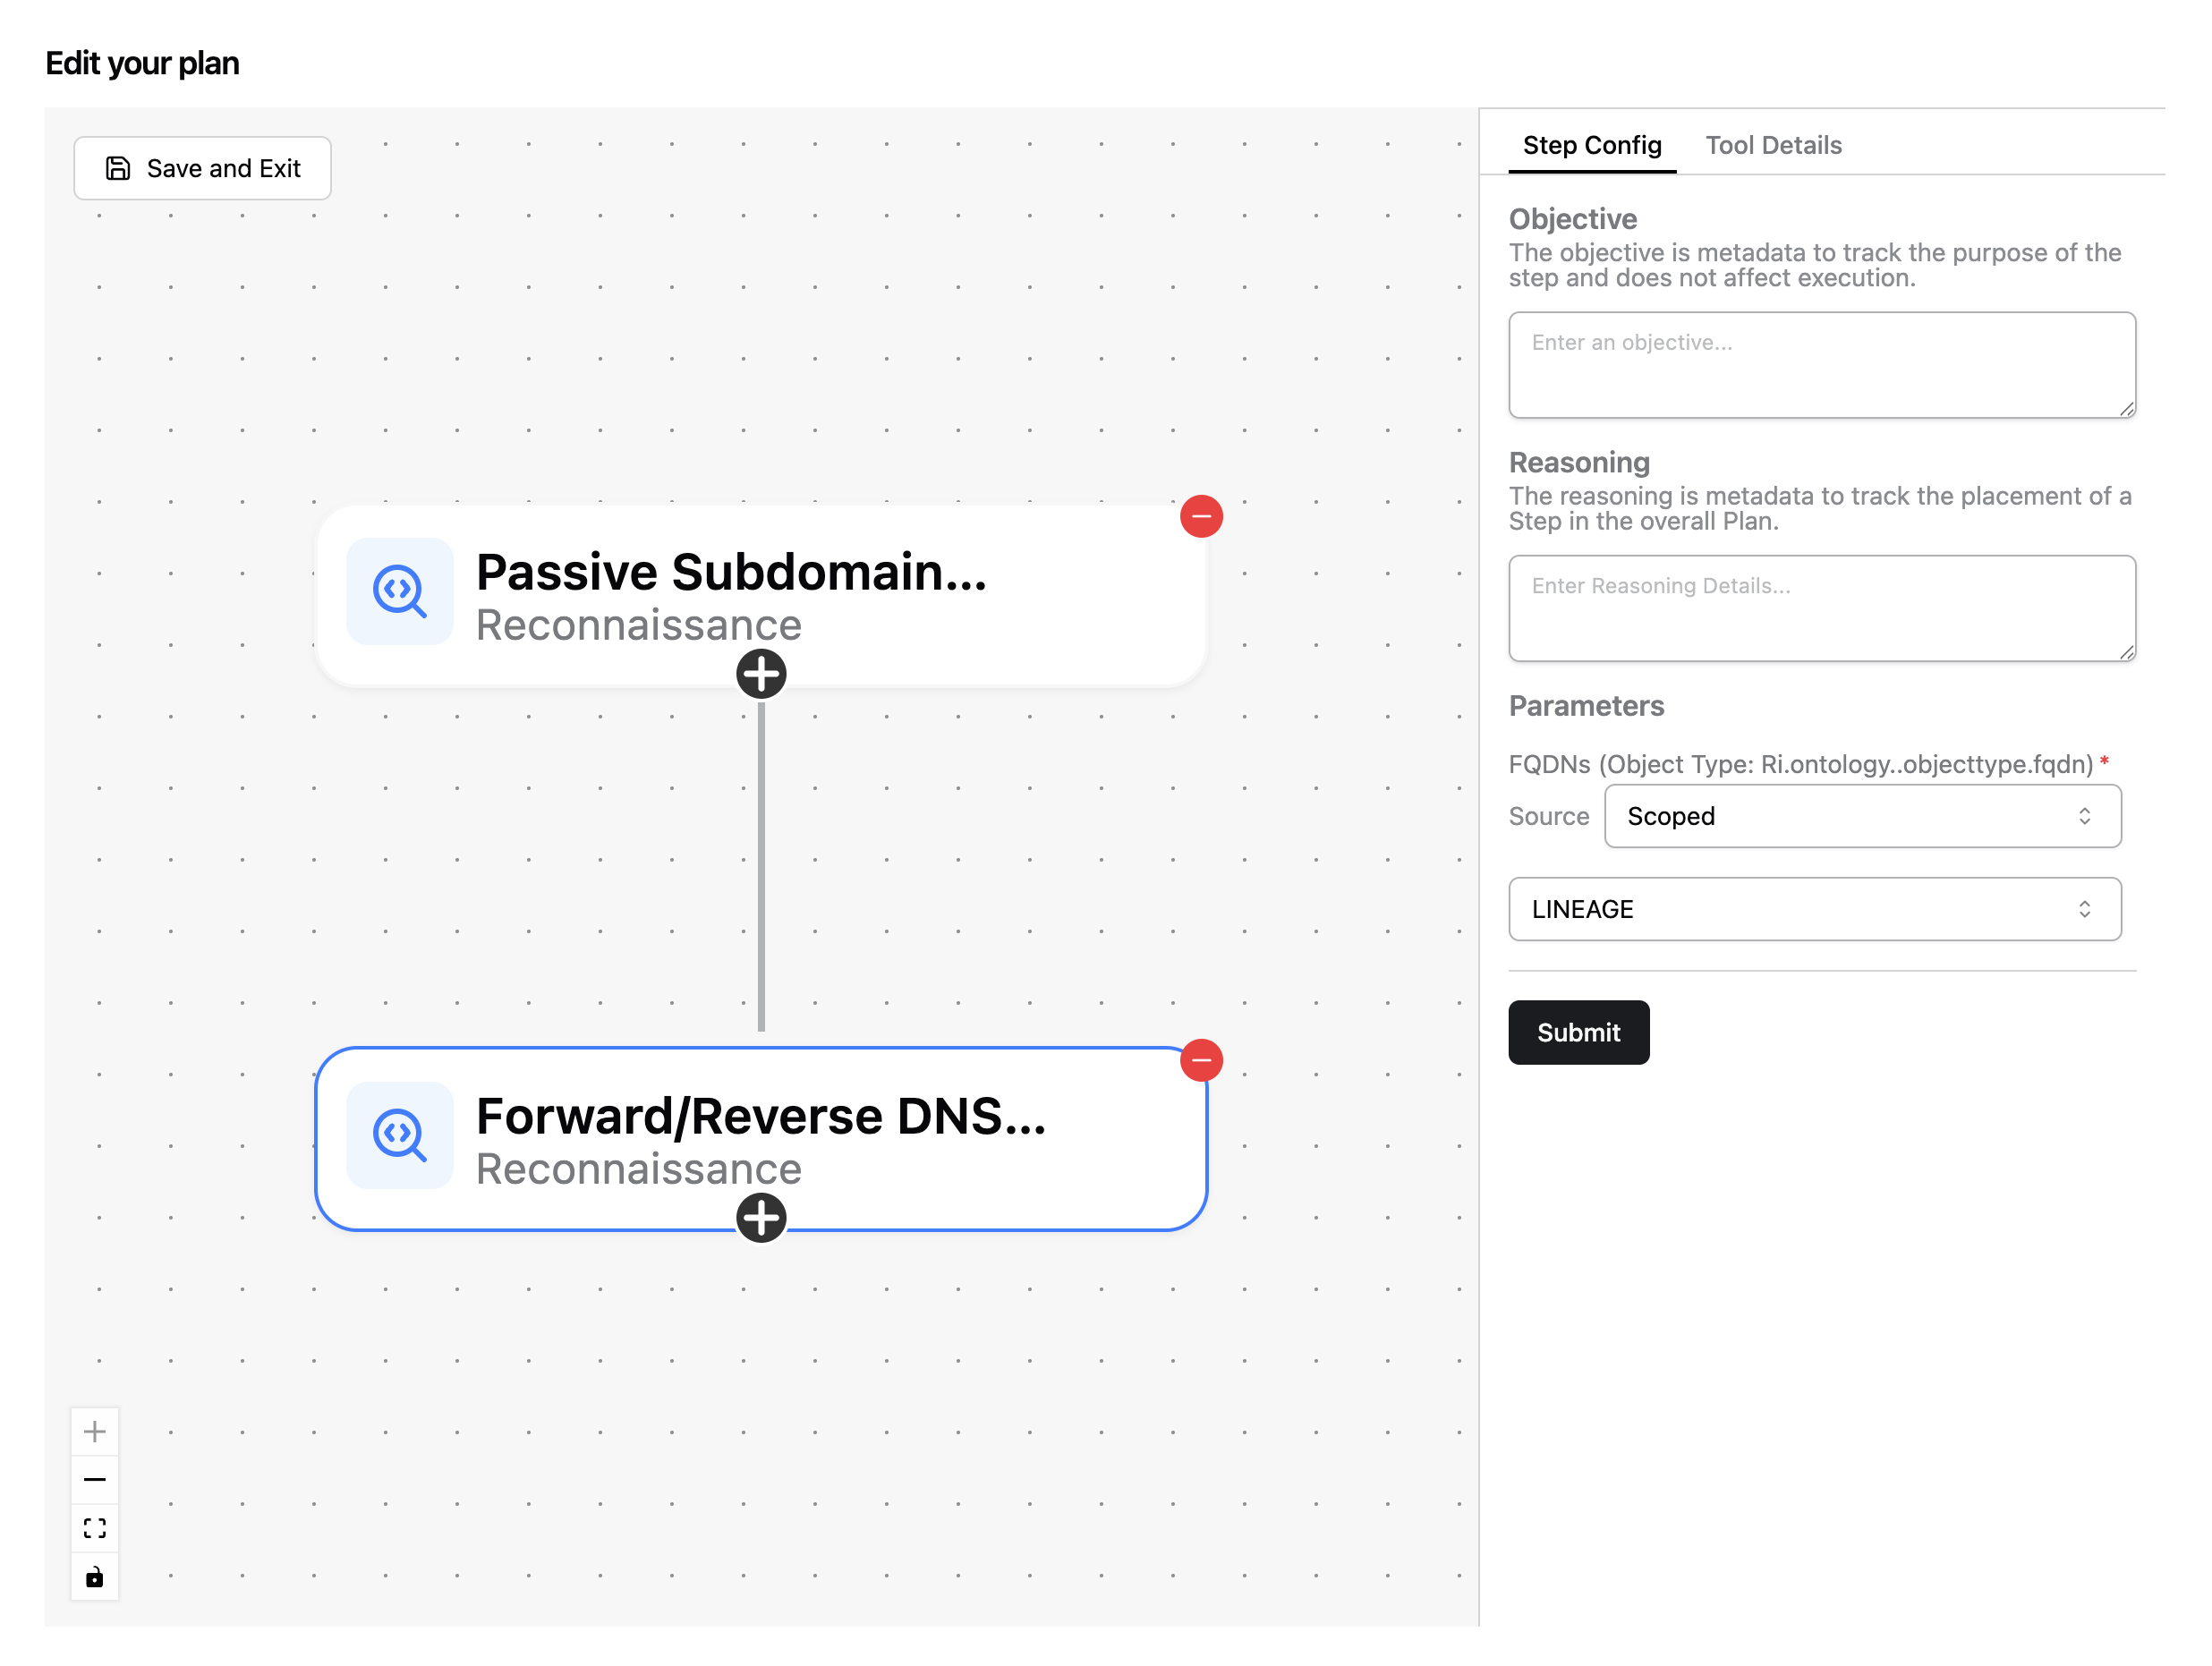
Continue by clicking on the black plus icon again.
Add each of the remaining tools in the following order:
- Port Scan
- Service Fingerprint
- Web Fingerprint
- Path Traversal - Cloud Bucket
Set each of them to accept inputs from the entire lineage.
When you’re done, you’ll have a graph that looks like this.
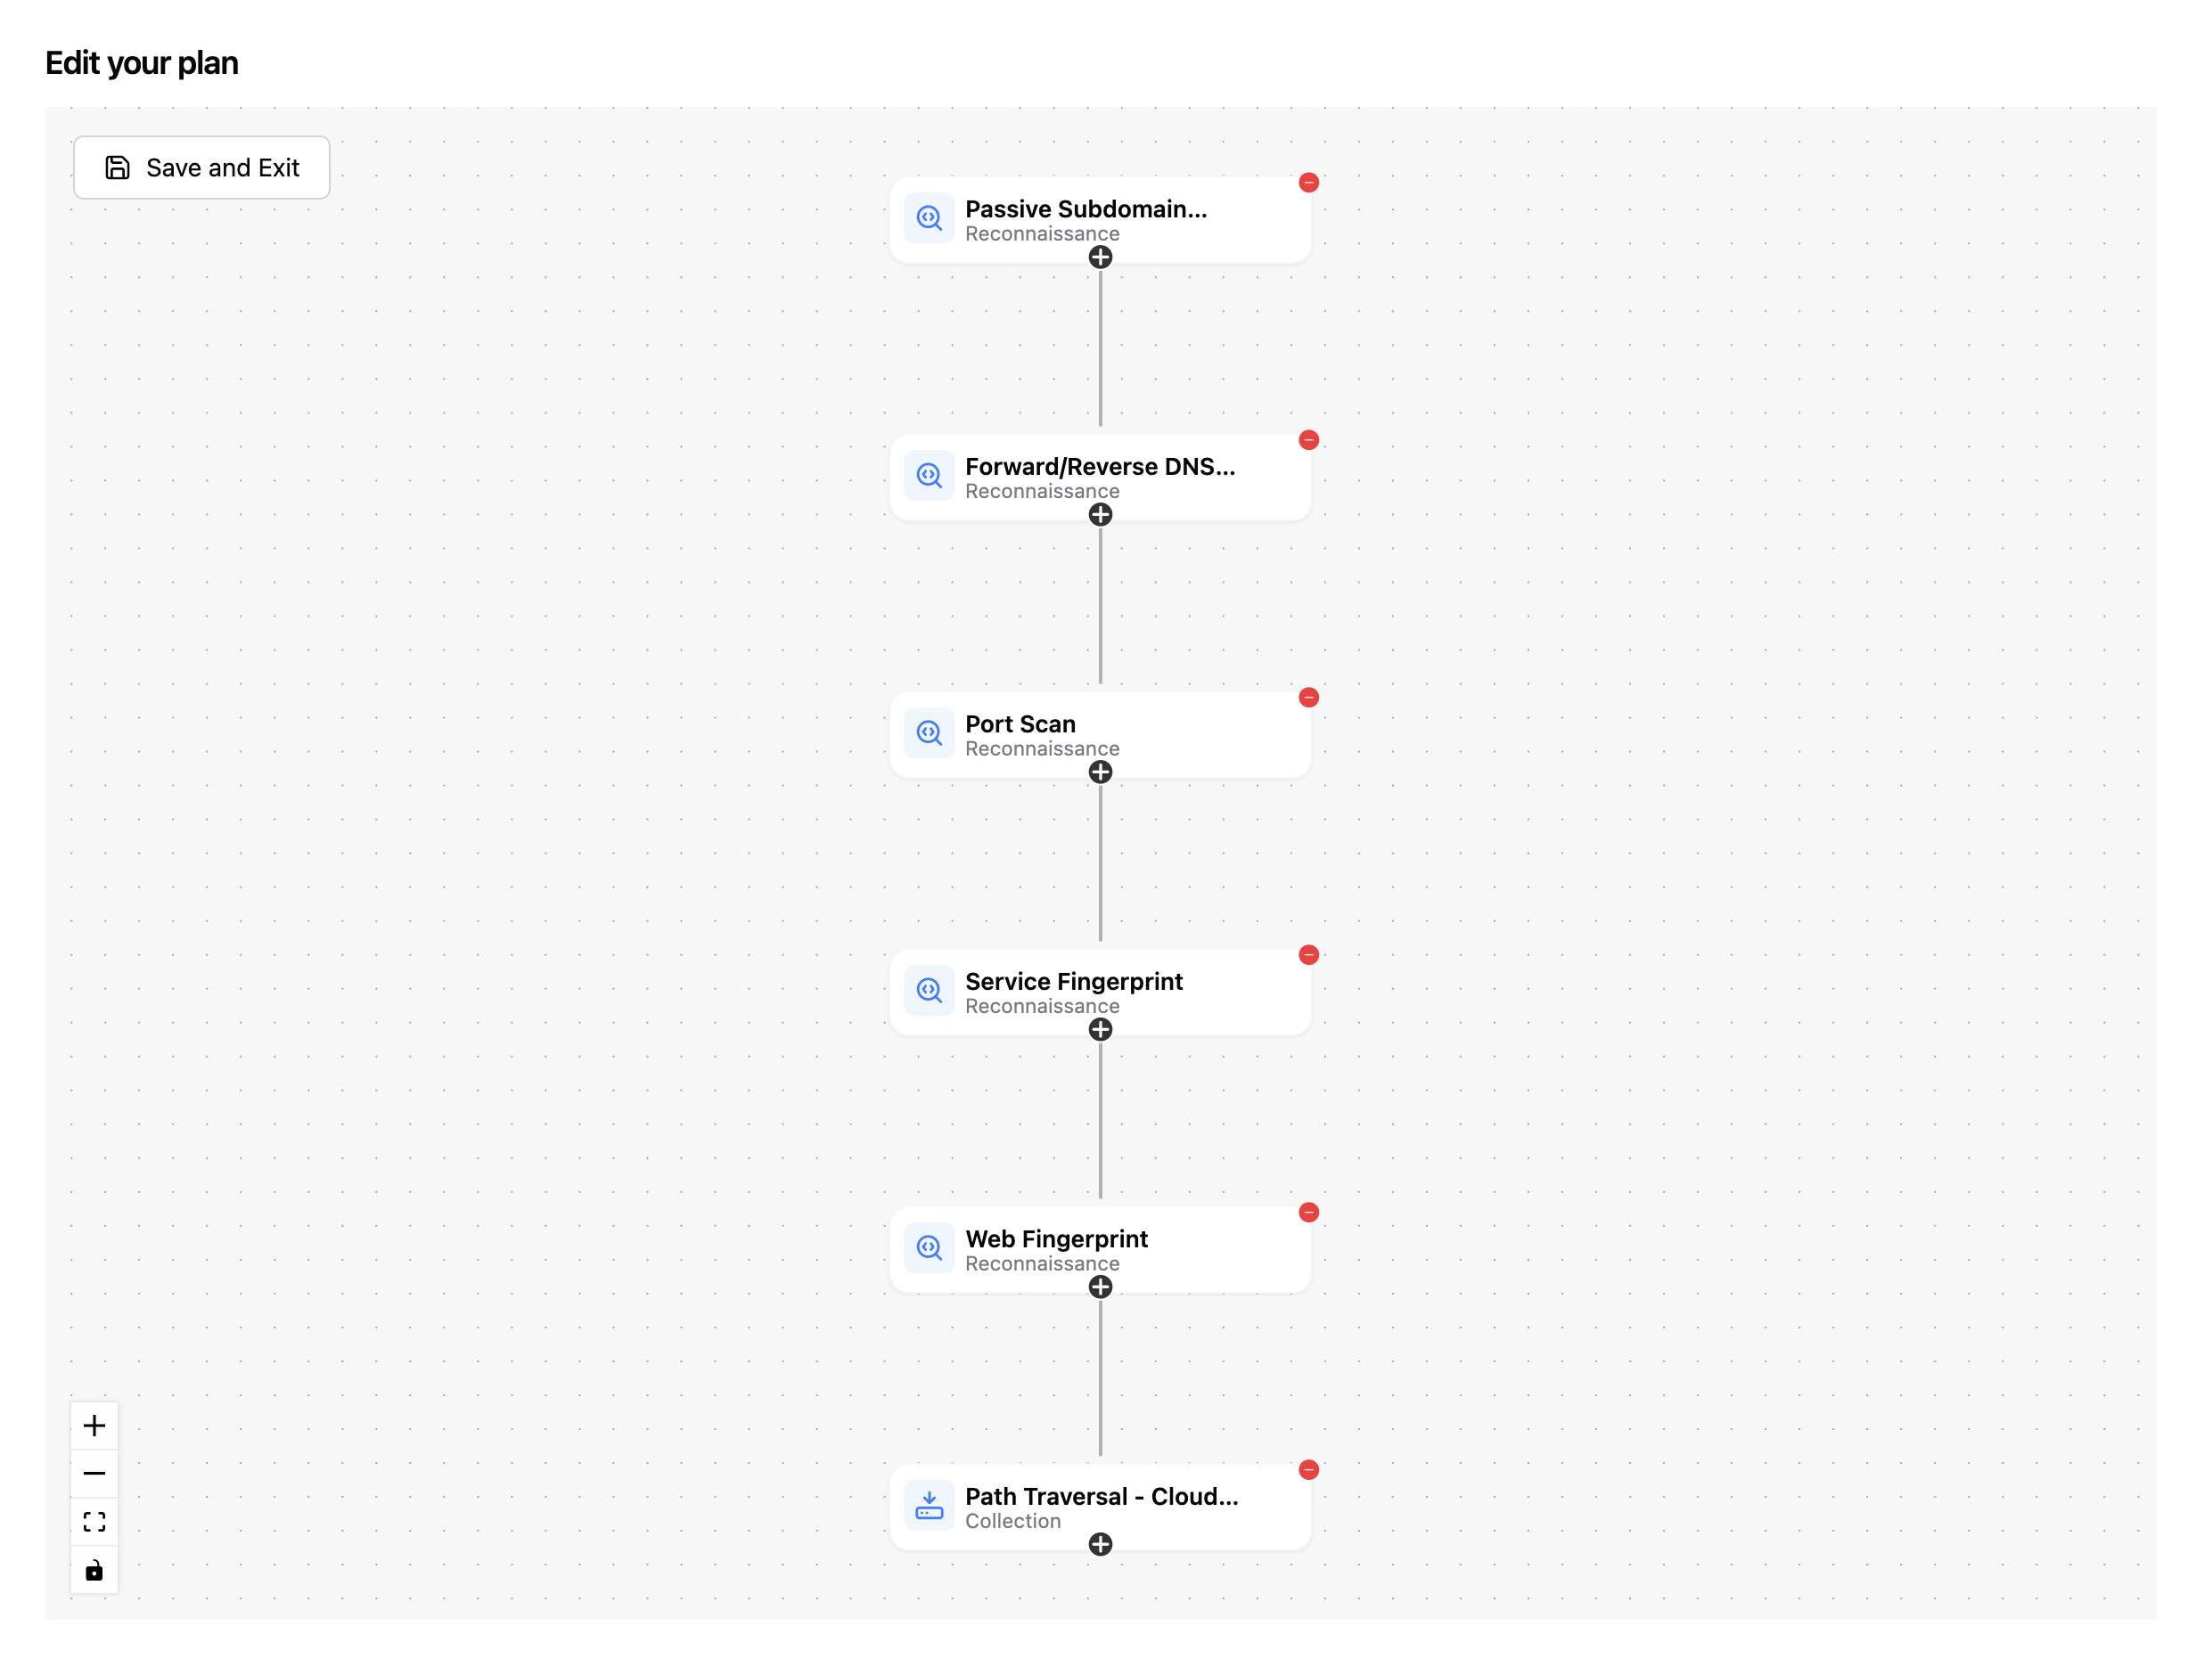
Click Save and Exit in the top-left to return to the form.
Congrats! You built your first Task. In the next guide, we’ll cover how to run it.