Creating a Test Case
This guide will show you how to create a Test Case.
What is a Test Case?
Test Cases are an opinionated wrapper around Tasks that allow you to assert whether the output looks as you expect. Test Cases allow you to take a Task, put it on a schedule, automatically assess whether the returned objects look as you expect, and indicate success or failure accordingly.
Differences between Test Case and a Scheduled Task Run
Both Test Cases and Scheduled Task Runs enable a Task to run on a schedule on a defined configuration.
However, the purpose of a Test Case is specifically to assert whether the Task output objects look as expected. You can Configure assertions of different types: checking object counts, property values, linked object properties, or linked issue properties, for specific qualities to match your expectations. Use these assertions to define what abnormal behavior in your environment looks like. If any of these fail to match, then the test will return a fail and notify you.
Learn more about Test Cases and their relationship to Tasks and Tools in the platform docs.
Before we start
Before creating your first Test Case, make sure you have a Task ready. You can use the Task we created in our guide or any Task you have on hand.
Creating the Test Case
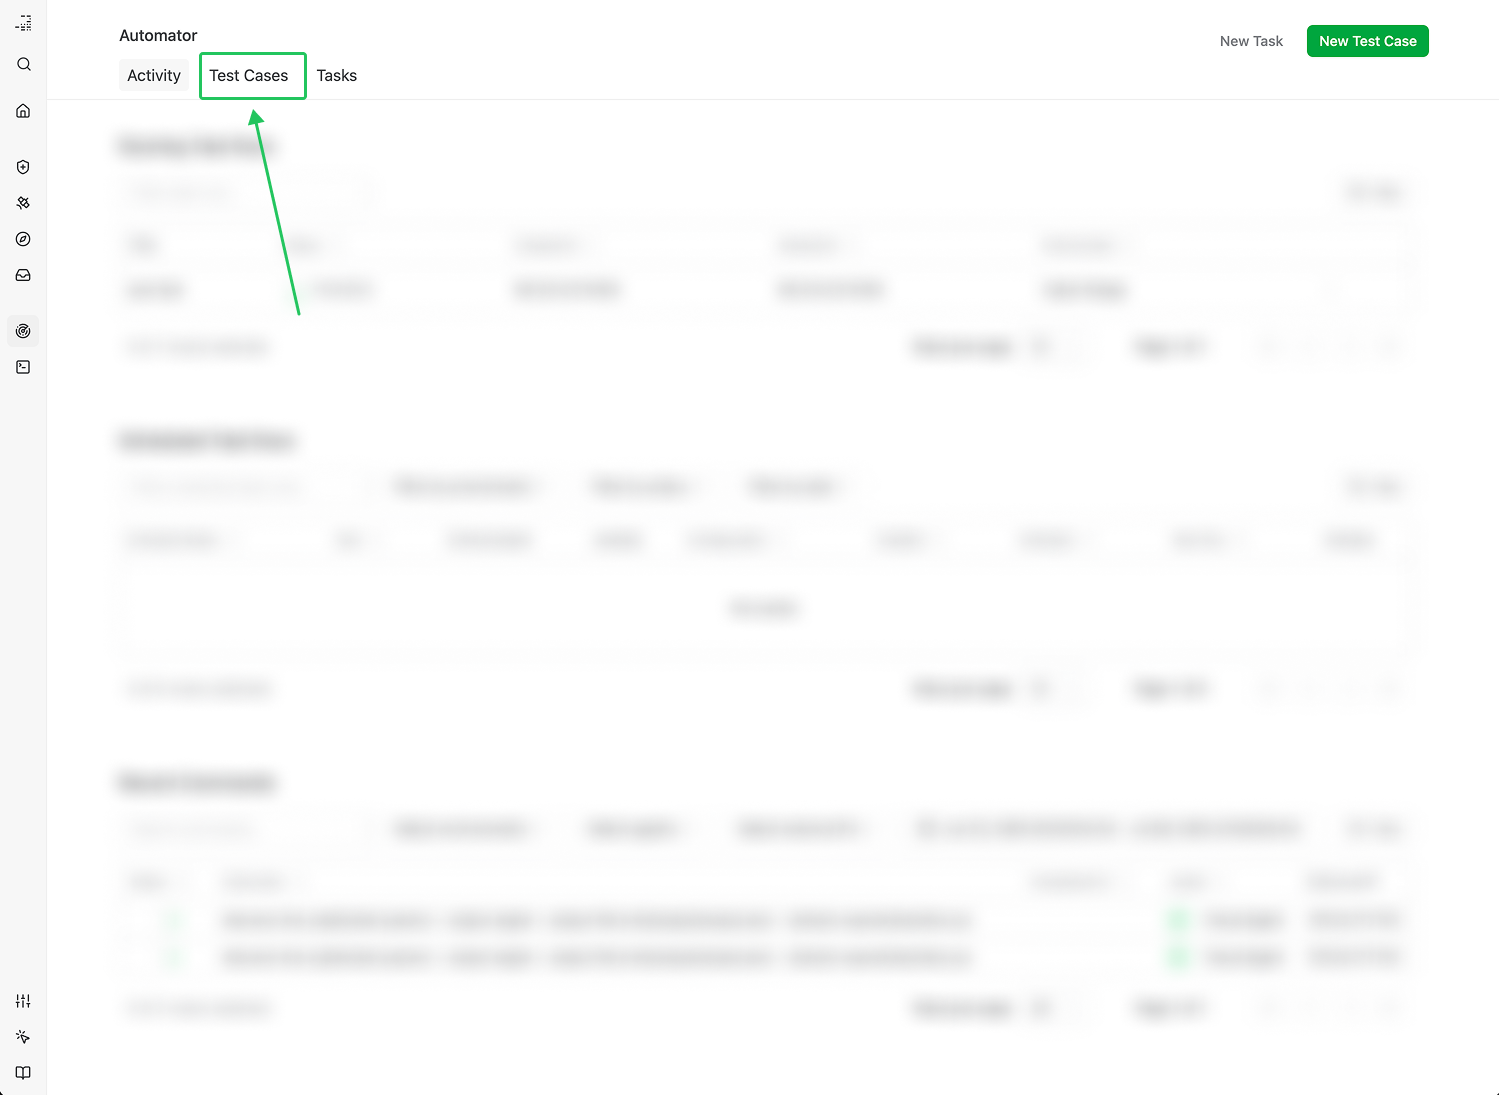
Start by navigating to Automator in the left-navigation. Existing Test Cases live in the Test Cases tab.
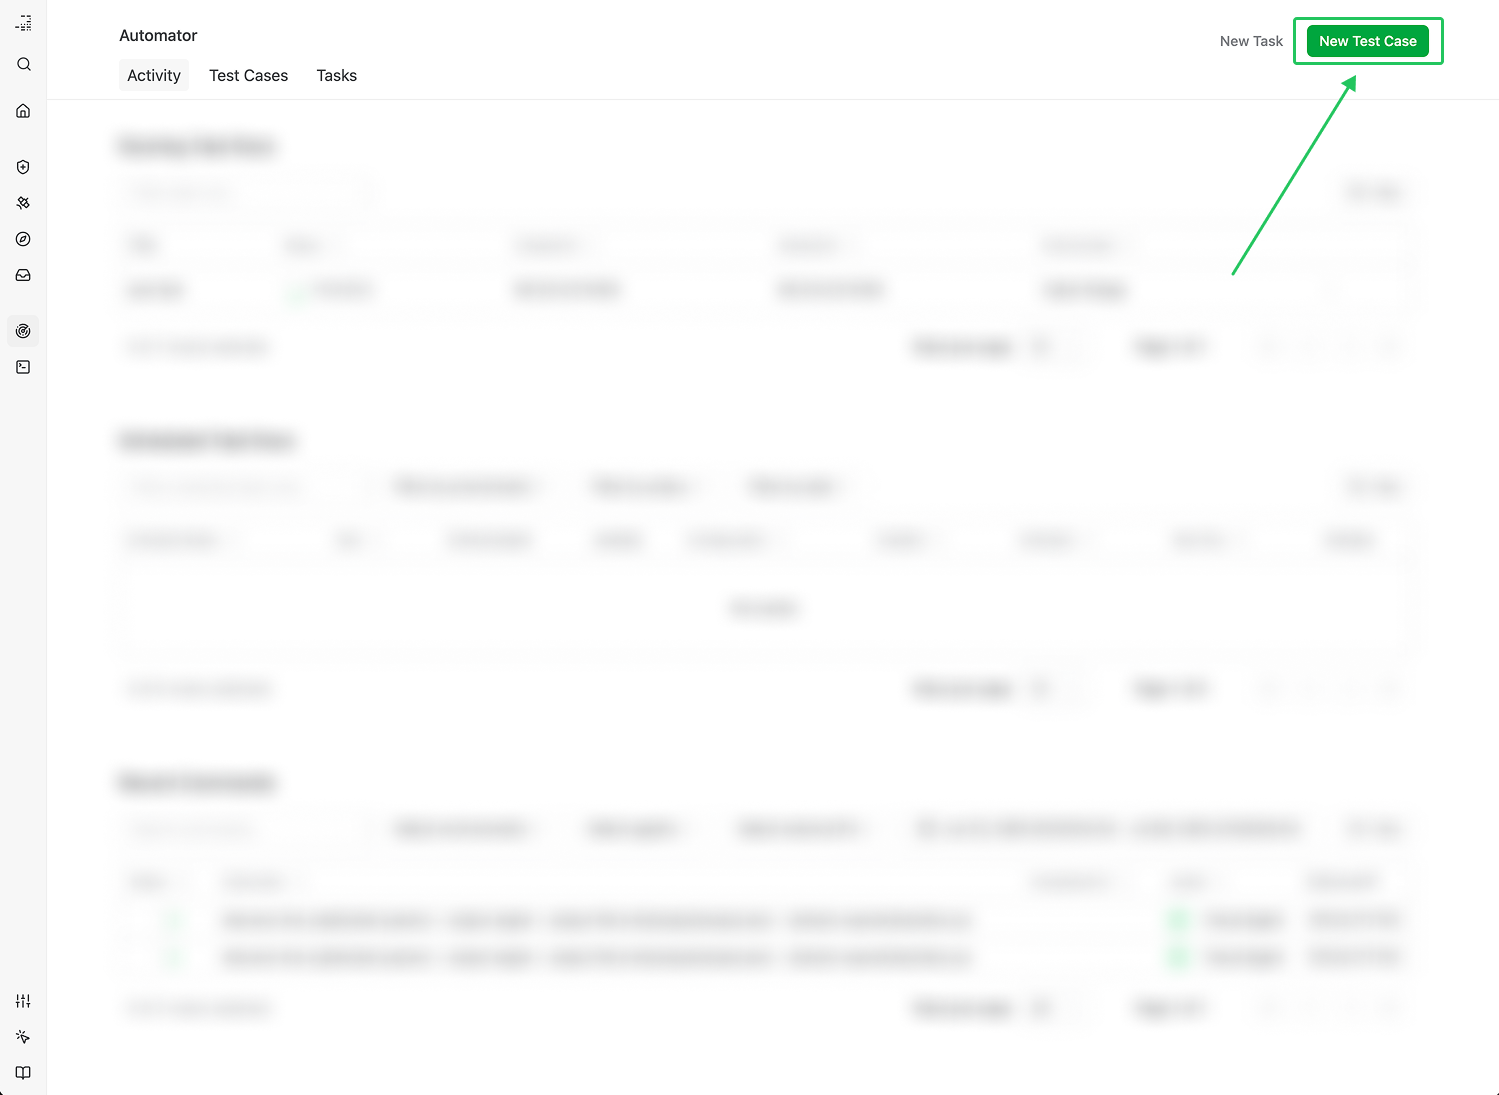
Create a new Test Case by clicking on New Test Case in the top-right corner of the app.
The Test Case form has five pages:
Oveview: where you configure metadata like Test Case NameConfigure Task: where you choose an existing Task and configure its inputsConfigure Assertions: where you define the conditions that must be true for your test to pass.Set Schedule: configure when the Test Case should runConfirmation: confirm all details before saving
In this guide, we will create a Test Case for the “[Example] Black Box Cloud Bucket Investigation [Record]” Task we created in the previous guide as our example.
Overview
Start by giving your Test Case a clear title and objective.
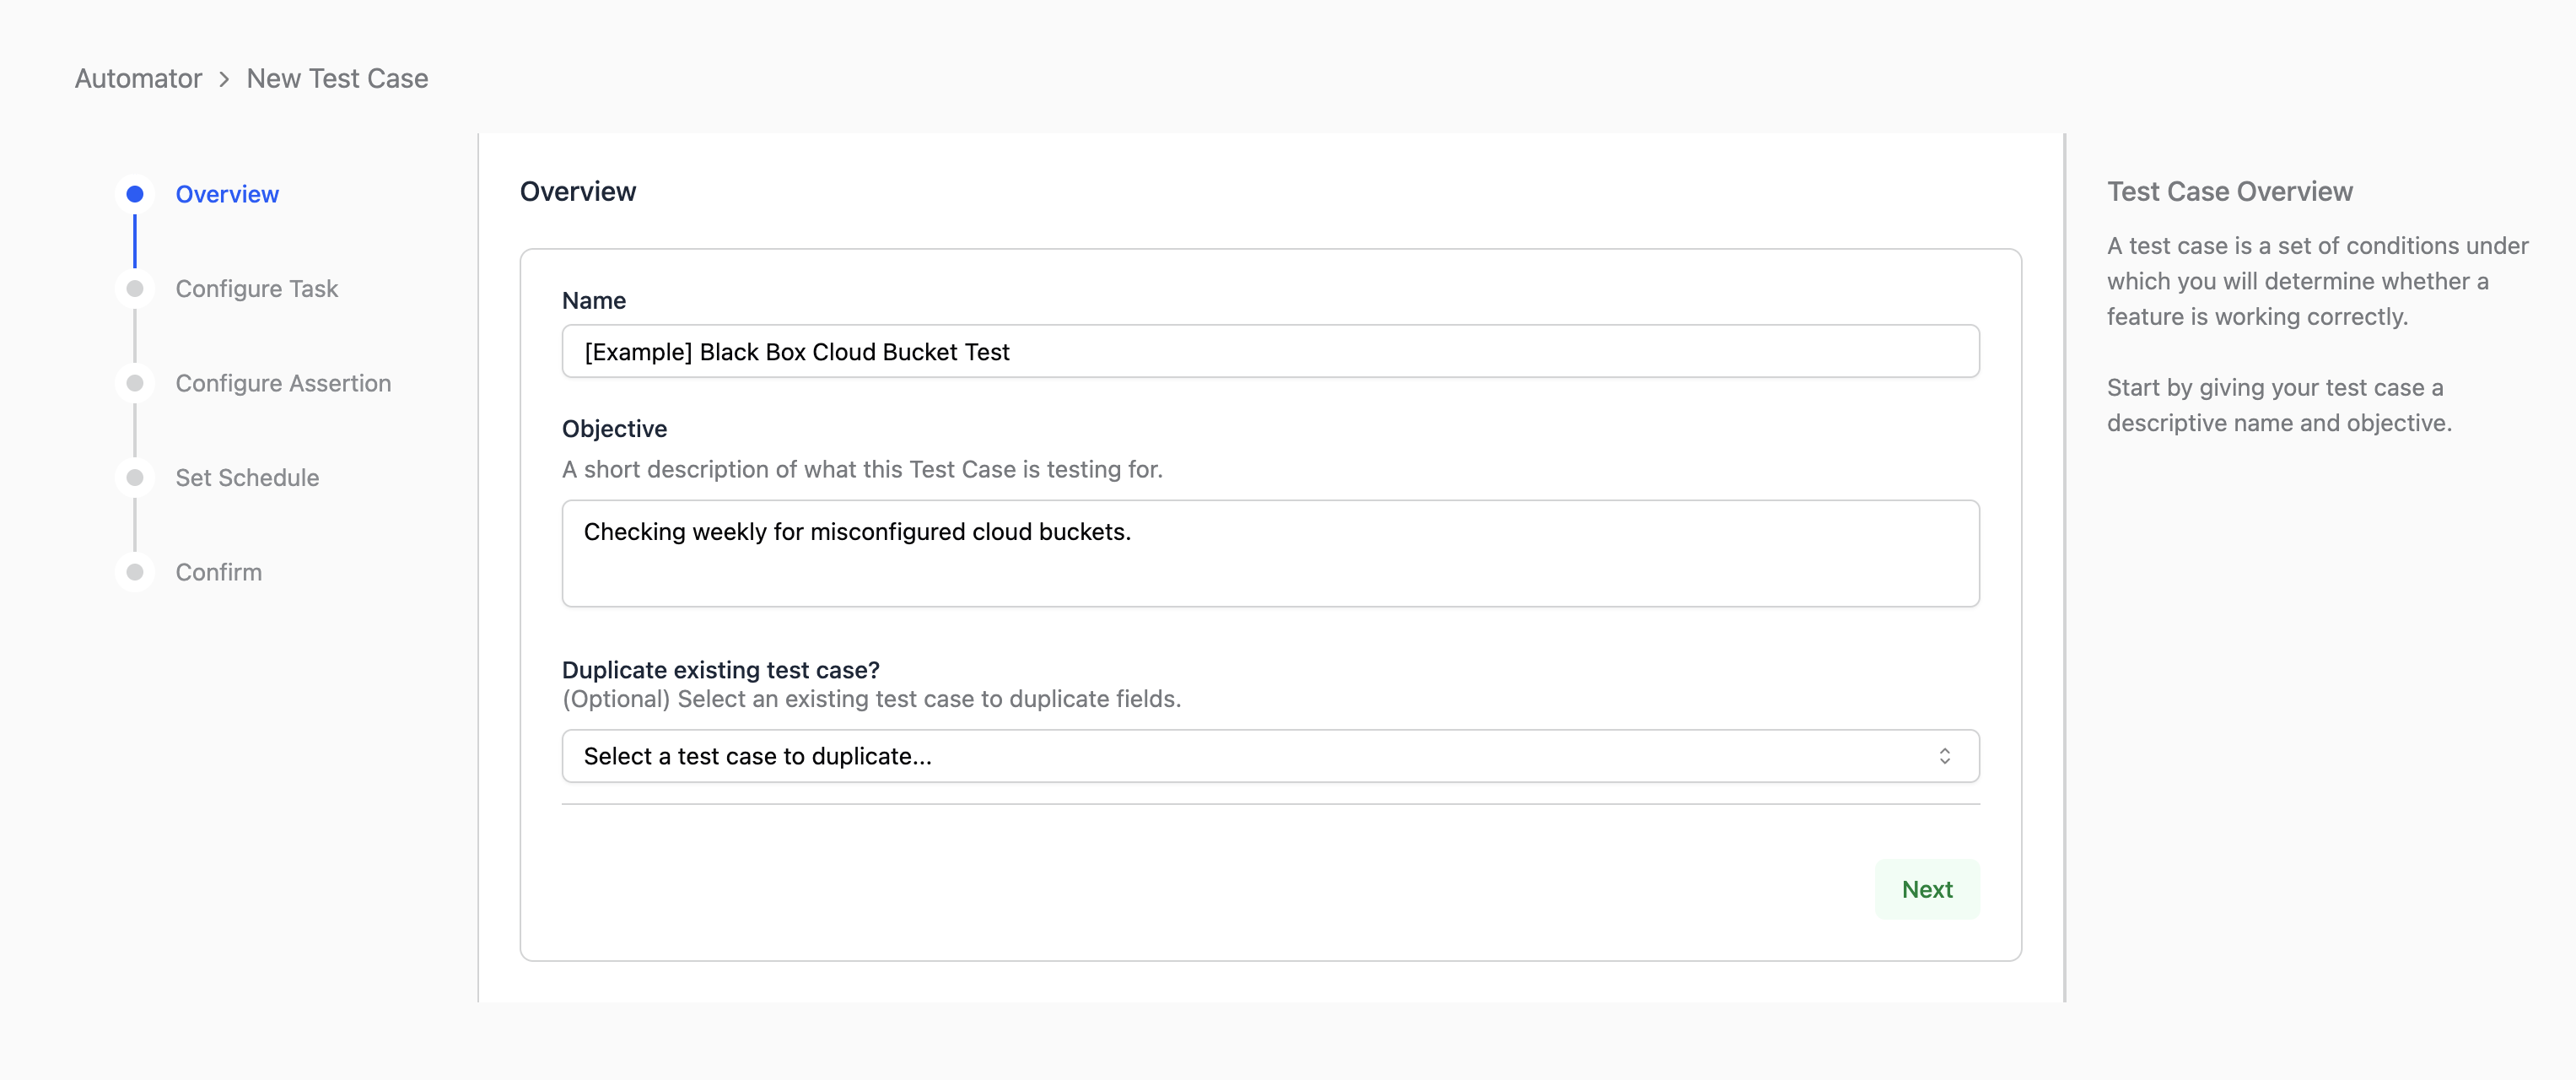
For our example:
- Name: [Example] Black Box Cloud Bucket Test
- Objective: Checking weekly for misconfigured cloud buckets.
- Duplicate: [leave blank]
If you’re creating a Test Case that is a modification of an existing Test Case, you can duplicate it to start and make modifications to it.
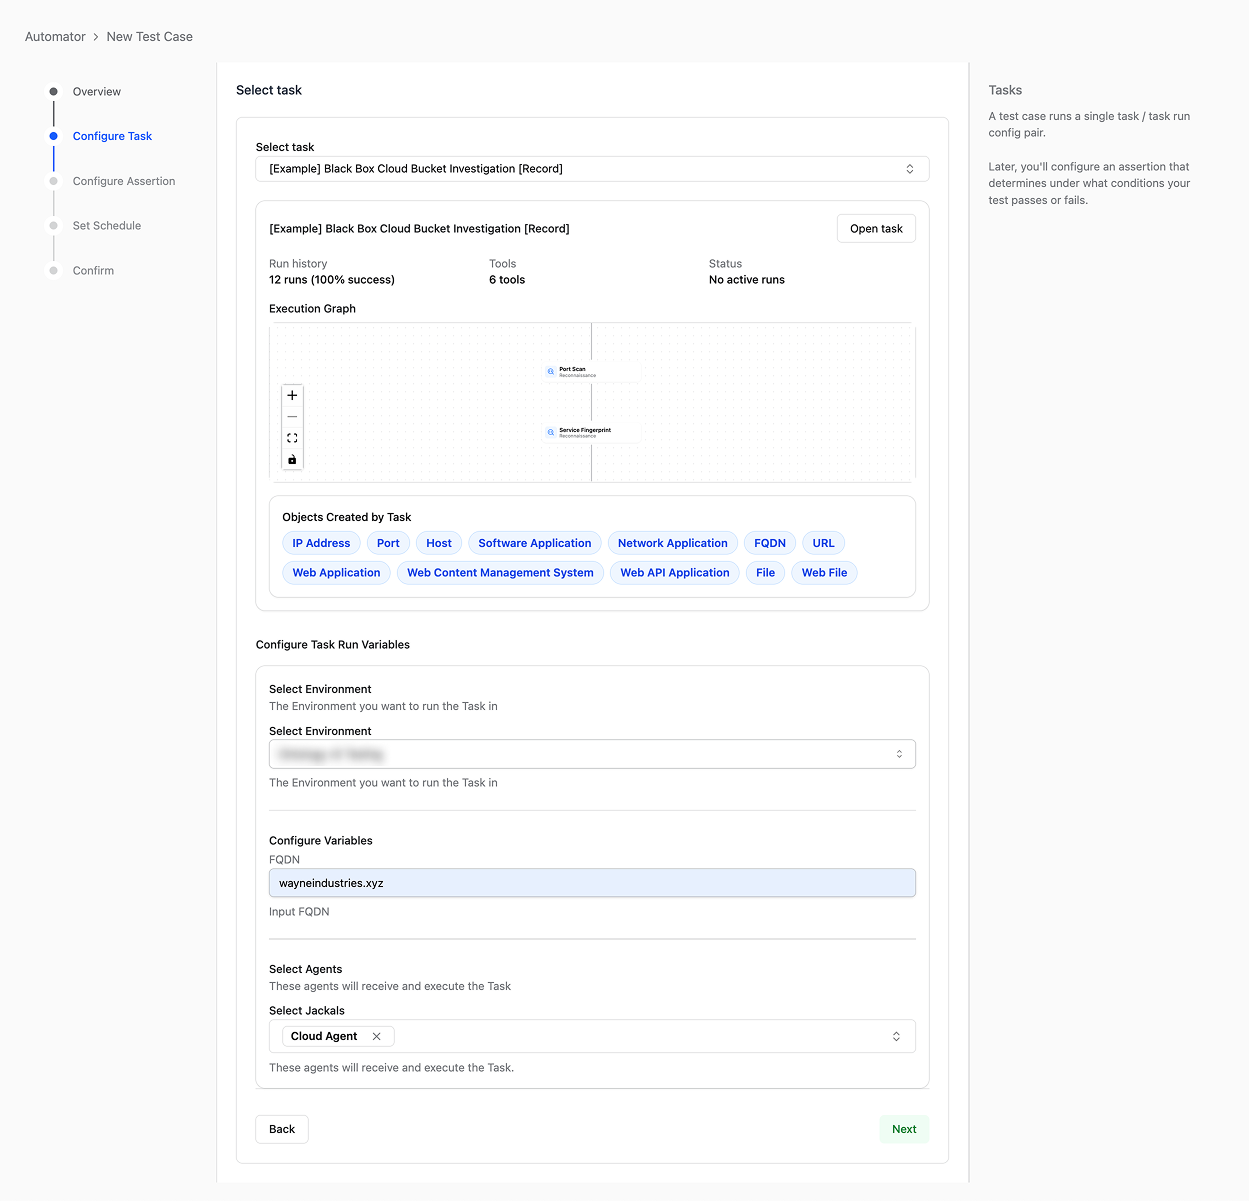
Configure Task
Next, configure the Task to be used in the test case. This selects the Task whose outputs we are testing.
In our example, select:
- Environment: use your tutorial testing environment
- Input FQDN:
wayneindustries.xyz - Agent: Cloud Agent
Configure Assertions
Configuring Issue Checks
This step is the important step. Here, you can configure the assertions that you expect to be true in order for your Test to pass. If any of these assertions fail, then the Test will fail.
For our example, we could check to see if any of our objects have critical or high-severity issues on them. That would be configured like so:
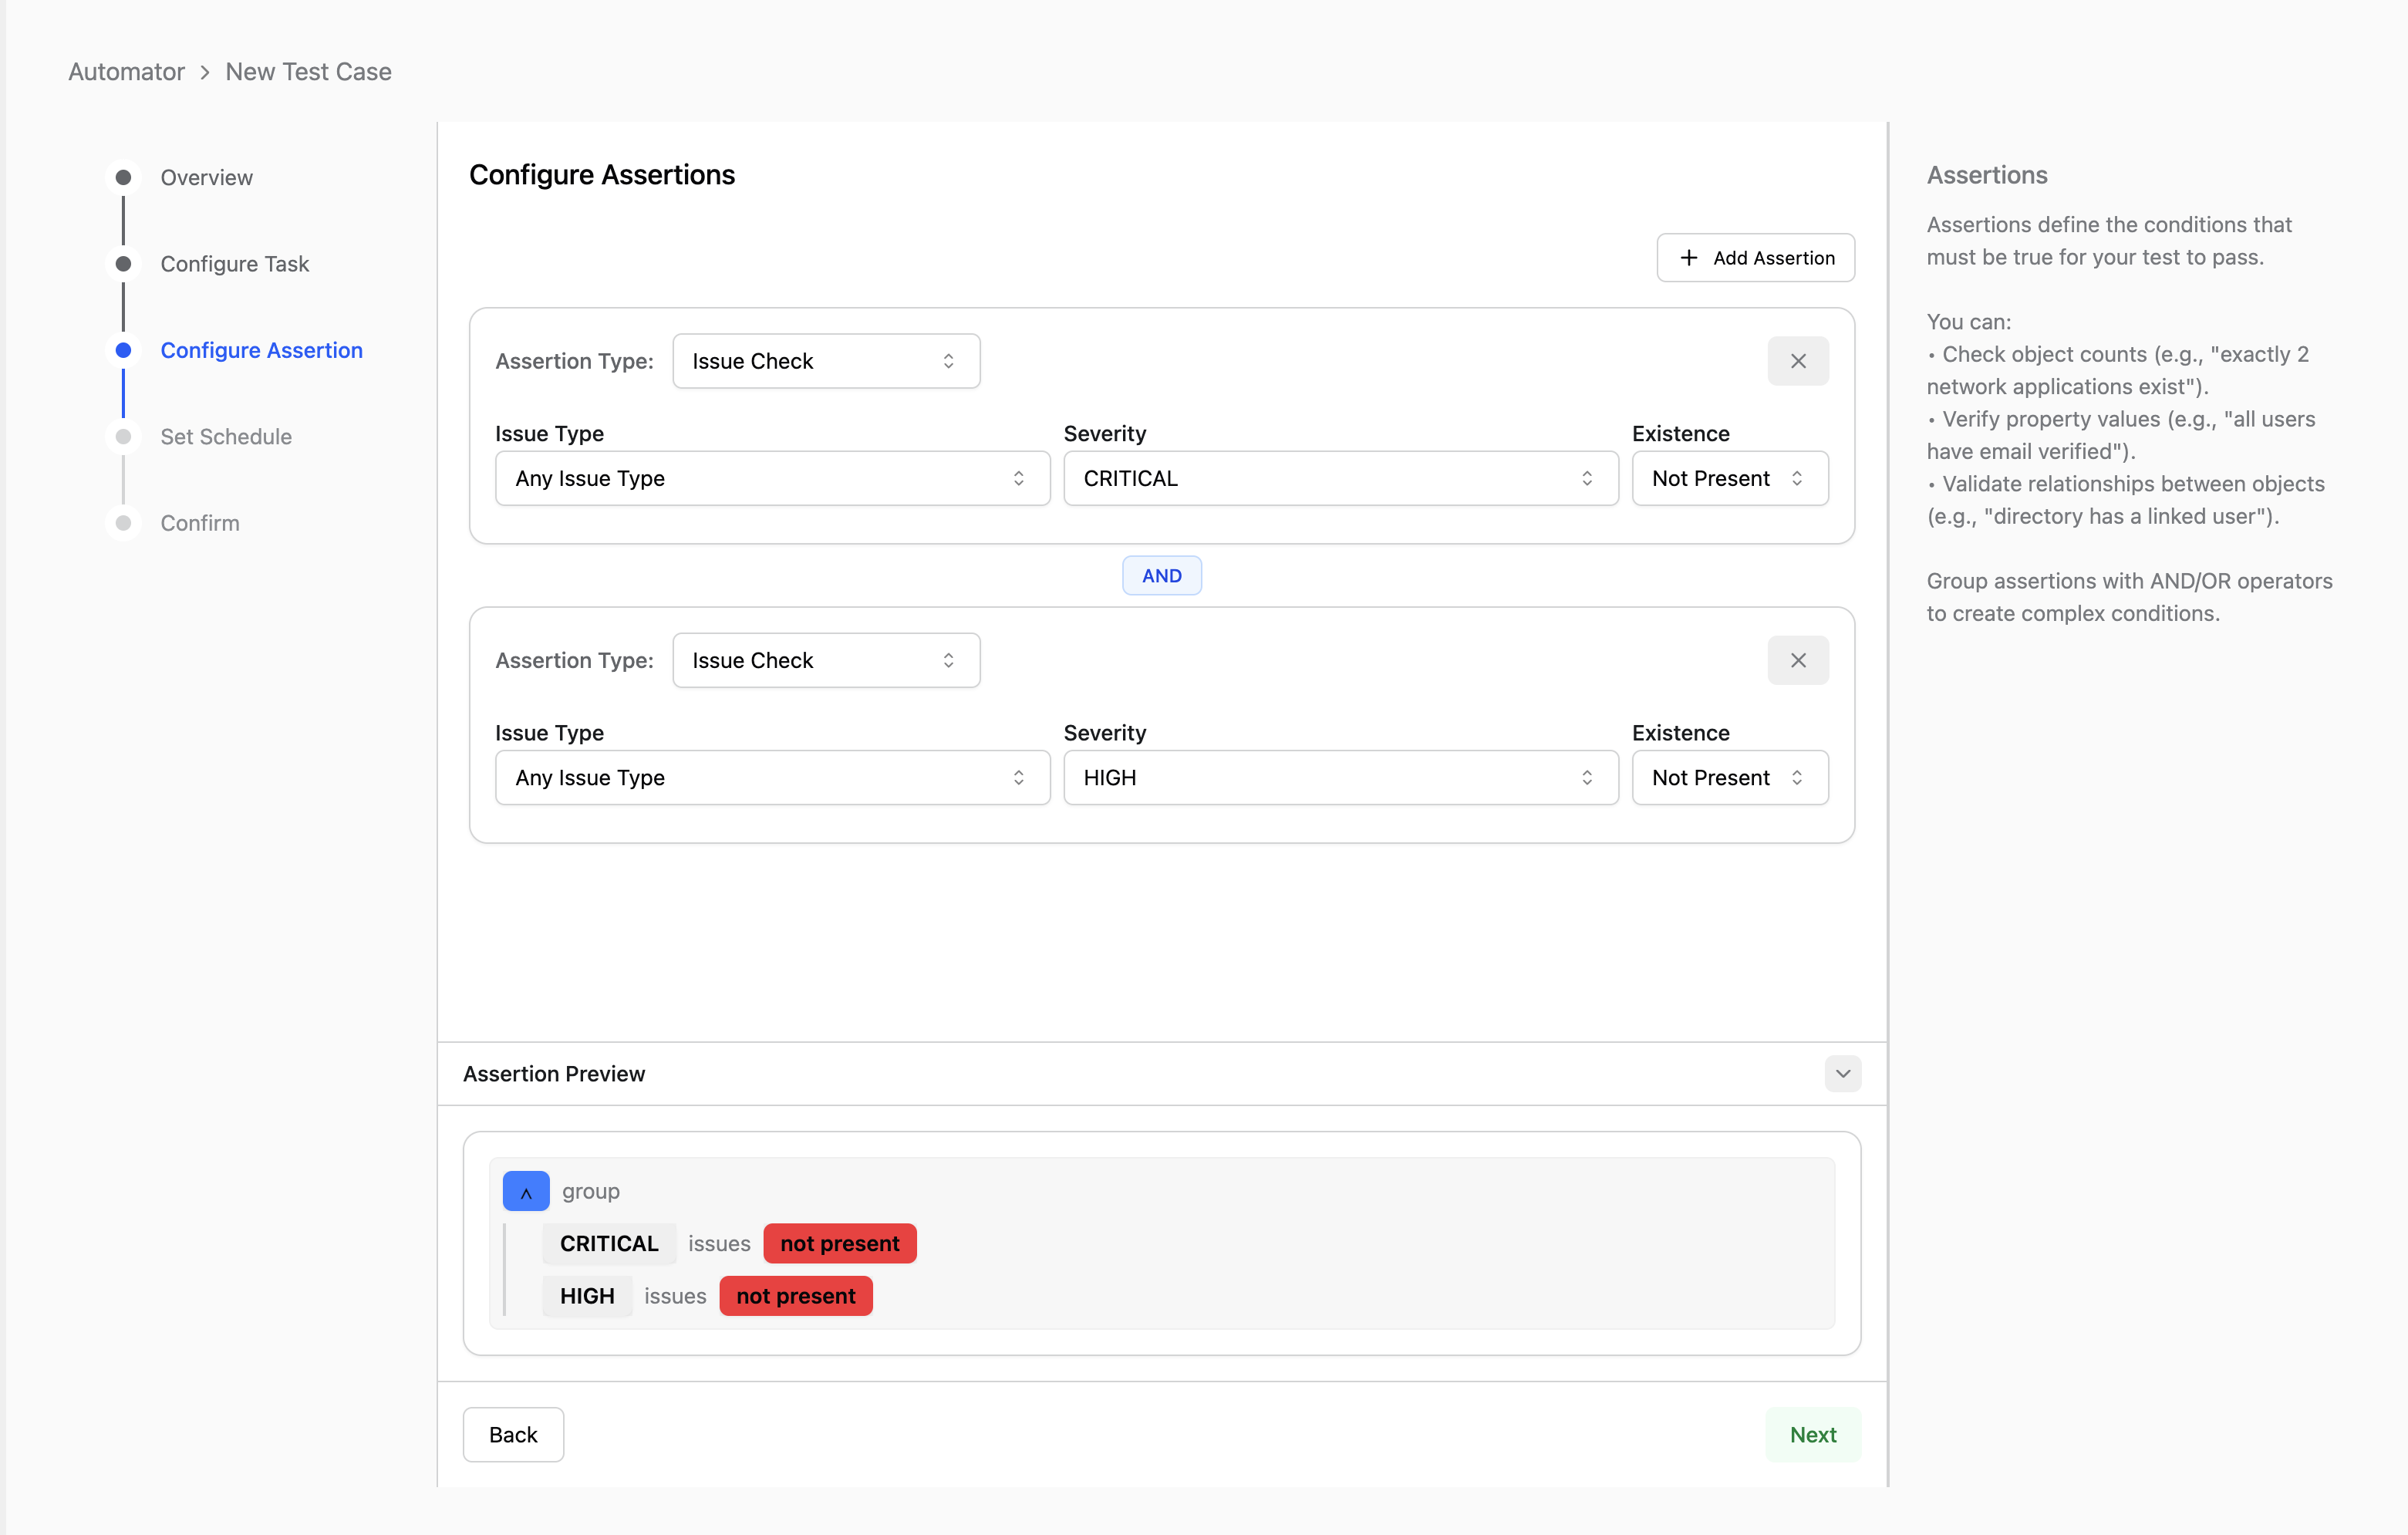
If the test finds any critical or high severity issues, then it will fail.
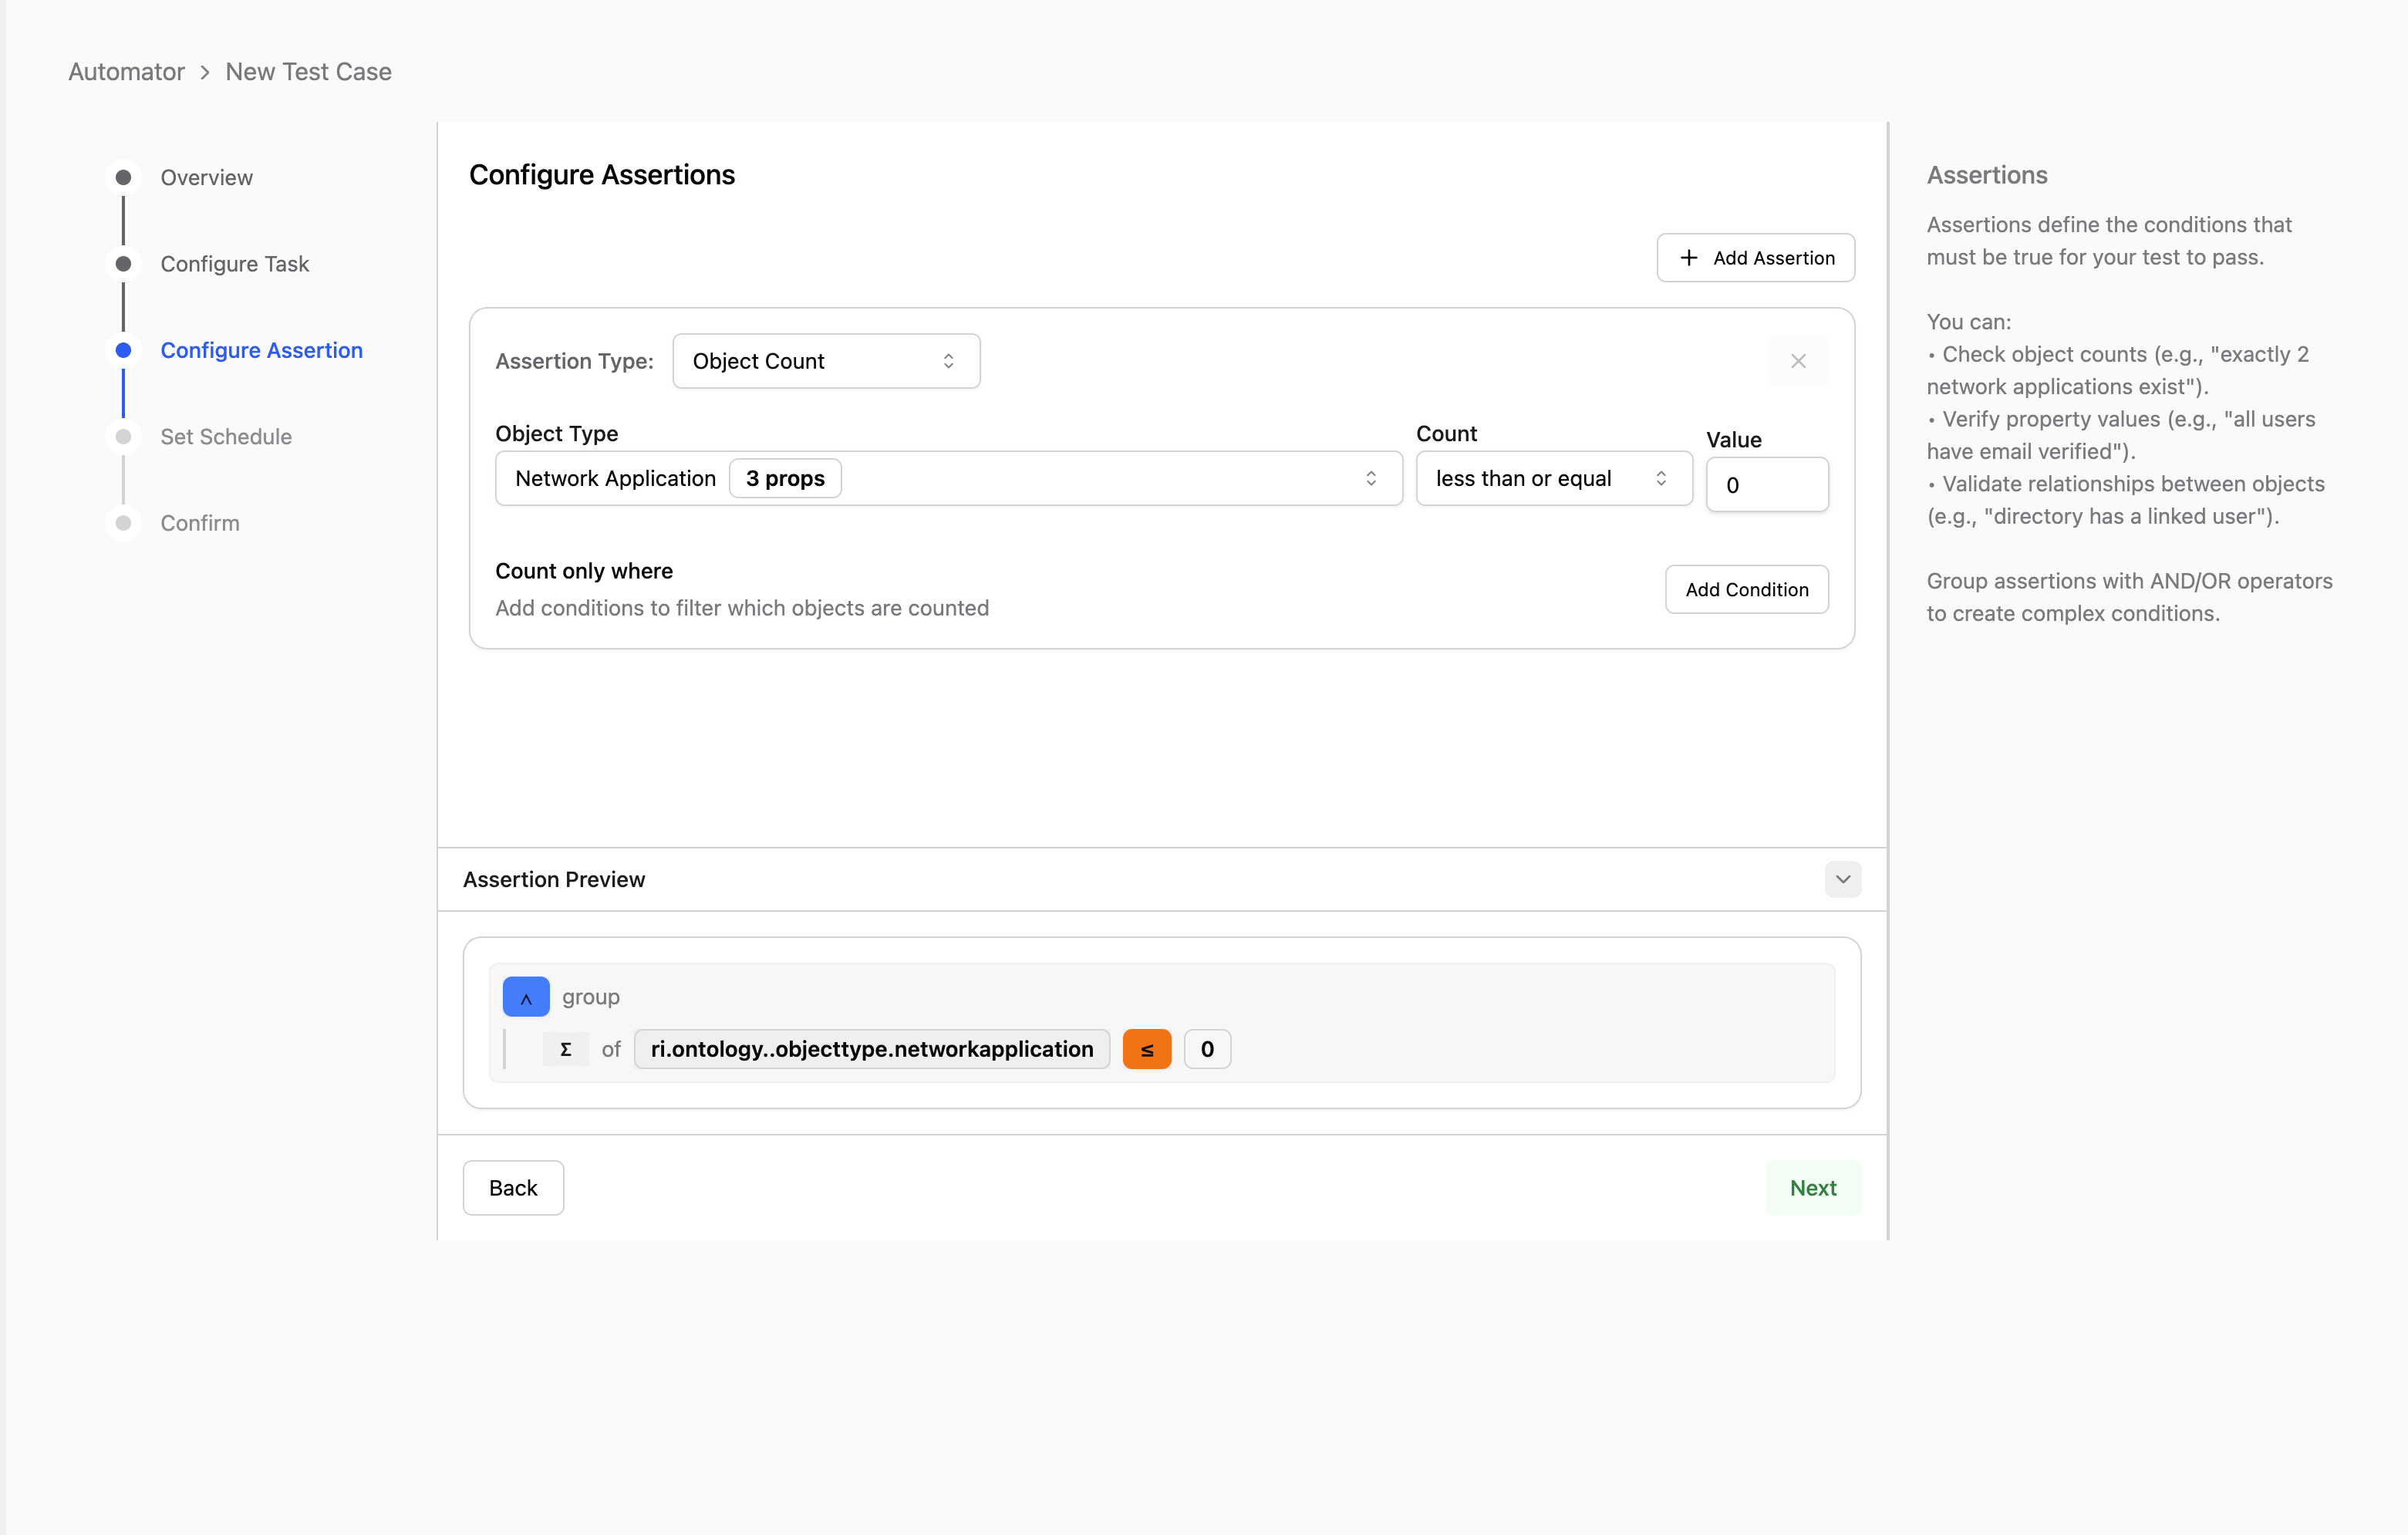
Configuring Object Checks
You can also configure assertions to check for Object counts. This checks to see if the number of returned objects looks like you may exepct. For example, if you are running a Test to ensure that network applications are not visible from outside-in, then you might add a check like this below, where you check to confirm that there are no network applications being returned.
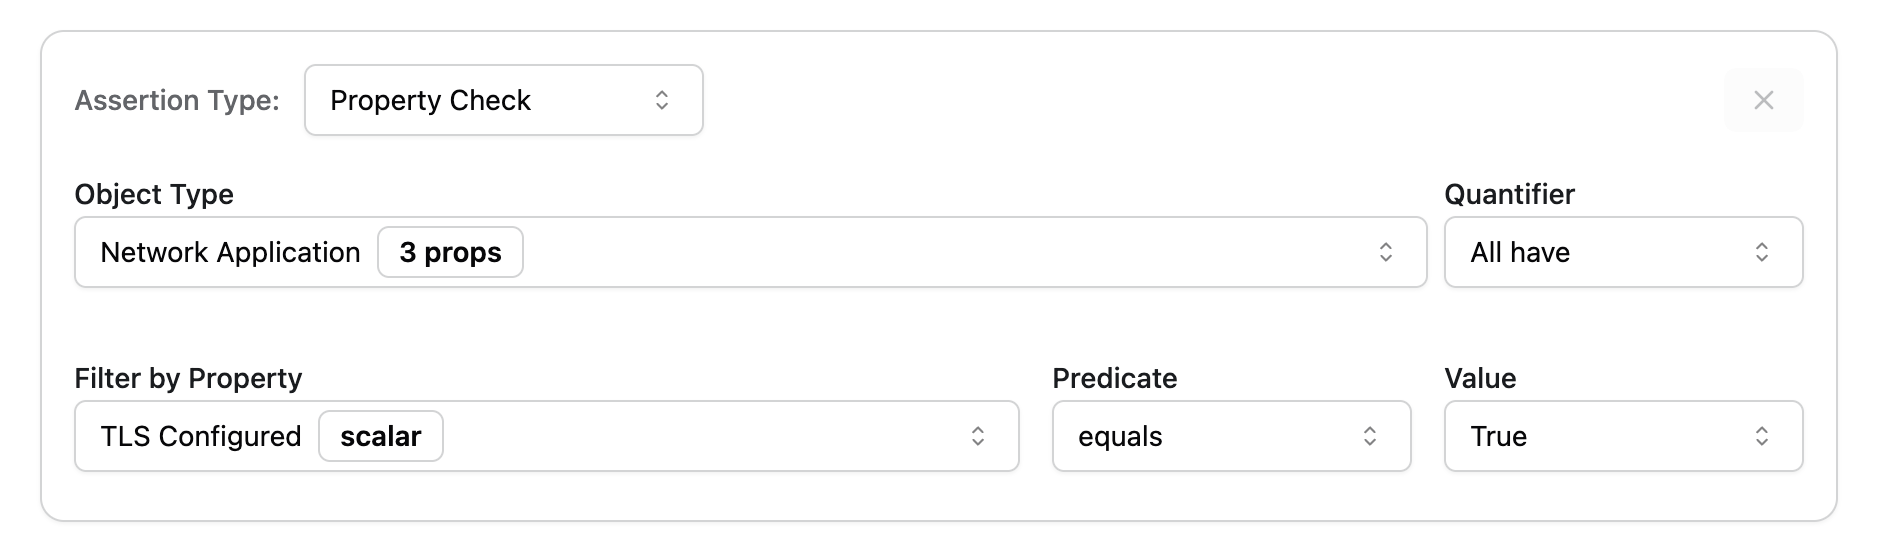
Configuring Property Checks
You can use assertions to check for unexpected property type values. You accomplish this by selecting:
- the object type that has the property you are interested in
- defining whether all, some, or none of those objects should have this property value
- select the property
- define the normal parameters for this property’s value (eg: “equals 4” or “exists”)
This allows you to check for the existence of and value of highly specific properties.
For example, you can check whether the Network Applications returned by your task all have TLS Configuration values of True.
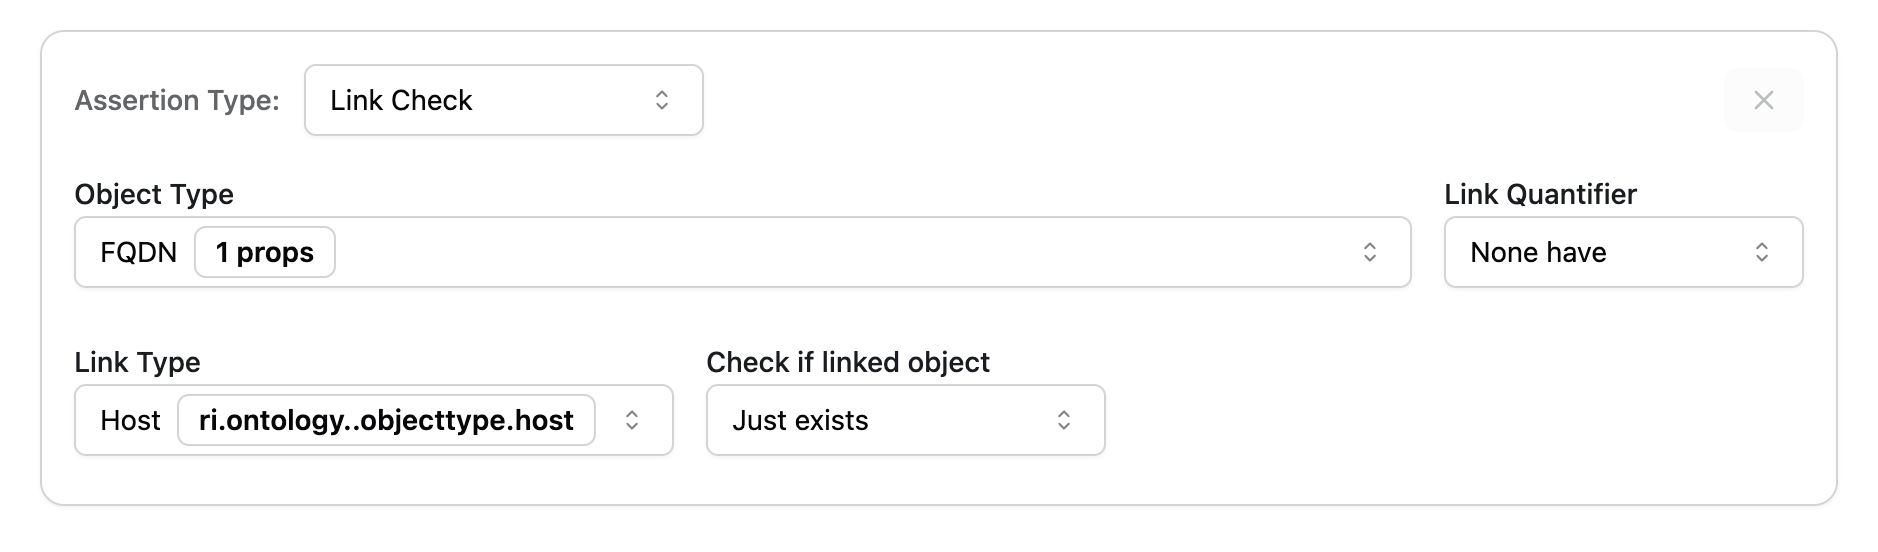
Configuring Link Checks
Finally, you can use assertions to check the objects that are linked to objects returned by your Task. You can run a object check (described above) or property check (described above) on these linked objects.
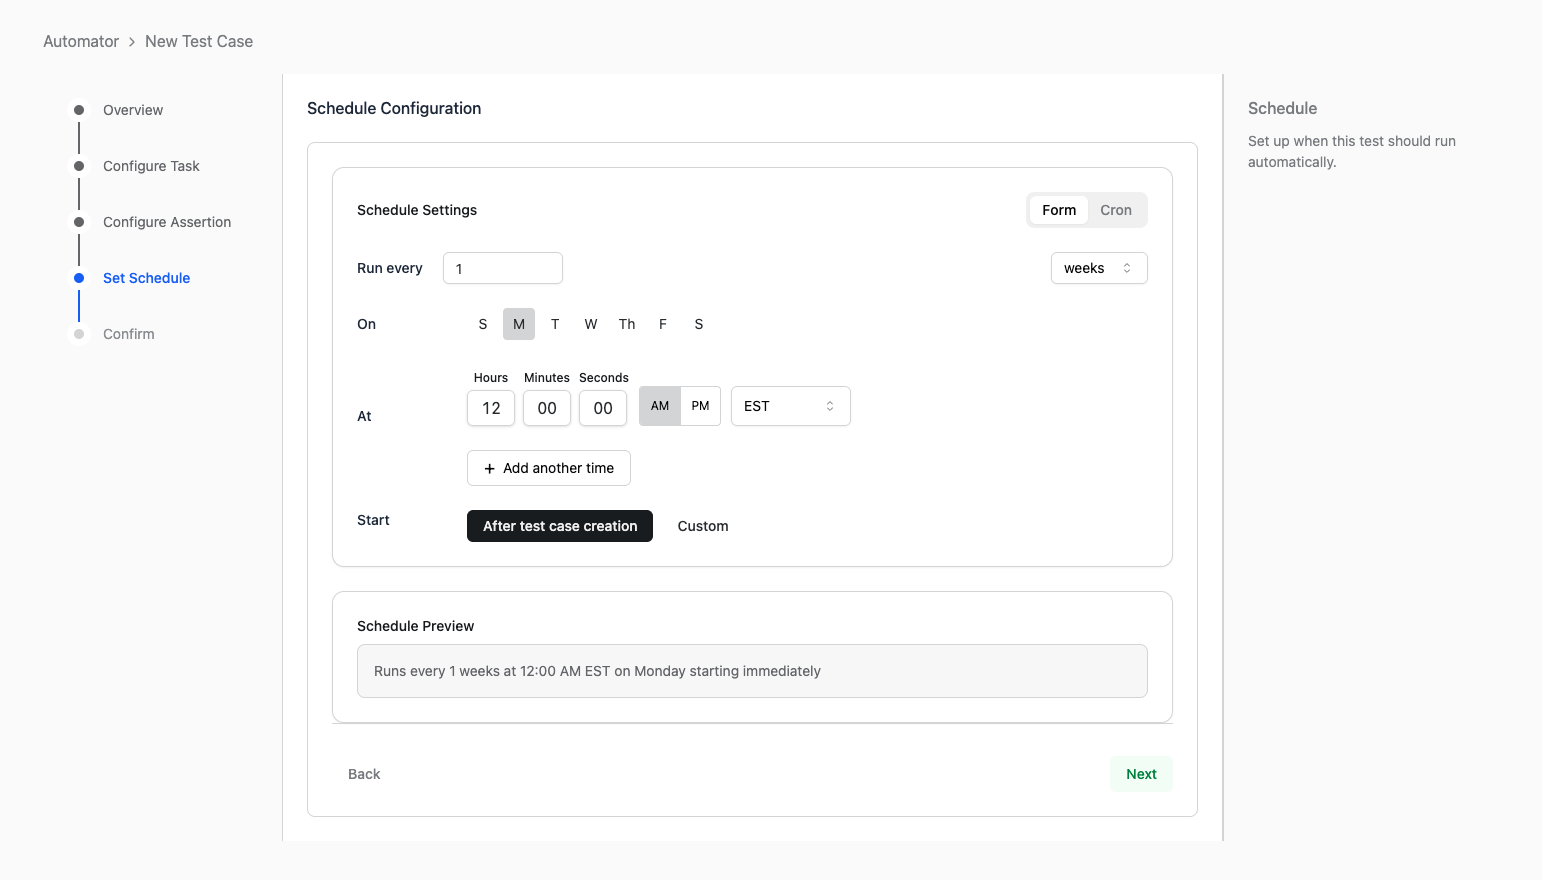
Configure Schedule
Test Cases have a UI for configuring schedules flexibly. You can optionally switch to using a Cron expression.
After configuring the schedule, you can choose a date for when the Test schedule should begin. By default, the schedule begins right away, but you can choose any future date to begin.
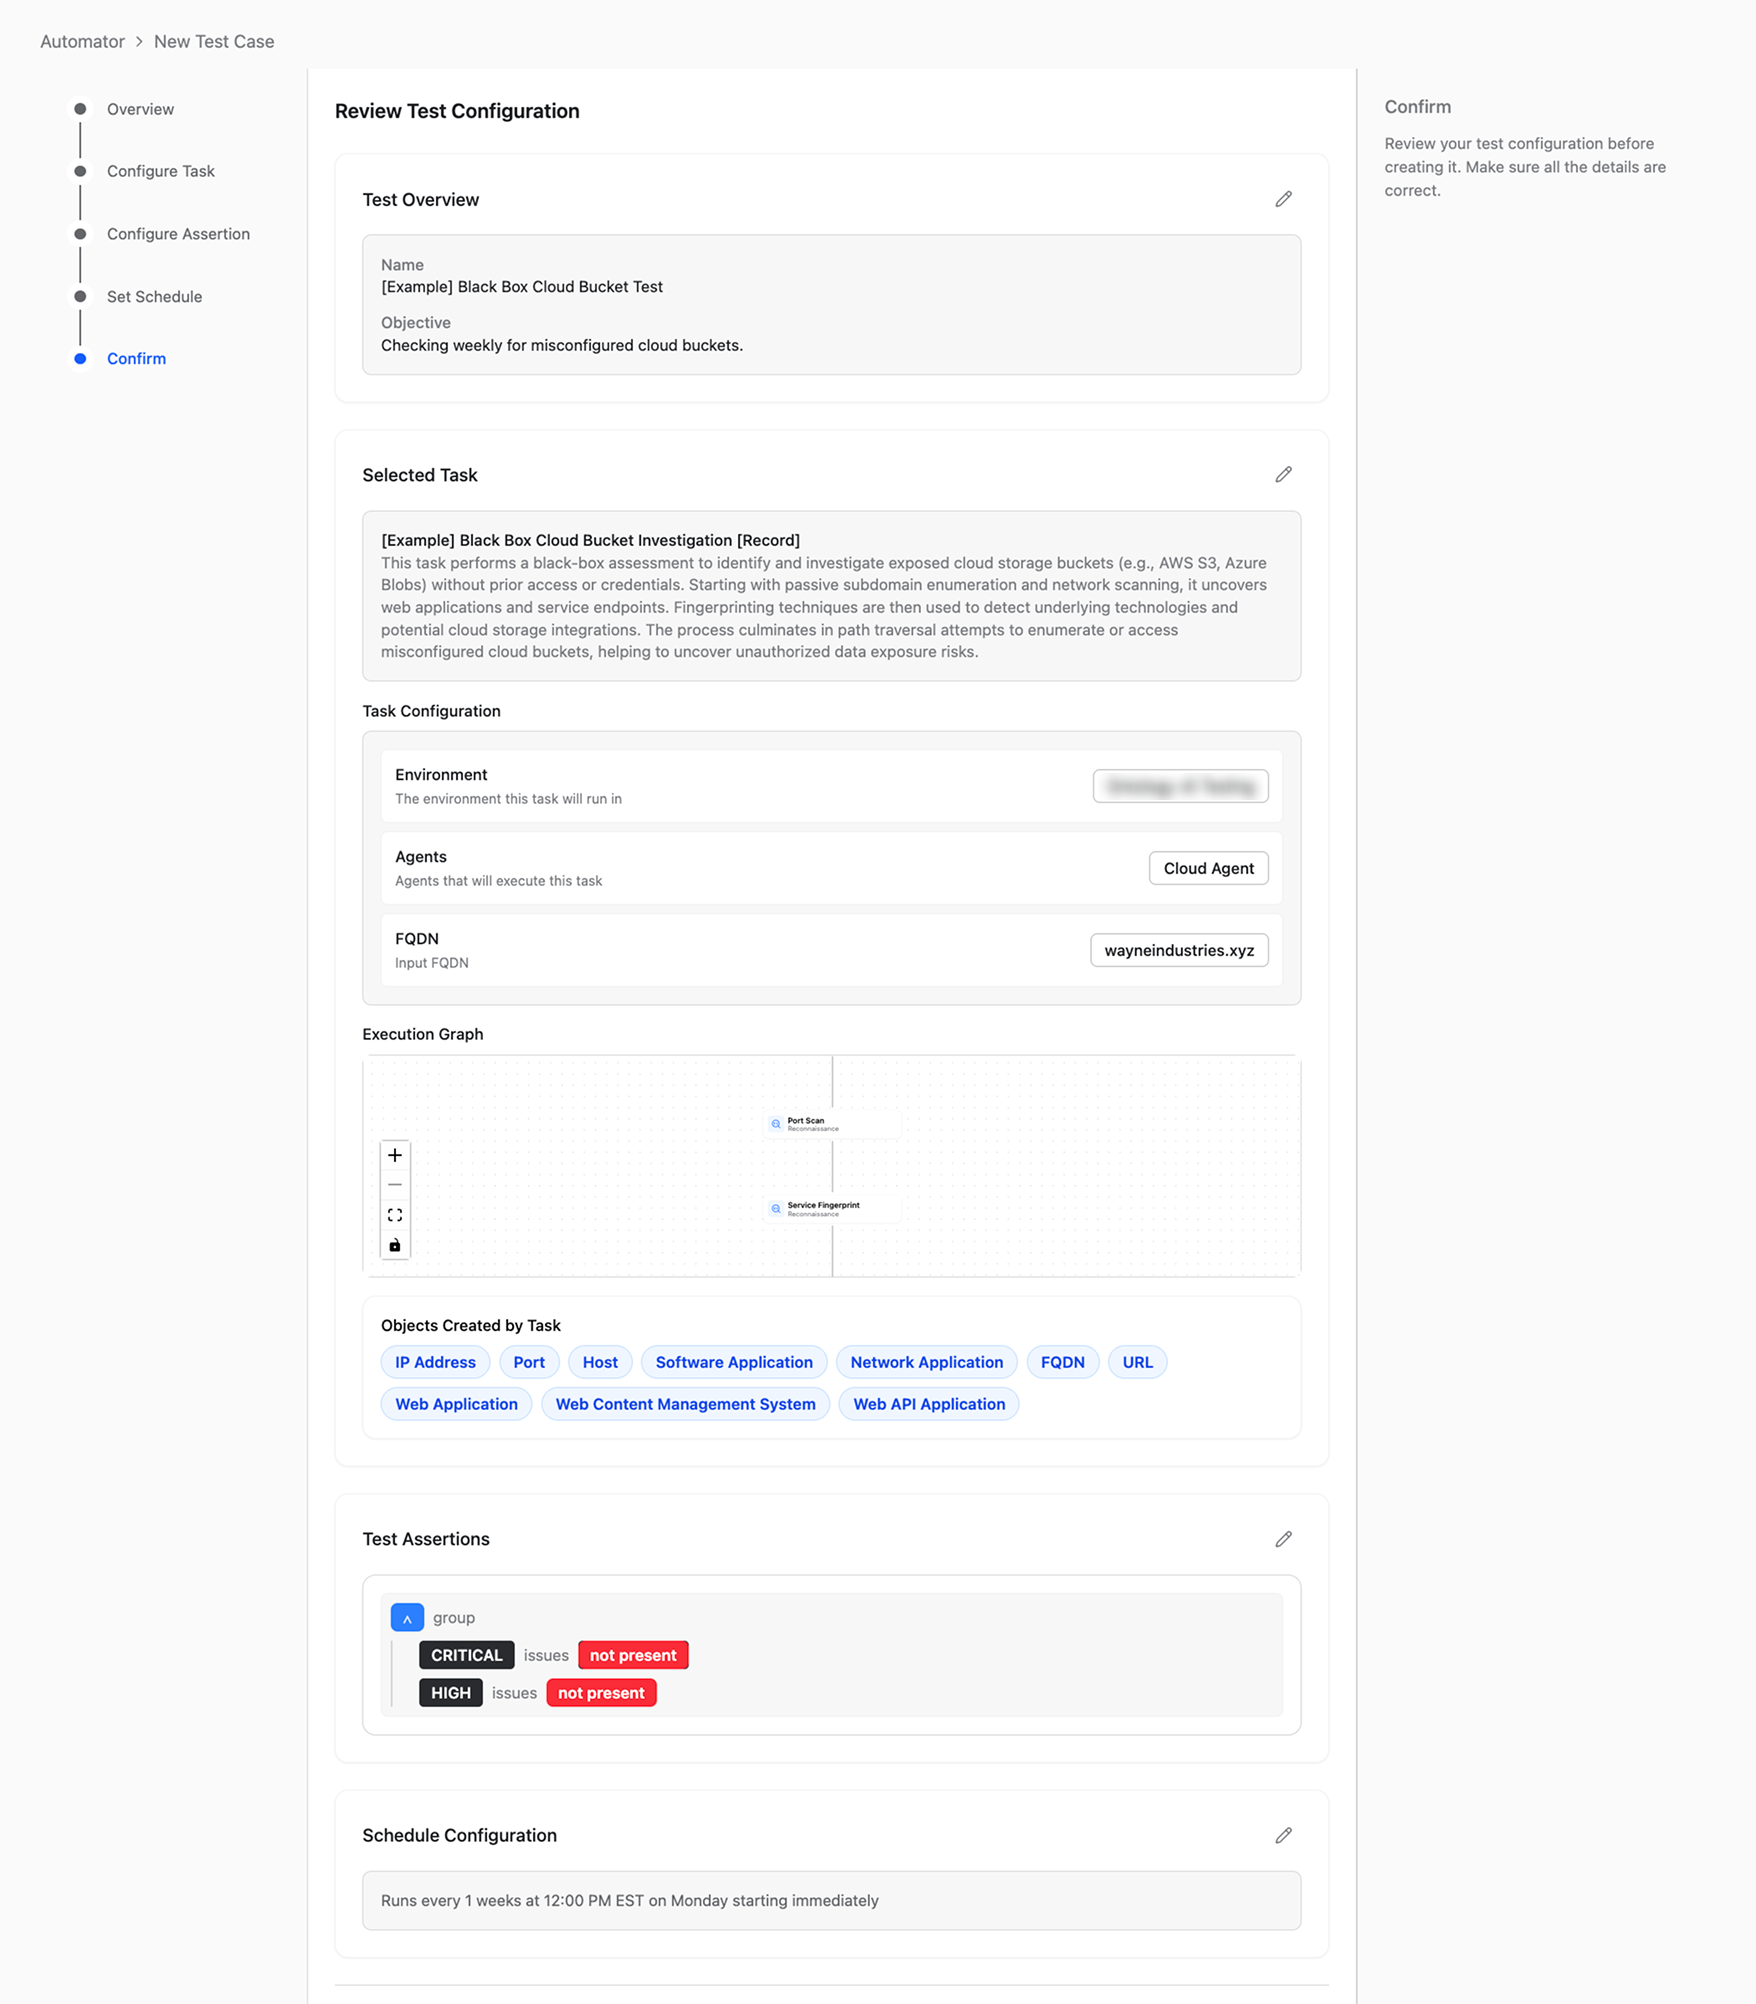
Confirm and complete
Finally, check the details of your Test Case, then hit Create. The Test Case will run at the specificied schedule you configured.