Install and configure a Jackal
Deploy a Jackal on a target machine and tune its exfiltration, workflow, and C2 parameters from the Method platform.
For background on Jackal architecture and how Jackals communicate with Method, see Jackal C2.
Open the install dialog
Click the lightning bolt icon in the left sidebar to open the Start something new menu, then select Install a Jackal.

Configure the Jackal
In the Configure step, provide the basics for the Jackal you’re about to deploy.
- Name: A descriptive label so the Jackal is easy to recognize across the platform.
- Environment: The Environment this Jackal belongs to. Operations launched from this Jackal will be scoped to that Environment.
- Operating System: The OS of the target machine. Choose Windows, Linux, or macOS.
- Execution Mode: How the Jackal runs on the target. On Disk writes the binary to the filesystem, while In Memory loads it without touching disk.
- Target URI (Advanced): The Method API endpoint the Jackal should call back to. The default value works for most deployments. Override it only if you’re routing through a custom domain.
Click Create Jackal to generate the Jackal’s secrets and install instructions.
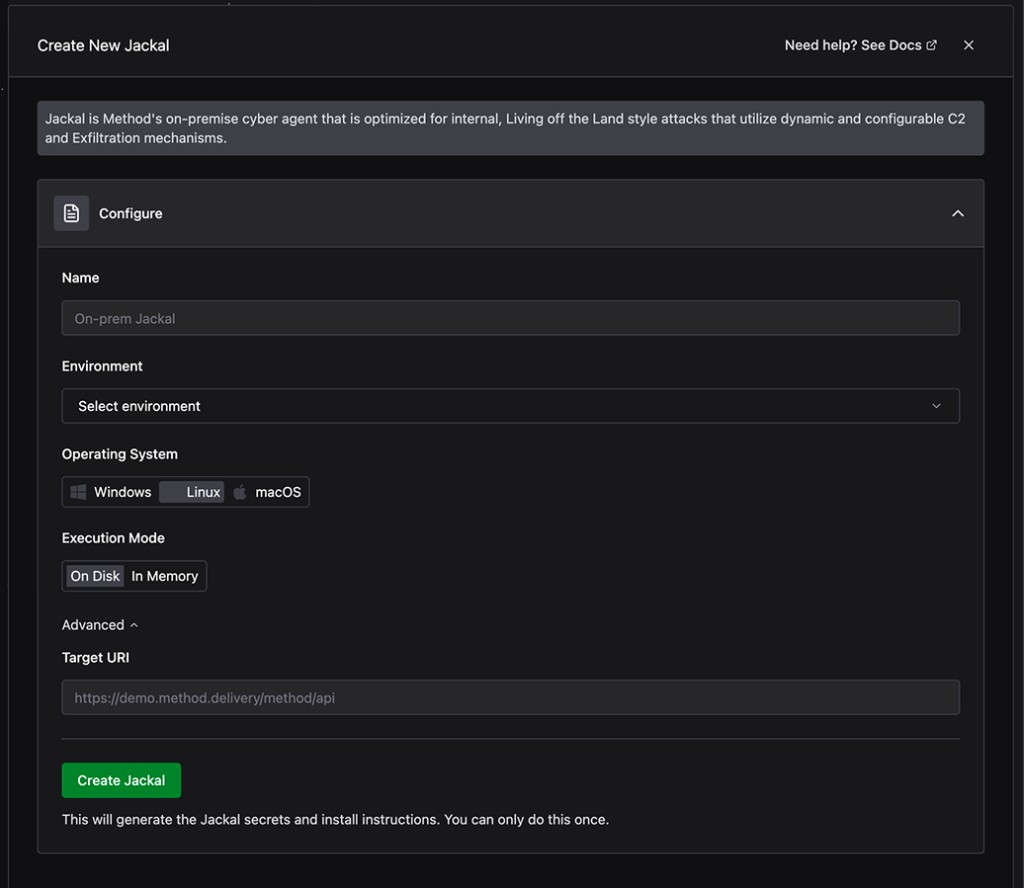
You can only retrieve install instructions once, immediately after creating the Jackal. Don’t close the dialog until you’ve downloaded or copied them.
Install the Jackal on the target machine
After the Jackal is created, the Install Jackal step opens with three ways to deploy it.
- Install via Command: Copy the generated
curlcommand and run it on the target machine. This is the fastest path for any machine with shell access. - Download Binary: Download the Jackal binary directly. Use this when you want to transfer the binary out-of-band or run it without piping through
curl.
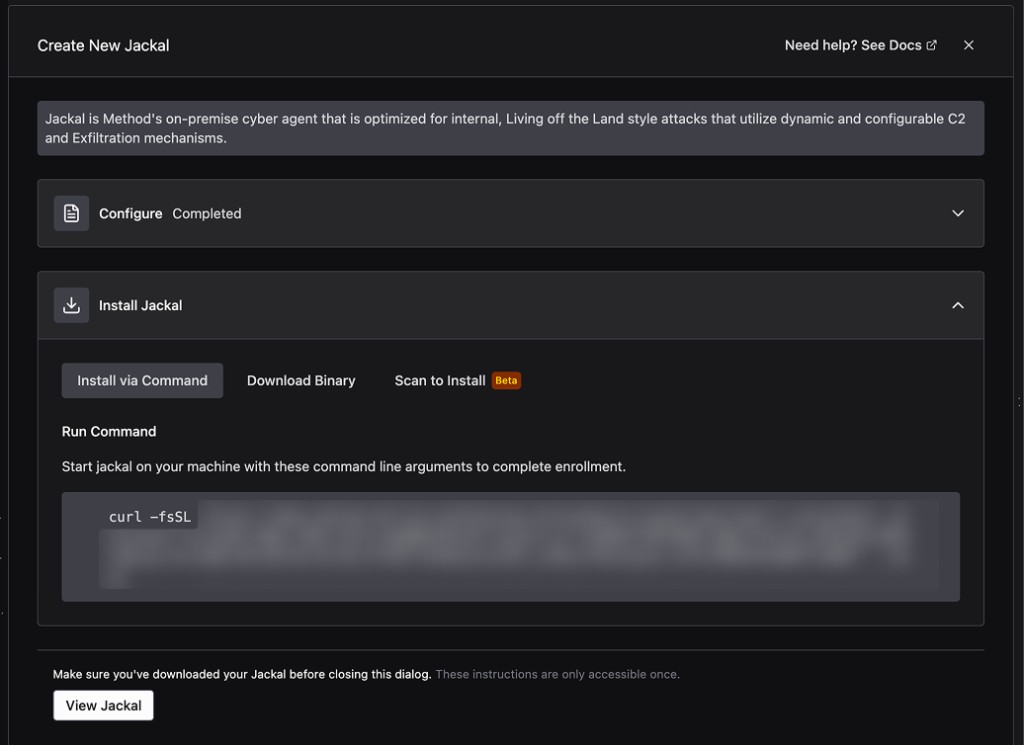
Run the command or binary on the target. Once the Jackal calls back to Method and completes enrollment, its status flips from Offline to Online and it becomes available to Operations and Tools.
Review the Jackal
Click View Jackal in the install dialog to open the Jackal’s detail page. The Overview tab shows enrollment metadata and a snapshot of the Jackal’s current configuration.
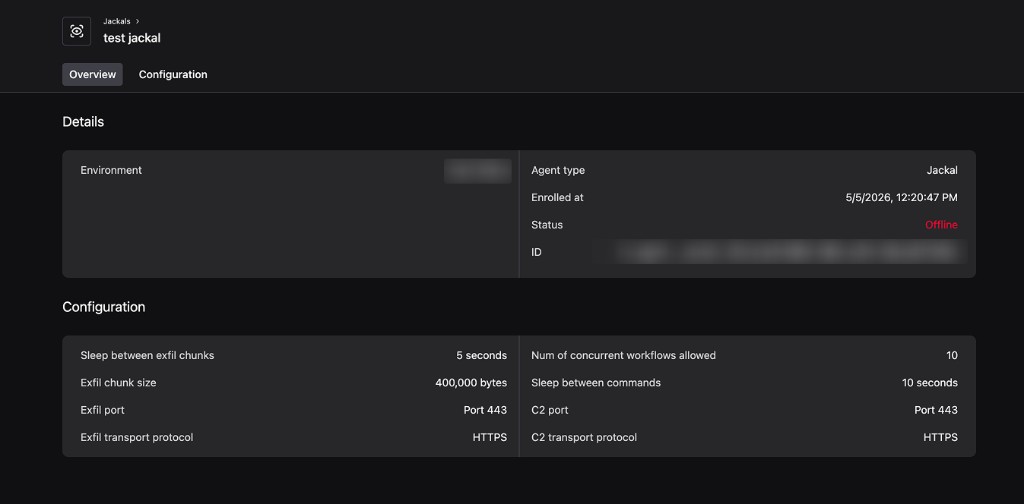
The Details card surfaces the Environment, Agent type, enrollment timestamp, status, and Jackal ID. The Configuration card summarizes the live values for exfiltration, workflow, and C2 settings so you can verify them at a glance.
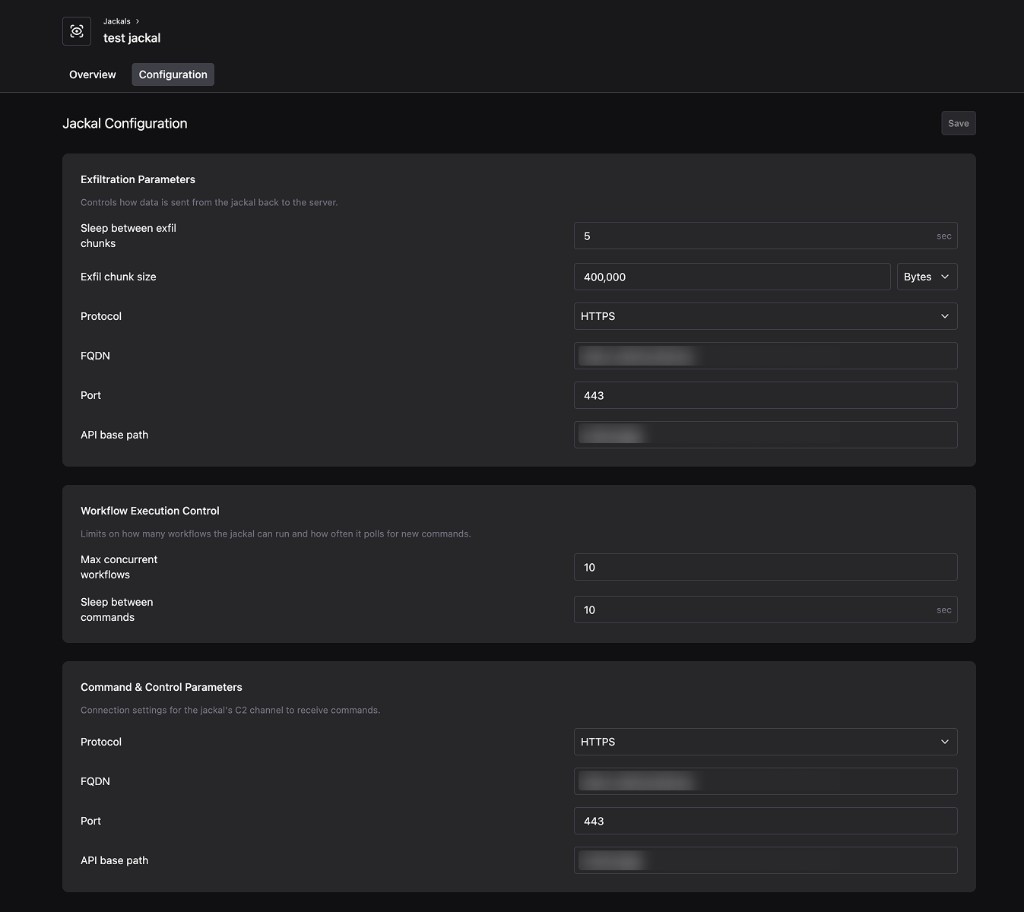
Tune Jackal parameters
Switch to the Configuration tab to adjust how the Jackal behaves during an Operation. Settings are grouped into three sections.
- Exfiltration Parameters: Control how data is sent from the Jackal back to Method. Tune the sleep interval between exfil chunks, the chunk size in bytes, and the protocol, FQDN, port, and API base path used for exfiltration.
- Workflow Execution Control: Cap how many workflows the Jackal can run in parallel and how often it polls Method for new commands. Lower the concurrency or increase the sleep interval to reduce the Jackal’s footprint on noisy networks.
- Command & Control Parameters: Configure the connection settings for the Jackal’s C2 channel, including protocol, FQDN, port, and API base path.
Click Save to push the new configuration to the Jackal.
View all deployed Jackals
To see every Jackal in your organization, open the Administration app and select Jackals under Agents. Filter by name, type, or status, then click any row to jump to that Jackal’s detail page.
With your Jackal online, you can use it as an access vector when launching an Operation. See Run your first Operation.