Run a Task
Run a Task once on demand, or set up a schedule to run it on a recurring cadence.
Open the run form
There are two ways to start a Task Run.
From the Task page
Open the Automator app, click into the Task you want to run, and look in the top-right corner of the Task page.
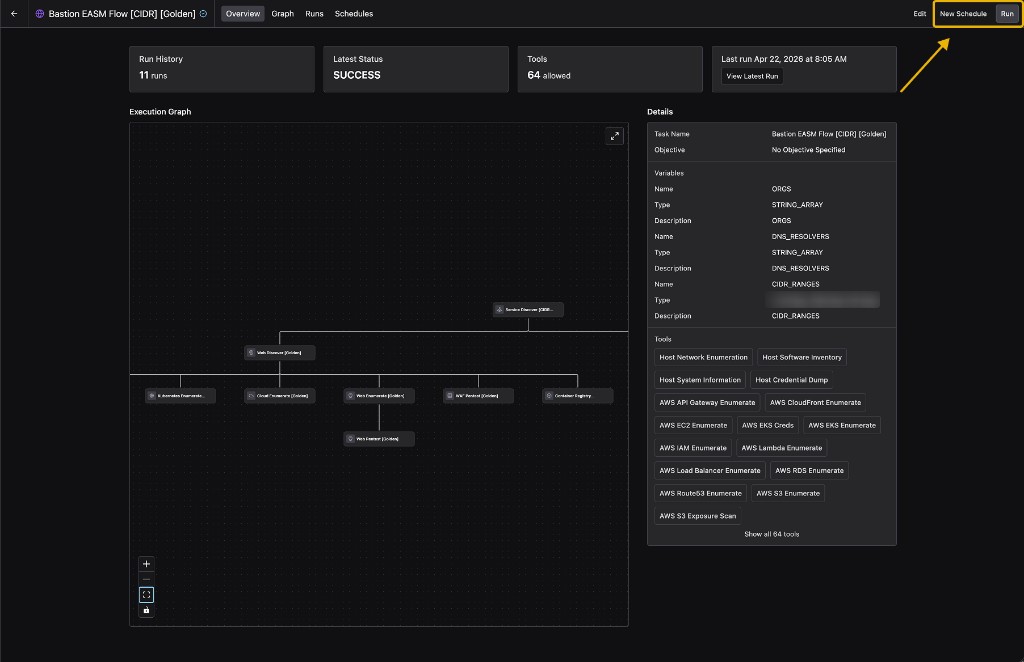
- Click Run to launch a one-time Task Run on demand.
- Click New Schedule to set up a recurring Task Run.
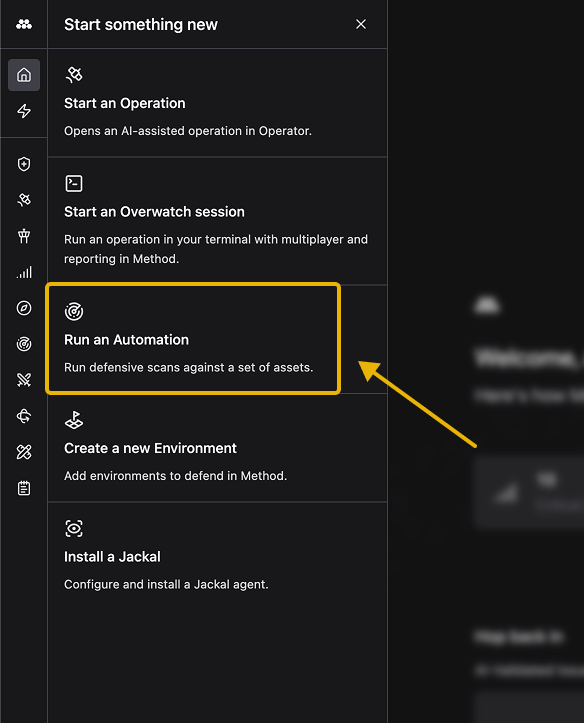
From the quick-action menu
Click the lightning bolt icon in the left sidebar to open the Start something new menu, then select Run an Automation.
A Select Task picker opens. Search for and pick the Task you want to run.
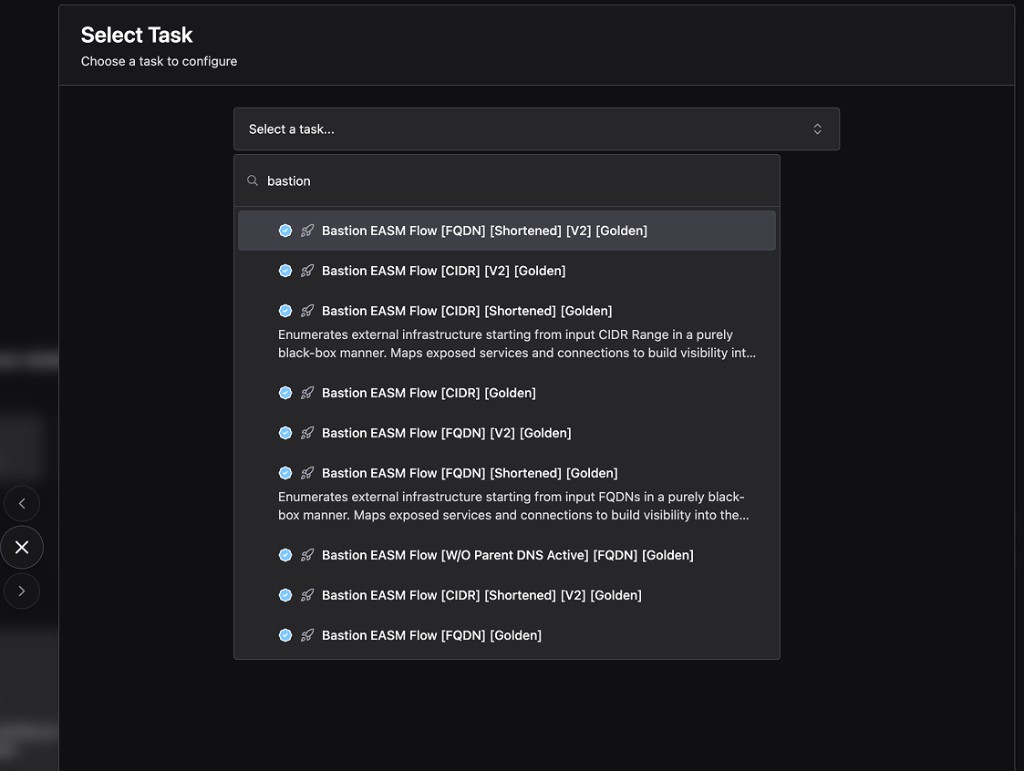
This opens the same on-demand run form as the Task page’s Run button. The quick-action menu is for on-demand runs only — to set up a schedule, open the Task page and use New Schedule instead.
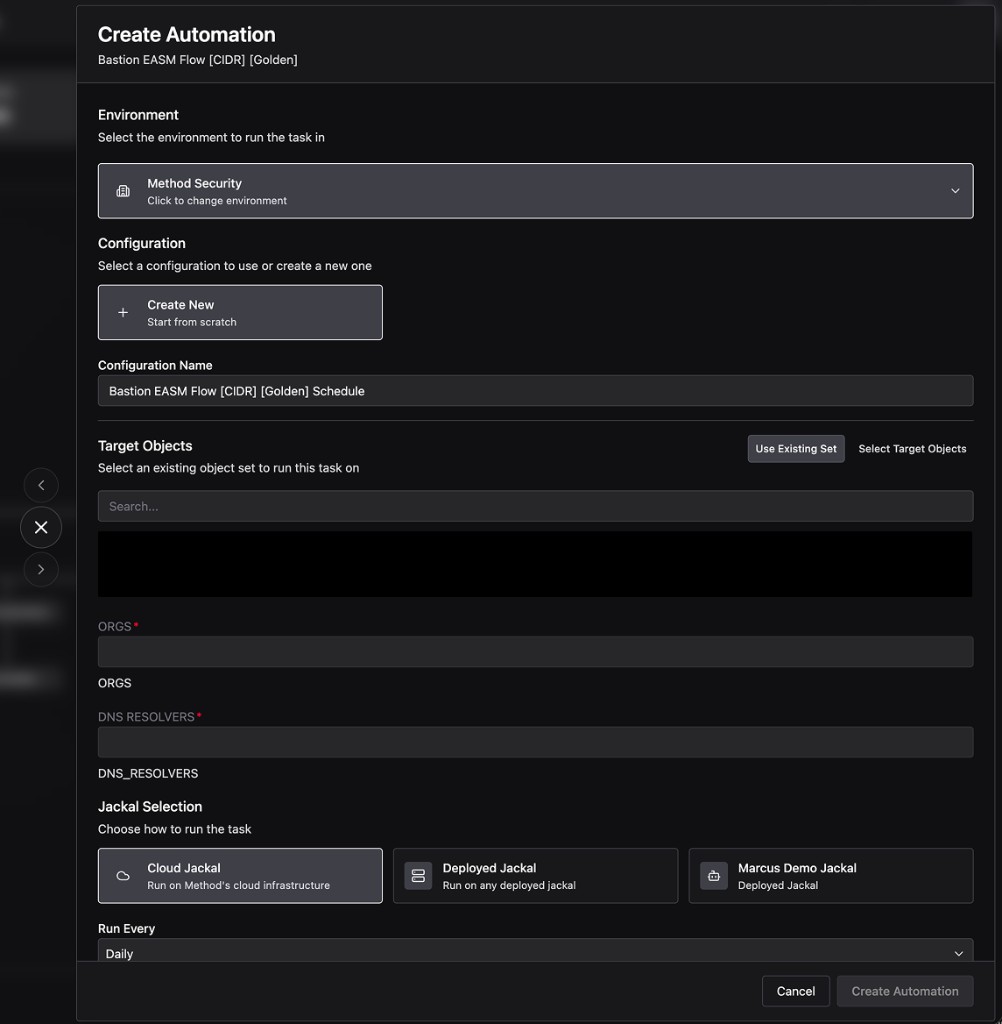
Configure the run
Both the on-demand and recurring forms share the same set of fields at the top.
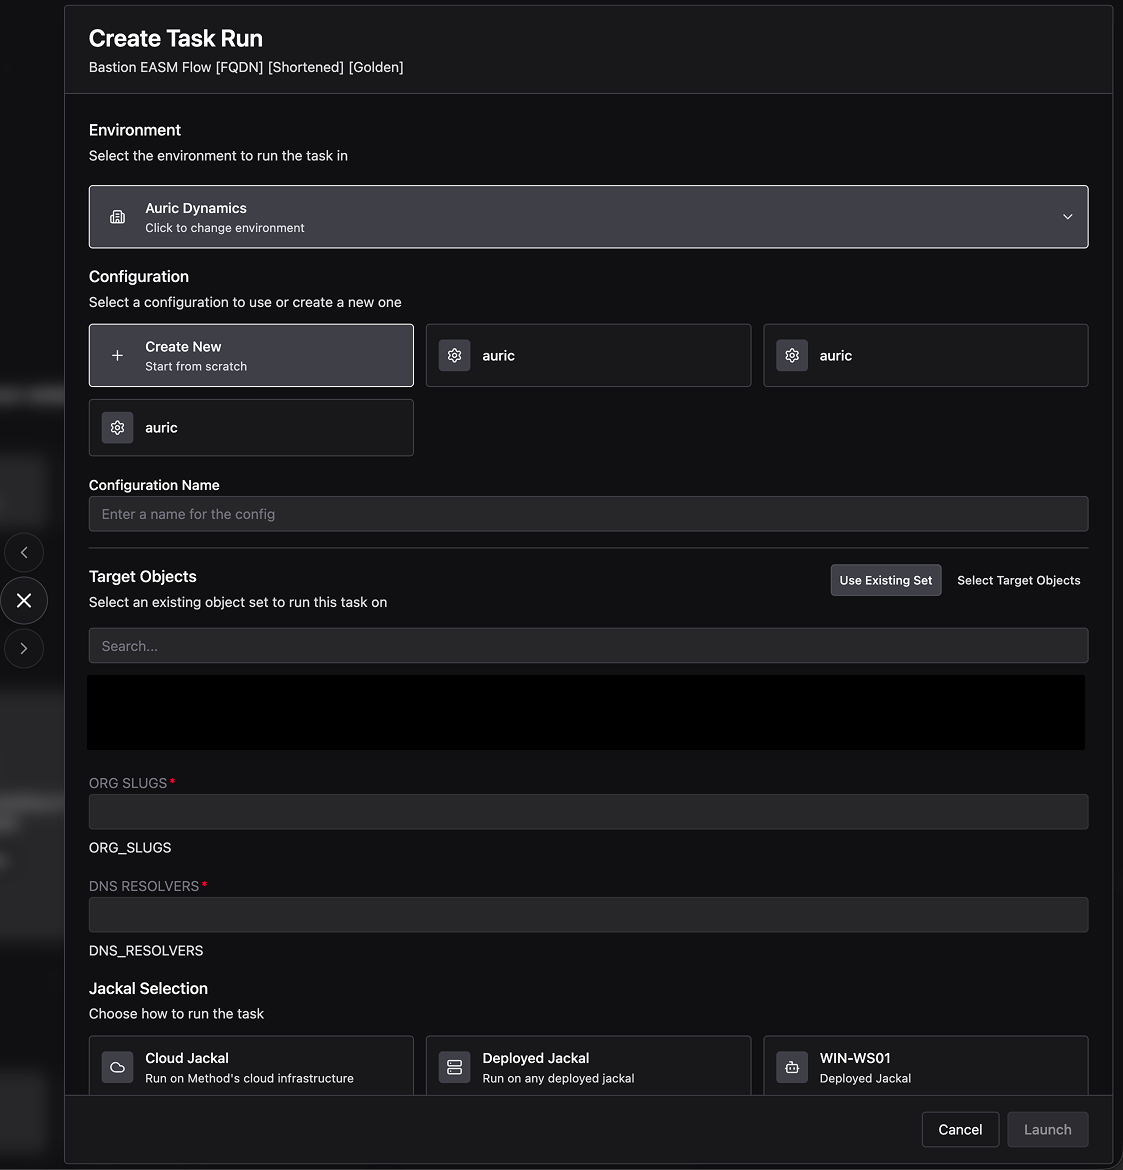
- Environment: The Environment to run the Task in. Configurations are scoped to a single Environment, so changing this resets the rest of the form.
- Configuration: A Configuration (or “Config”) is a reusable bundle of parameter values, Target Objects, and Jackal selection for this Task. Pick an existing Config card to reuse its values, or click Create New to start from scratch.
- Configuration Name: A label for this Config so you can pick it up again later.
- Target Objects: The input Objects the Task should run against. Toggle between Use Existing Set to pull from a saved Object Set or Select Target Objects to pick Objects ad-hoc.
- Task parameters: Any Input Parameters declared on the Task render here as inline fields. The exact set varies from Task to Task. Required parameters are marked with a red asterisk.
- Jackal Selection: Where the Task runs. Pick Cloud Jackal to use Method’s infrastructure, Deployed Jackal to run on any of your installed Jackals, or pick a specific Jackal by name.
Run on demand
When the form is filled in, click Launch in the bottom-right corner. The Task starts immediately and the new run appears under the Task’s Runs tab.
Schedule a recurring run
Clicking New Schedule on the Task page opens a form with the same shared fields, plus a scheduling block at the bottom. The form’s title is Create Automation, but the result is a recurring Task Run scoped to this Task.
After filling in the shared fields, configure the cadence.
- Run Every: How often the schedule should fire.
- Run on Days of Week: The days the schedule is allowed to run. Toggle each day on or off.
- Set Deny Slot times where this Automation should not run: Time windows during which the schedule should not run, even if the cadence and day-of-week match. Pick a Preset or set custom Start and End times, then choose a Timezone. Use + Add Window to add multiple deny ranges. The preview timeline shows green bars where the schedule is allowed to run; gaps are deny windows.
- Schedule Enabled: Toggle on or off to enable or disable the schedule without deleting it.
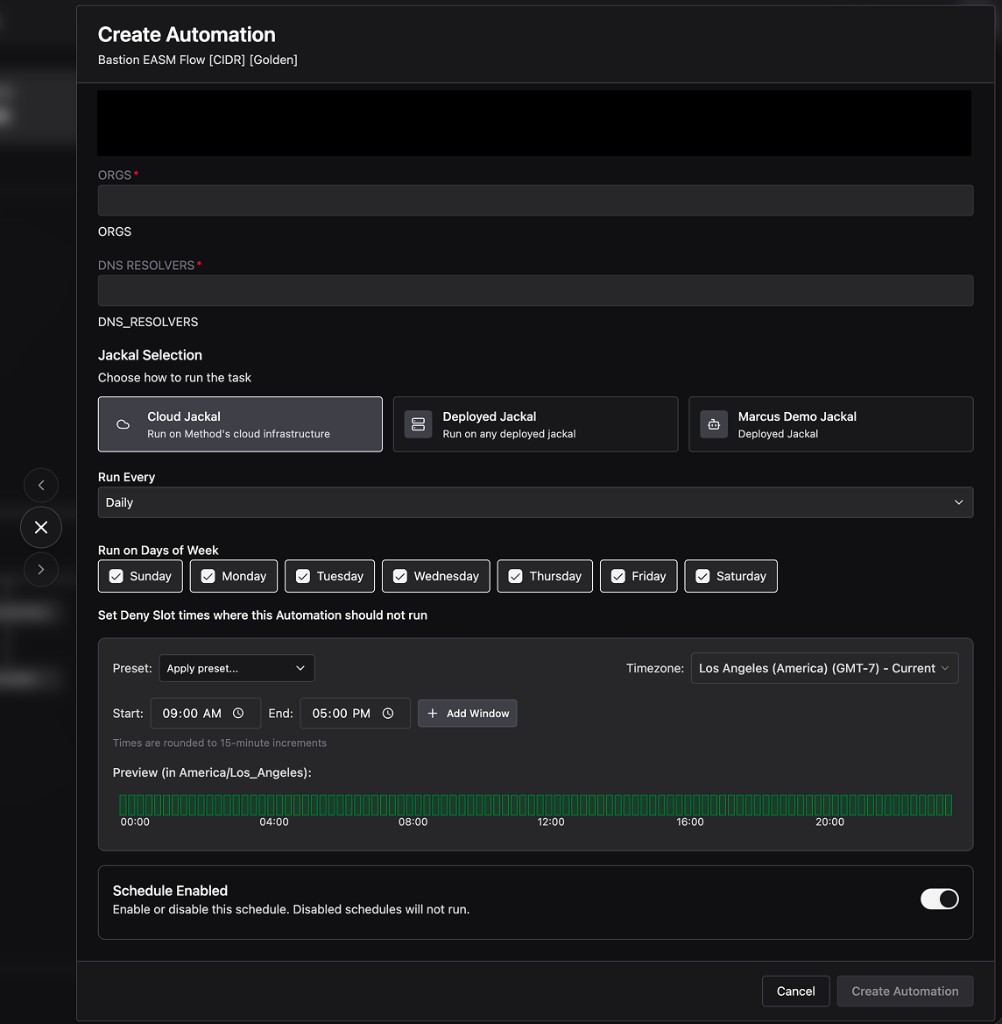
Click Create Automation in the bottom-right to save the schedule. It will appear under the Task’s Schedules tab.
You can create multiple schedules per Task. Keep each one focused on a specific set of Target Objects so it’s easier to track over time.