Start a new Campaign
A Campaign wires together an Environment, a scan schedule, and one or more Targeting Packages. The Campaign wizard walks you through six steps: Environment, Input data, Intel & no-strike, Scan setup, Targeting, and Review.
For background on Campaigns and the Targeting funnel, see Targeting.
Create a Campaign
Open the Campaign wizard
From the Targeting application, click New Campaign in the top-right corner. This opens the Campaign wizard.
Select an Environment
Choose where the Campaign runs. Pick an existing Environment from the list or create a new one inline by entering a name.
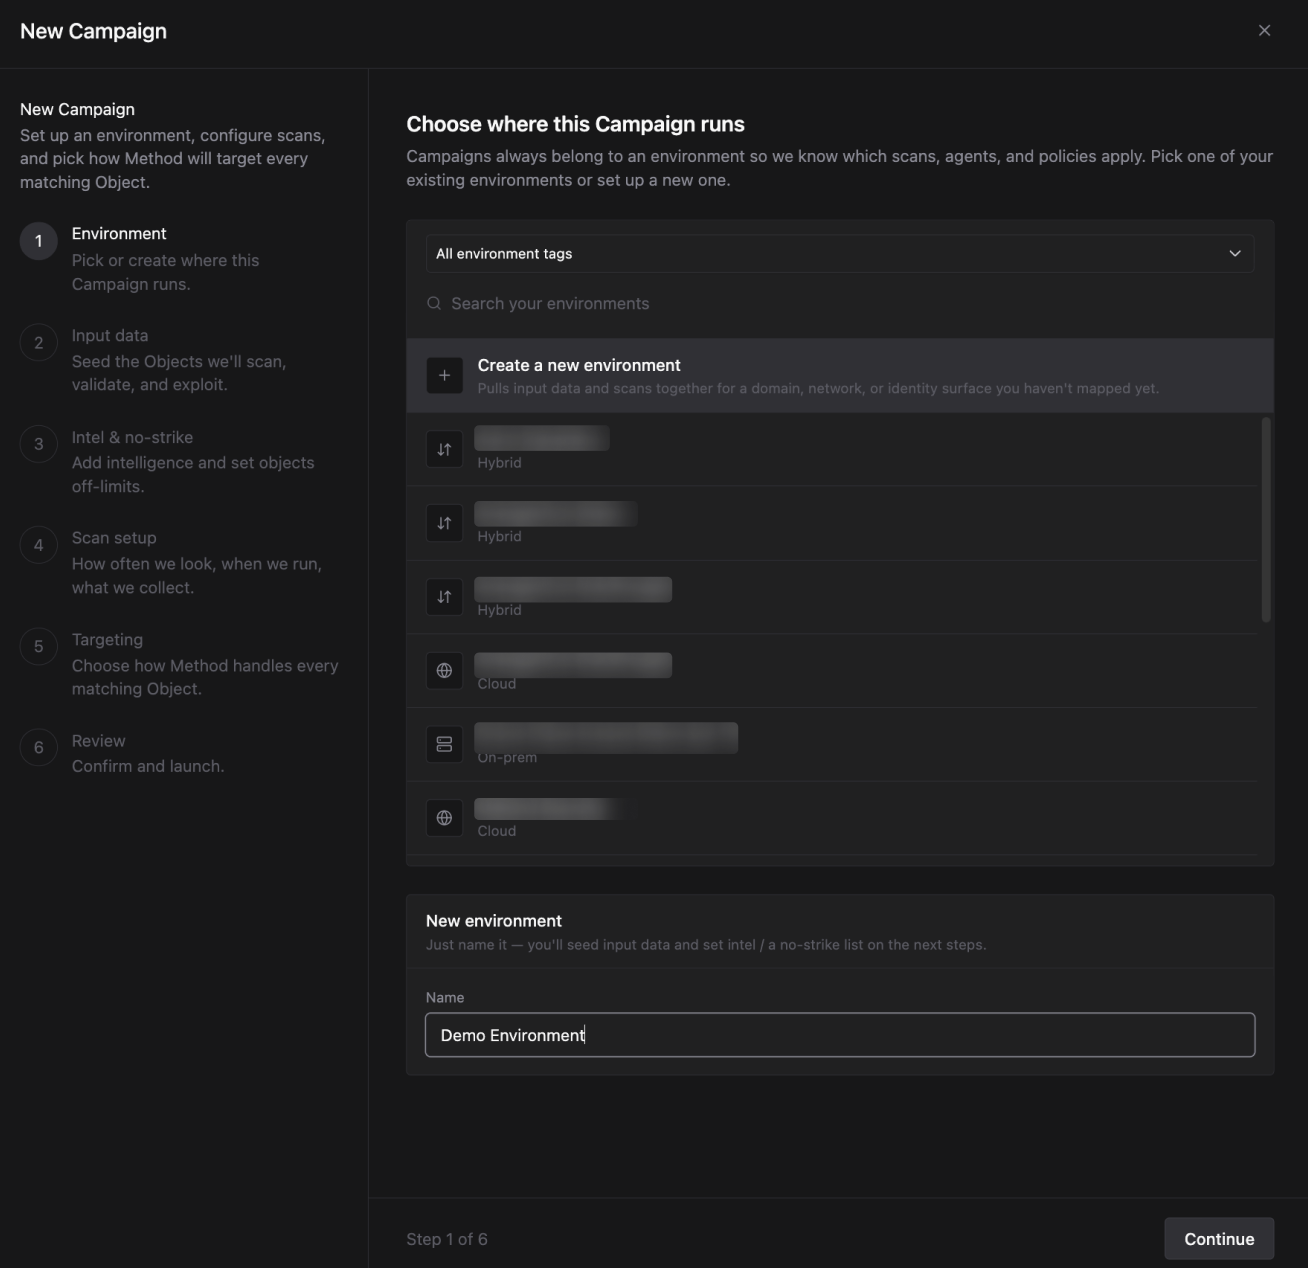
Campaigns run on an Environment. You can determine which scans, Agents, and Policies apply to this Environment. If you create a new Environment here, you seed it with input data in the next step. For a full walkthrough of Environment settings, see Create a new Environment.
Add input data
Seed the assets in scope for this Campaign. These become the Object Sets for scanning in Automator. These produce additional Object Sets for use in the Targeting workflow.
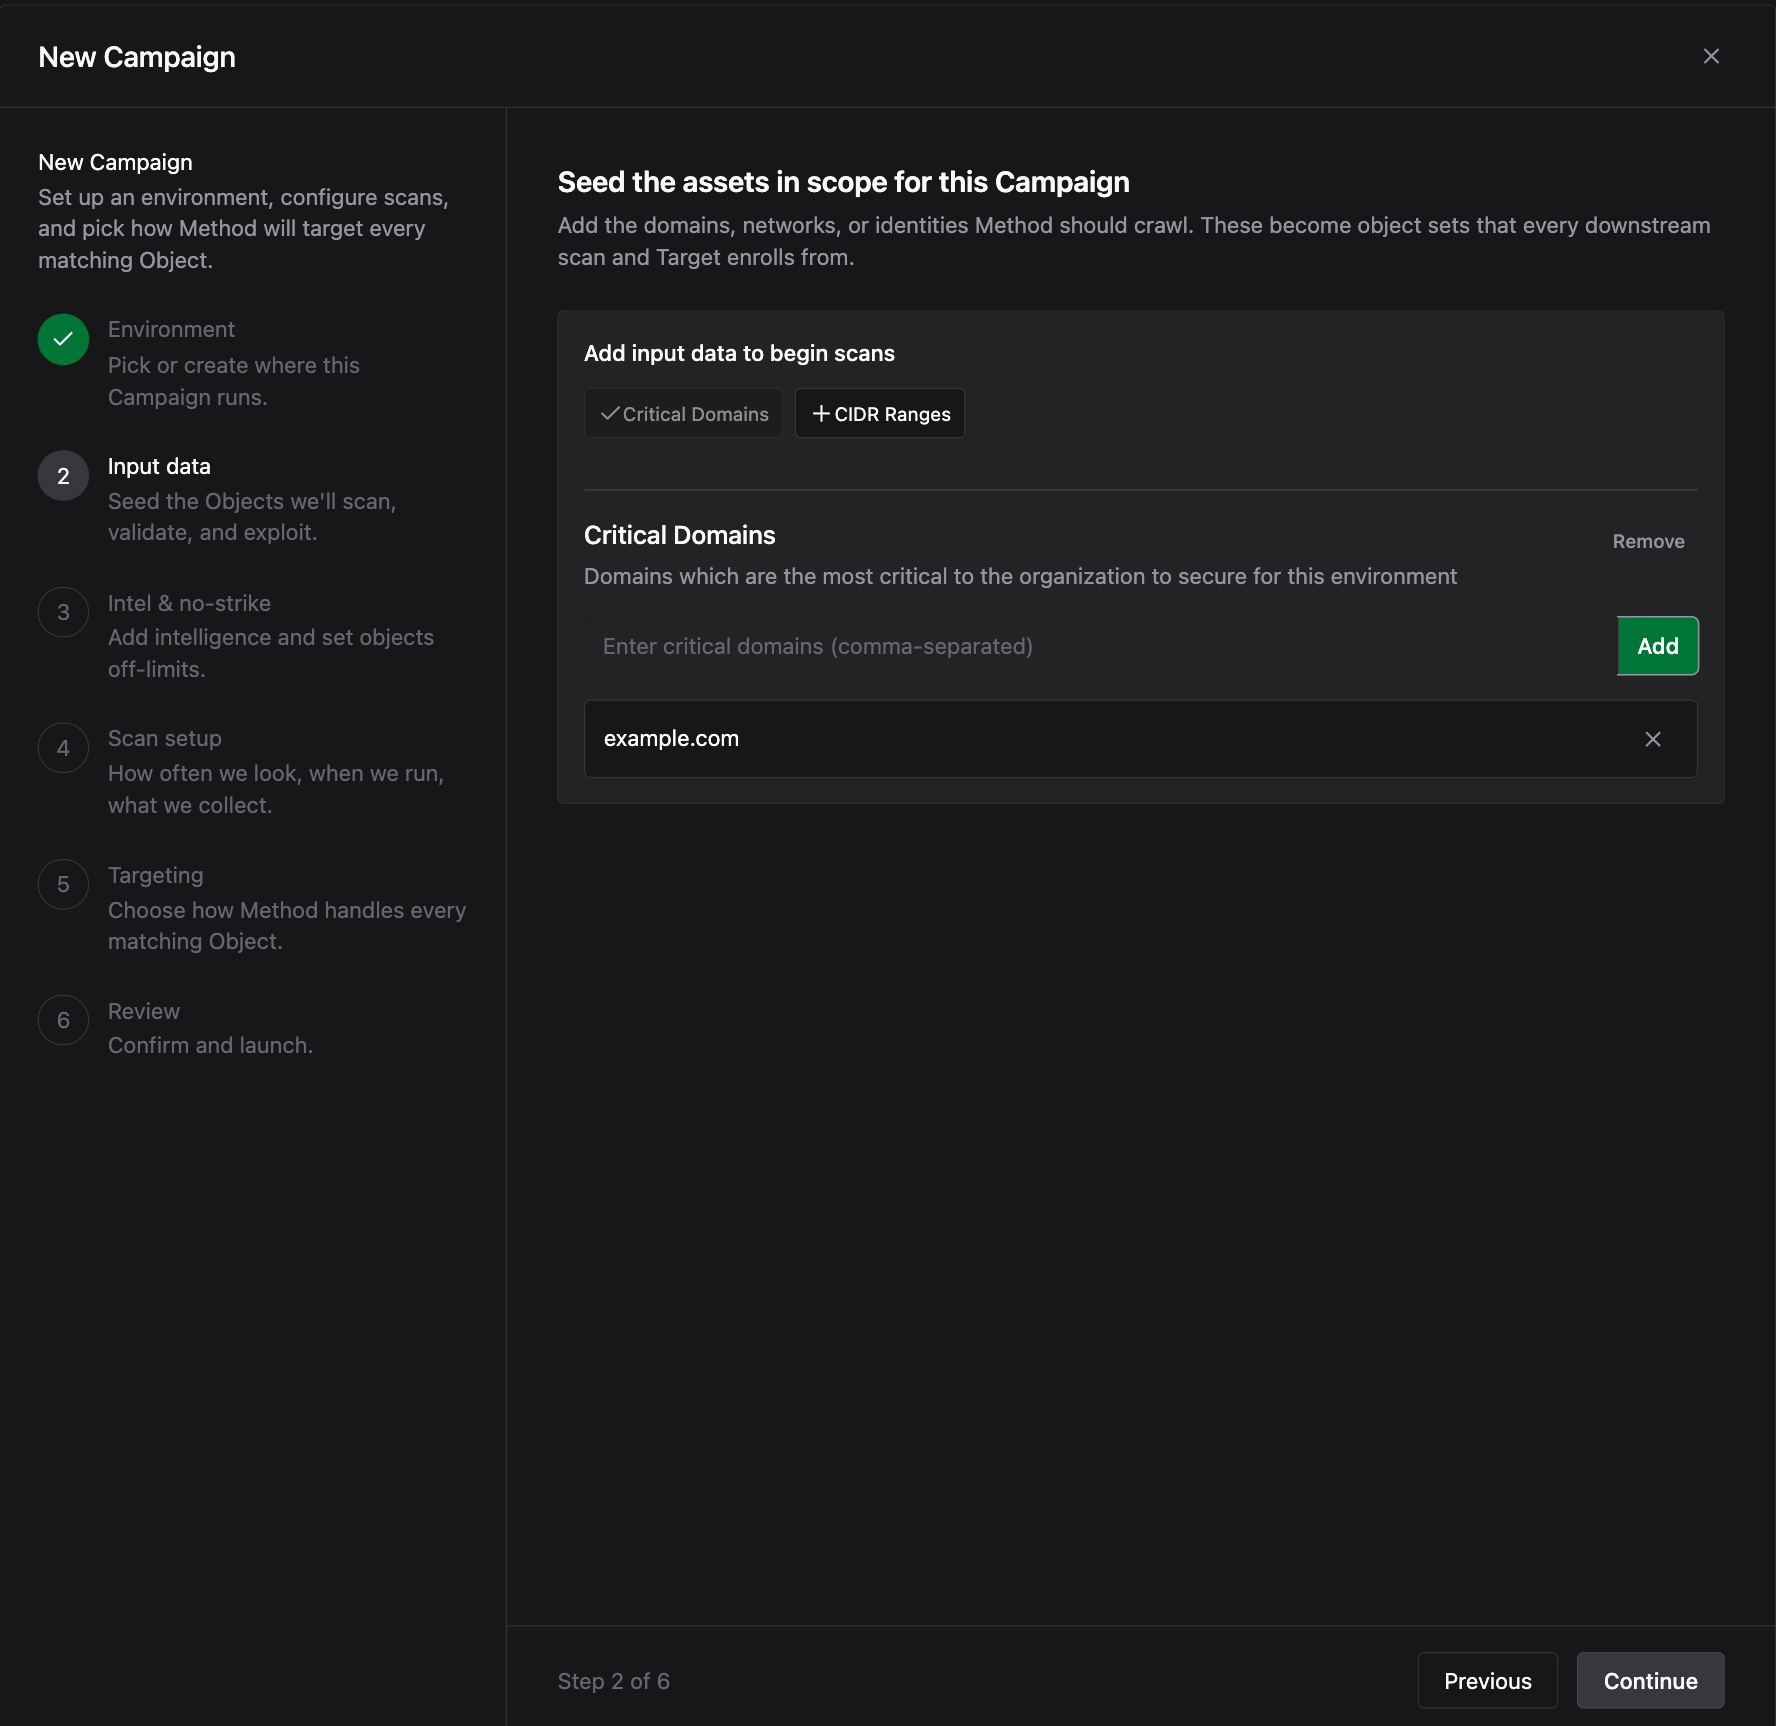
- Critical Domains: Organizational domains for this Environment (e.g.
example.comormail.example.com). - CIDR Ranges: IP ranges to include in network discovery in standard CIDR format (e.g.
10.0.0.0/24).
Set up Intelligence and No Strike List
Give Method context to work from and protect the Objects that must stay off-limits. Both sections are optional.
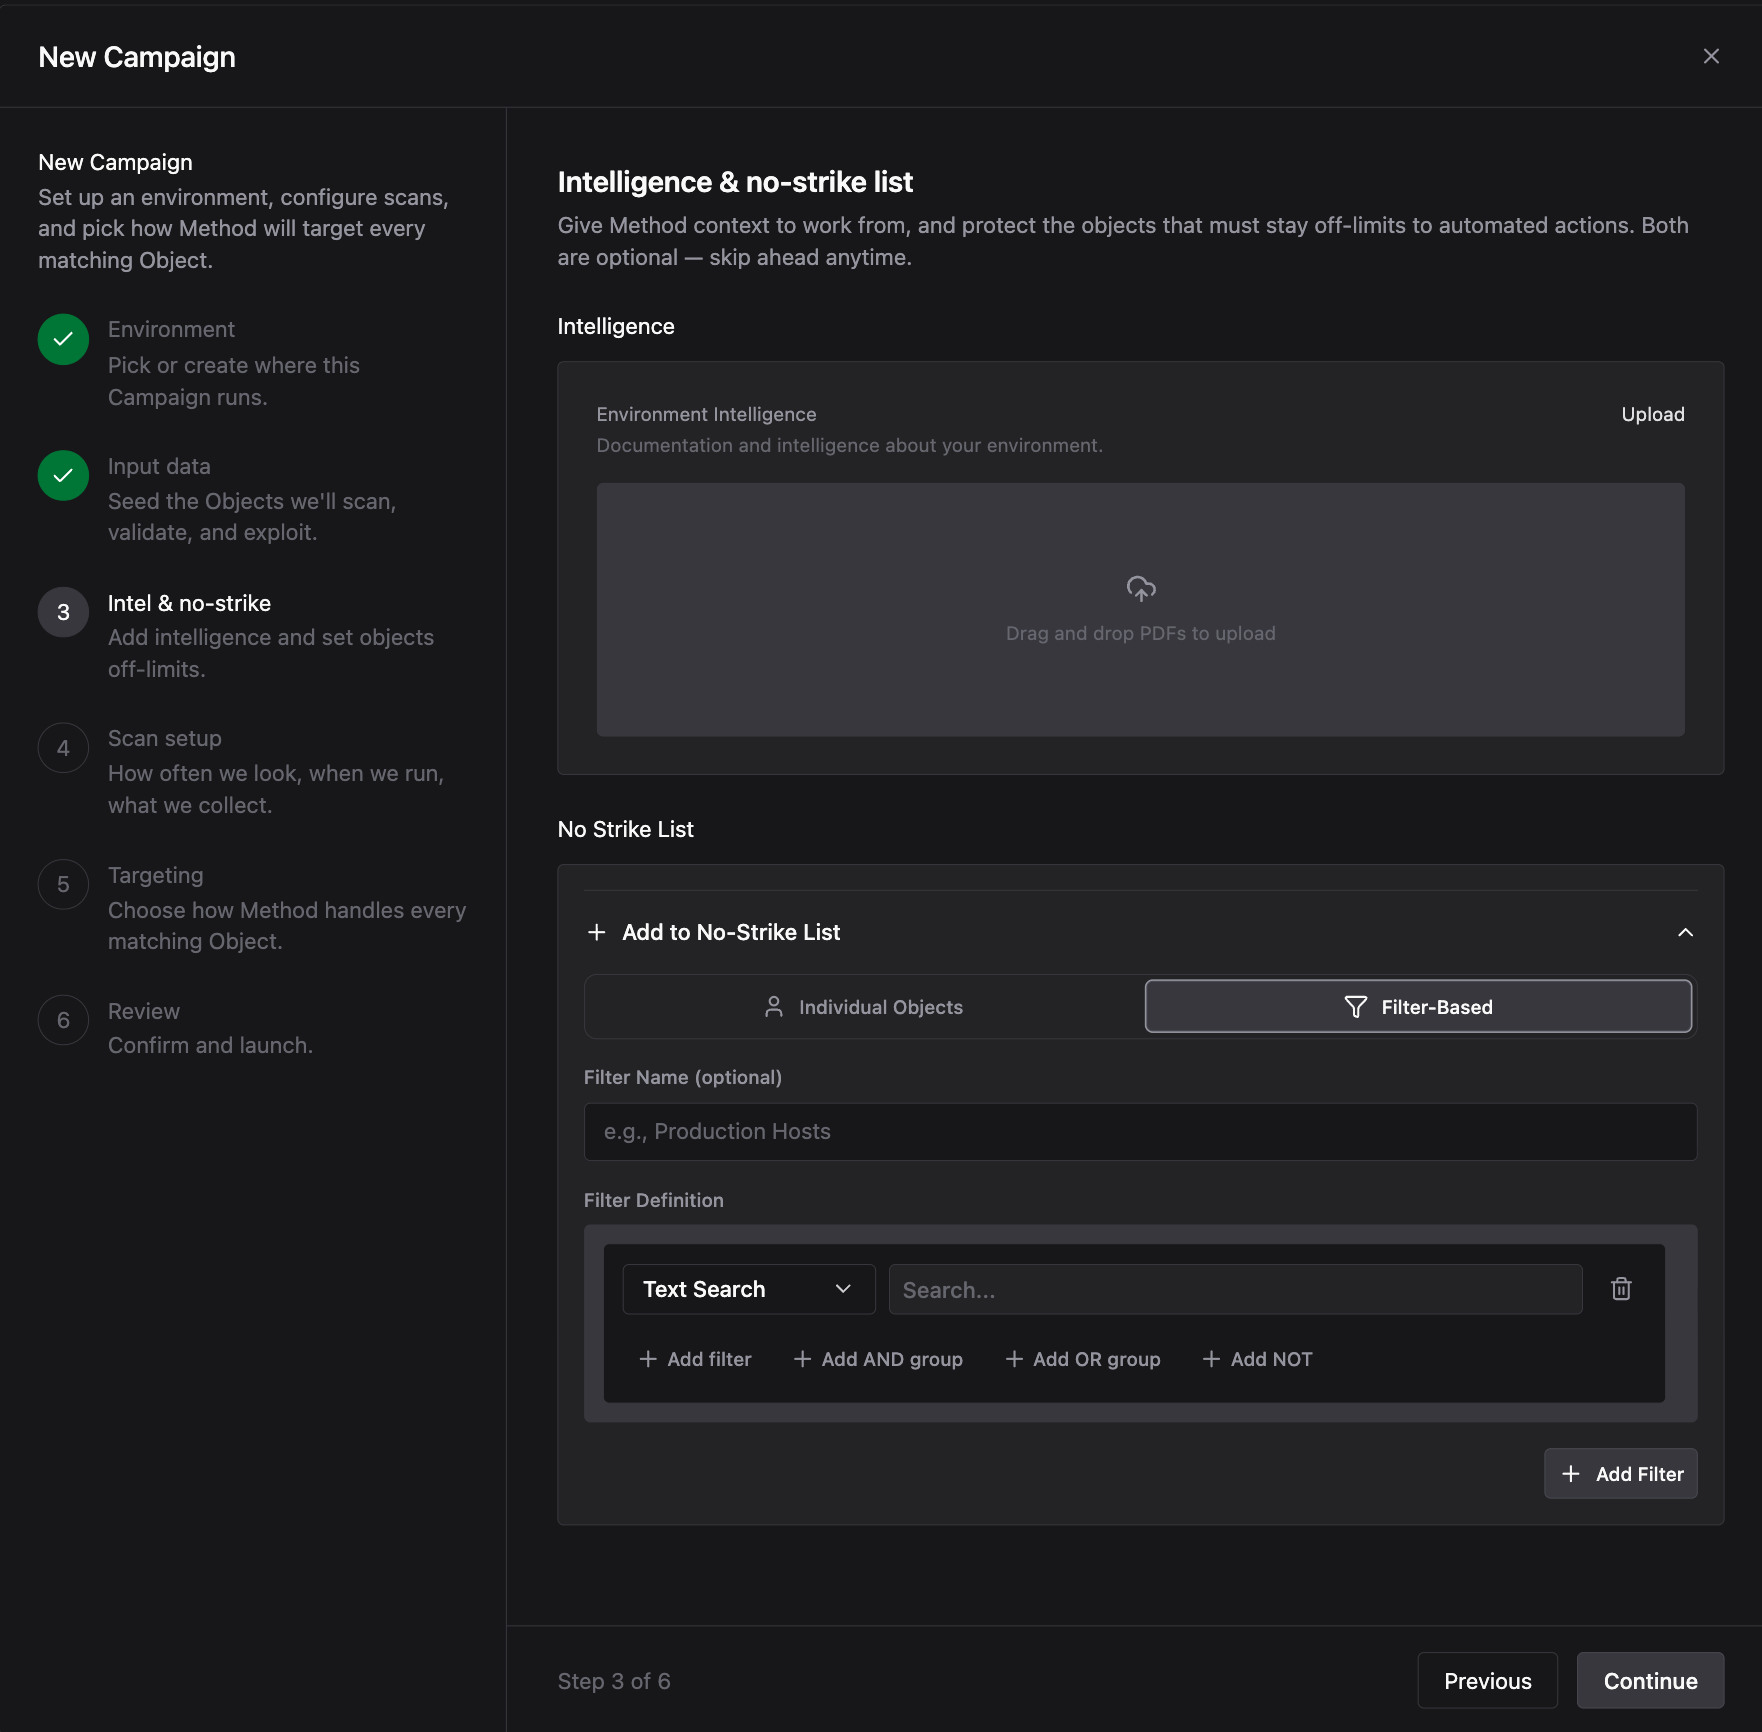
Intelligence
Upload PDFs under Environment Intelligence to give Agents documentation and context about this environment. Agents use this material when reasoning about Targets.
No Strike List
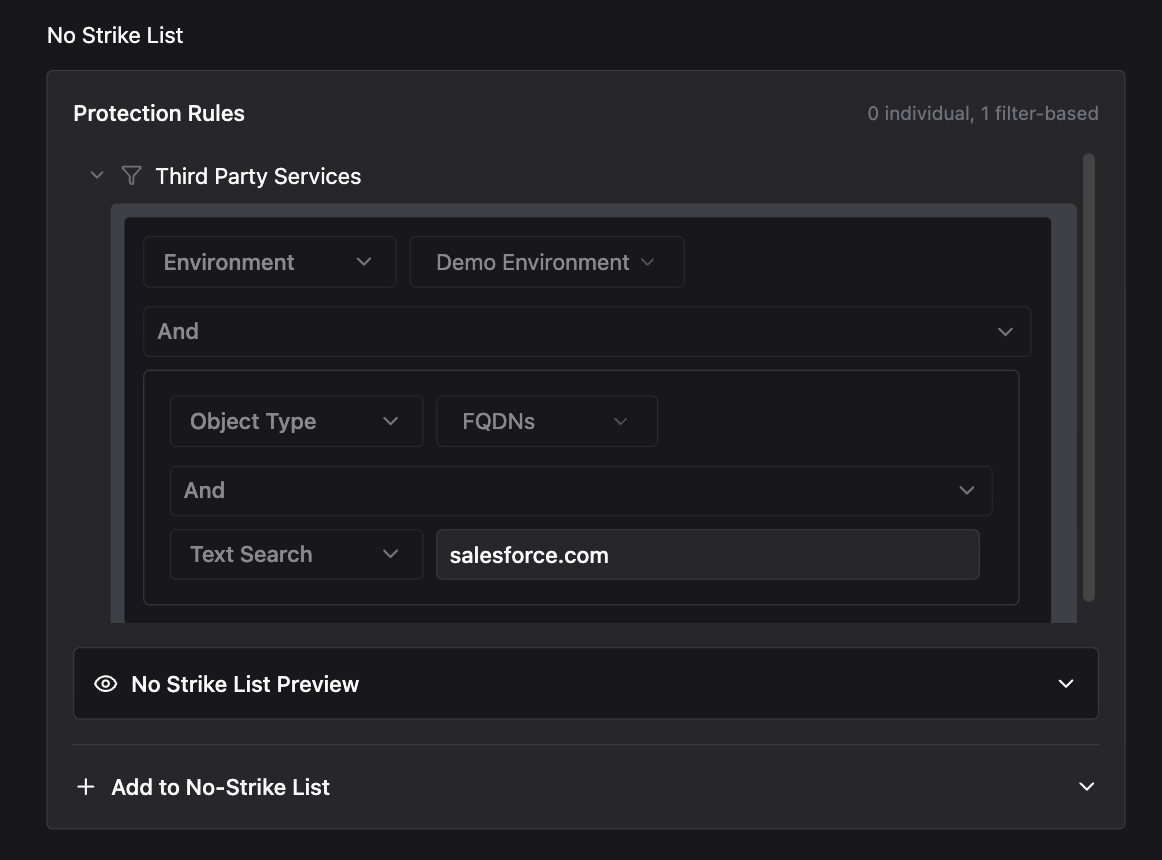
Add Protection Rules to keep Objects off-limits for all automated actions in this Campaign. You can protect Objects two ways:
- Individual Objects: select specific Objects by name
- Filter-Based: define a query that matches a class of Objects
Filter-based rules are the more scalable option. Common examples:

Configure scan setup
Set how often Method runs scans, when they may run, and where scan tasks execute.
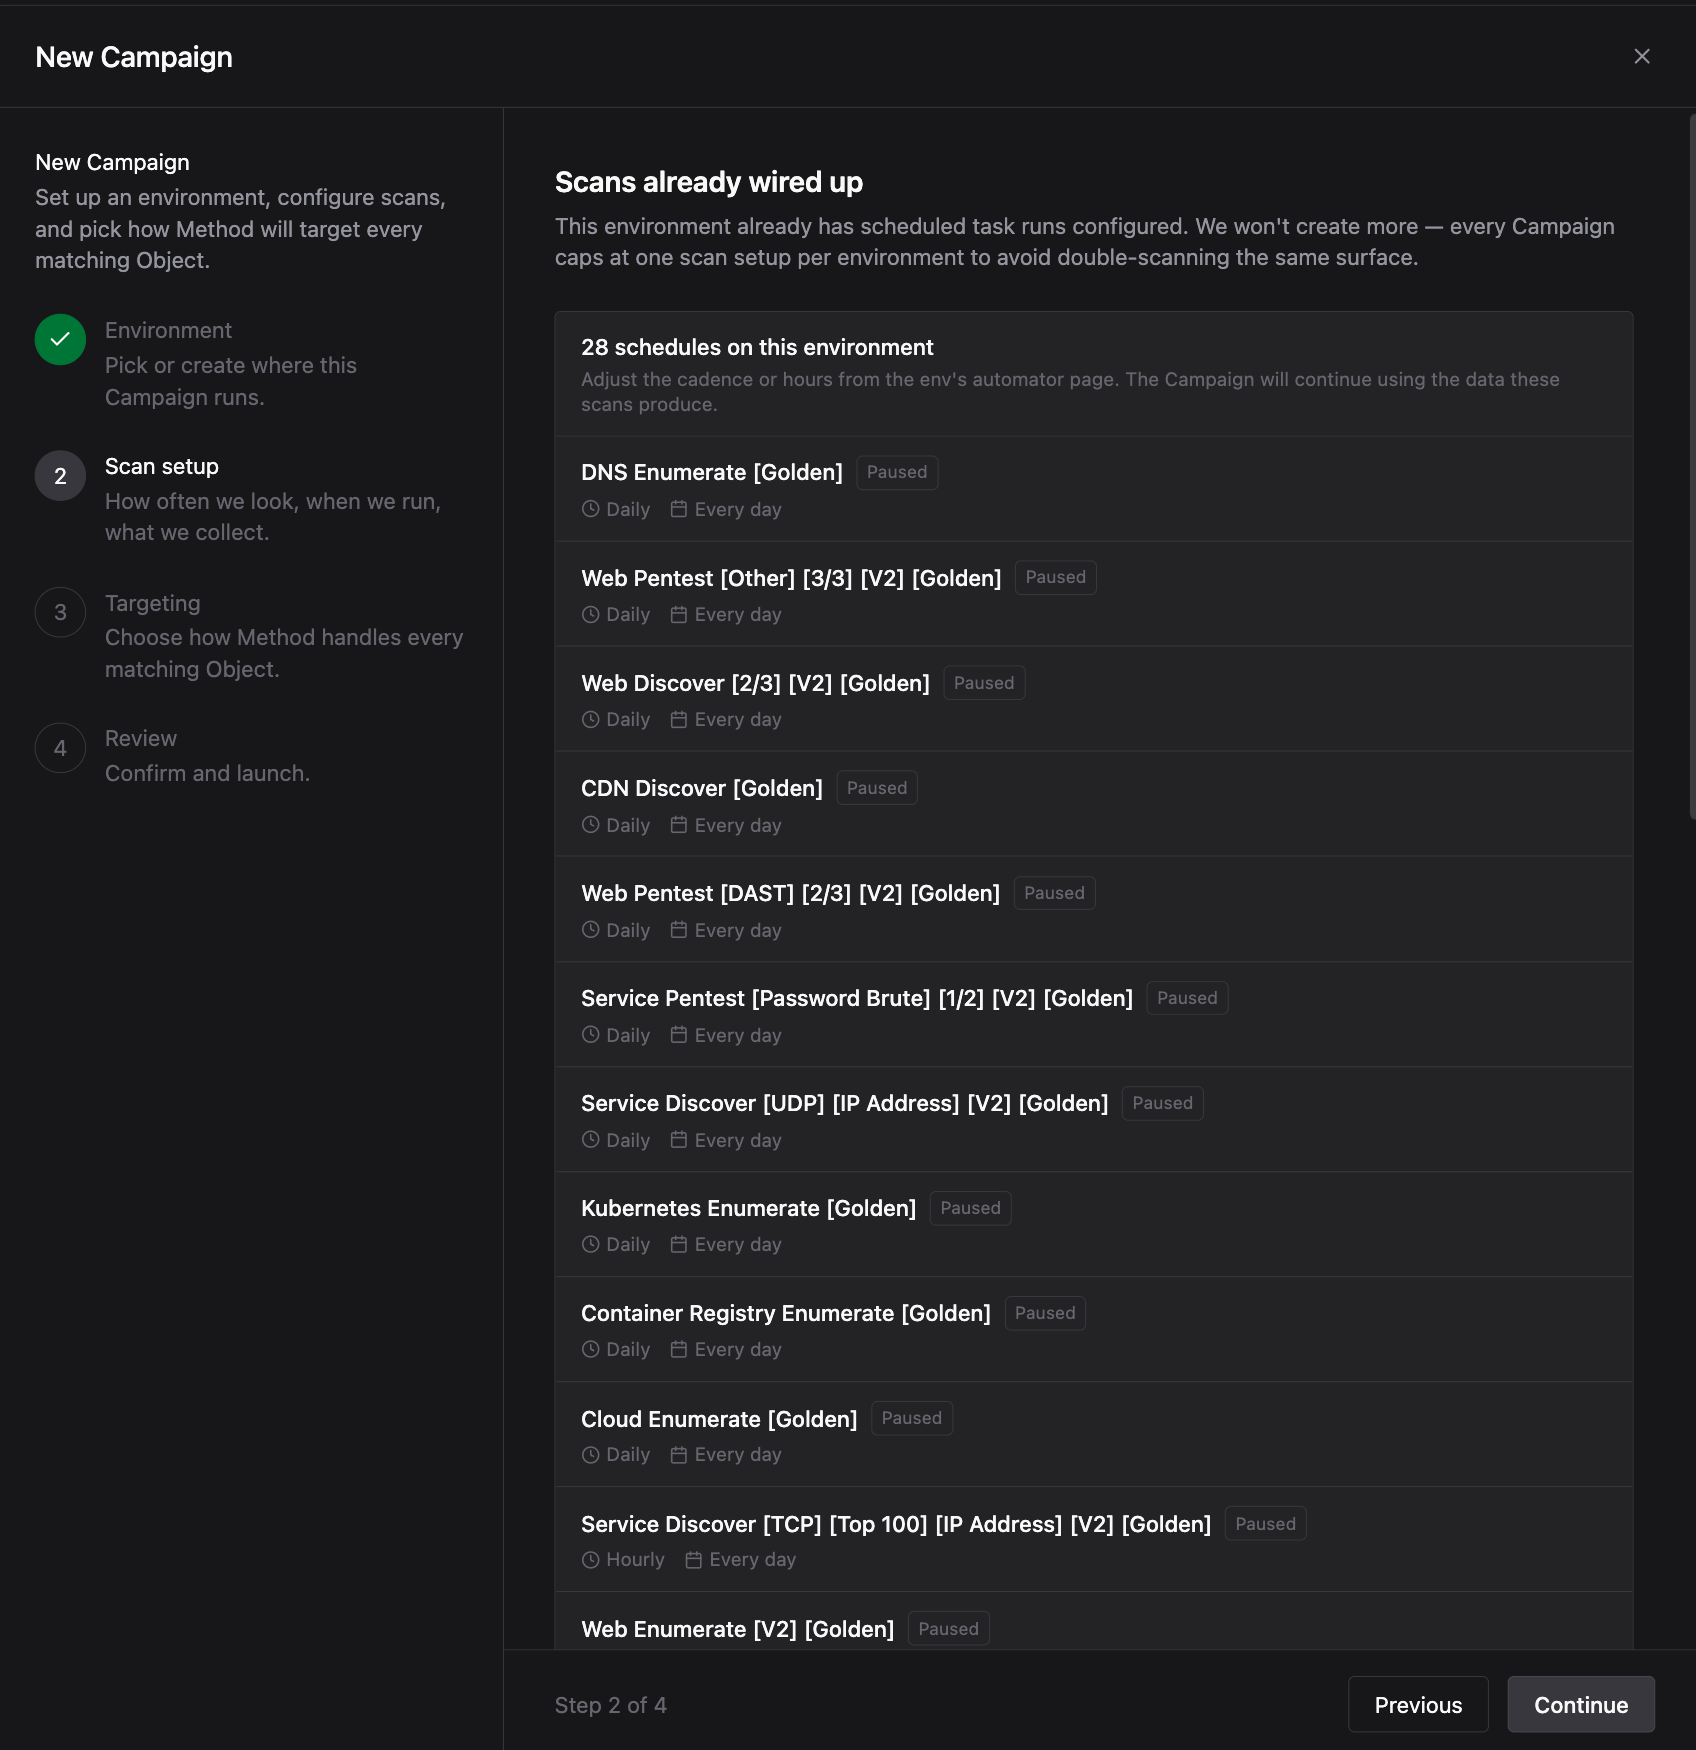
If the Environment you selected already has scheduled scans configured, Method shows a Scans already wired up screen instead. Each Campaign caps at one scan setup per Environment to avoid scanning the same surface twice. You can adjust cadence and hours for scanning via the Automator page.
For new scan setups, configure the following:
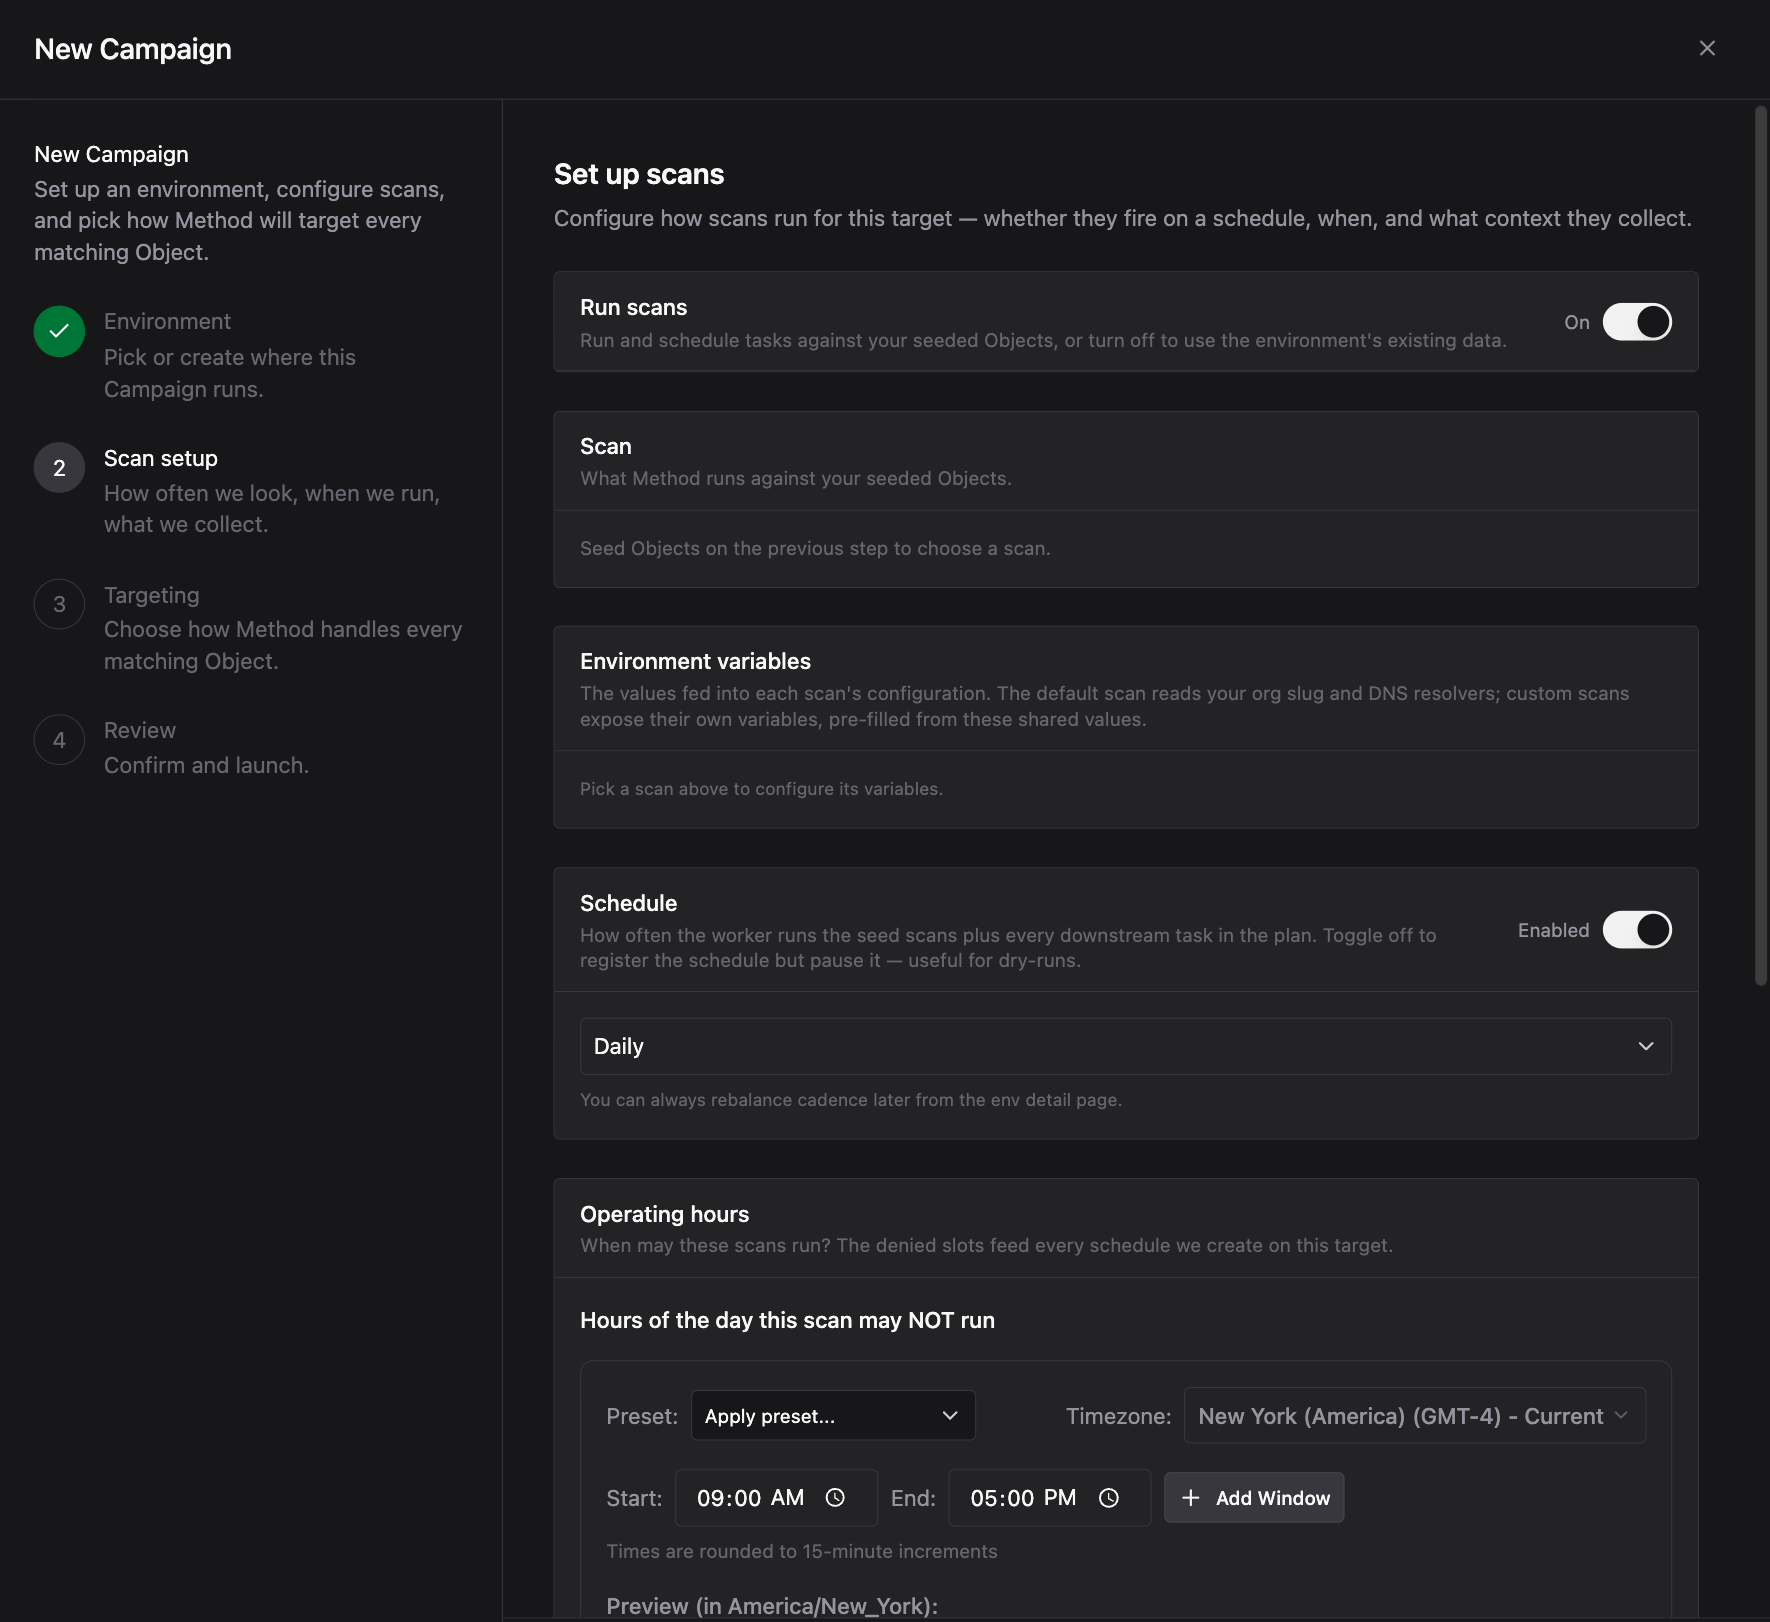
- Run scans: toggle on to run and schedule scan tasks against your seeded Objects. Toggle off to use the Environment’s existing data without running new scans.
- Scan: select which scan Method runs against your seeded Objects. Seed Objects in the previous step to unlock this picker.
- Schedule: how often the scan runs. Daily is the default. You can rebalance cadence later from the Automator page.
- Operating hours: the hours of the day this scan may NOT run. Set a start and end time to create a blackout window. Use the Preset dropdown for common patterns and select the applicable timezone.
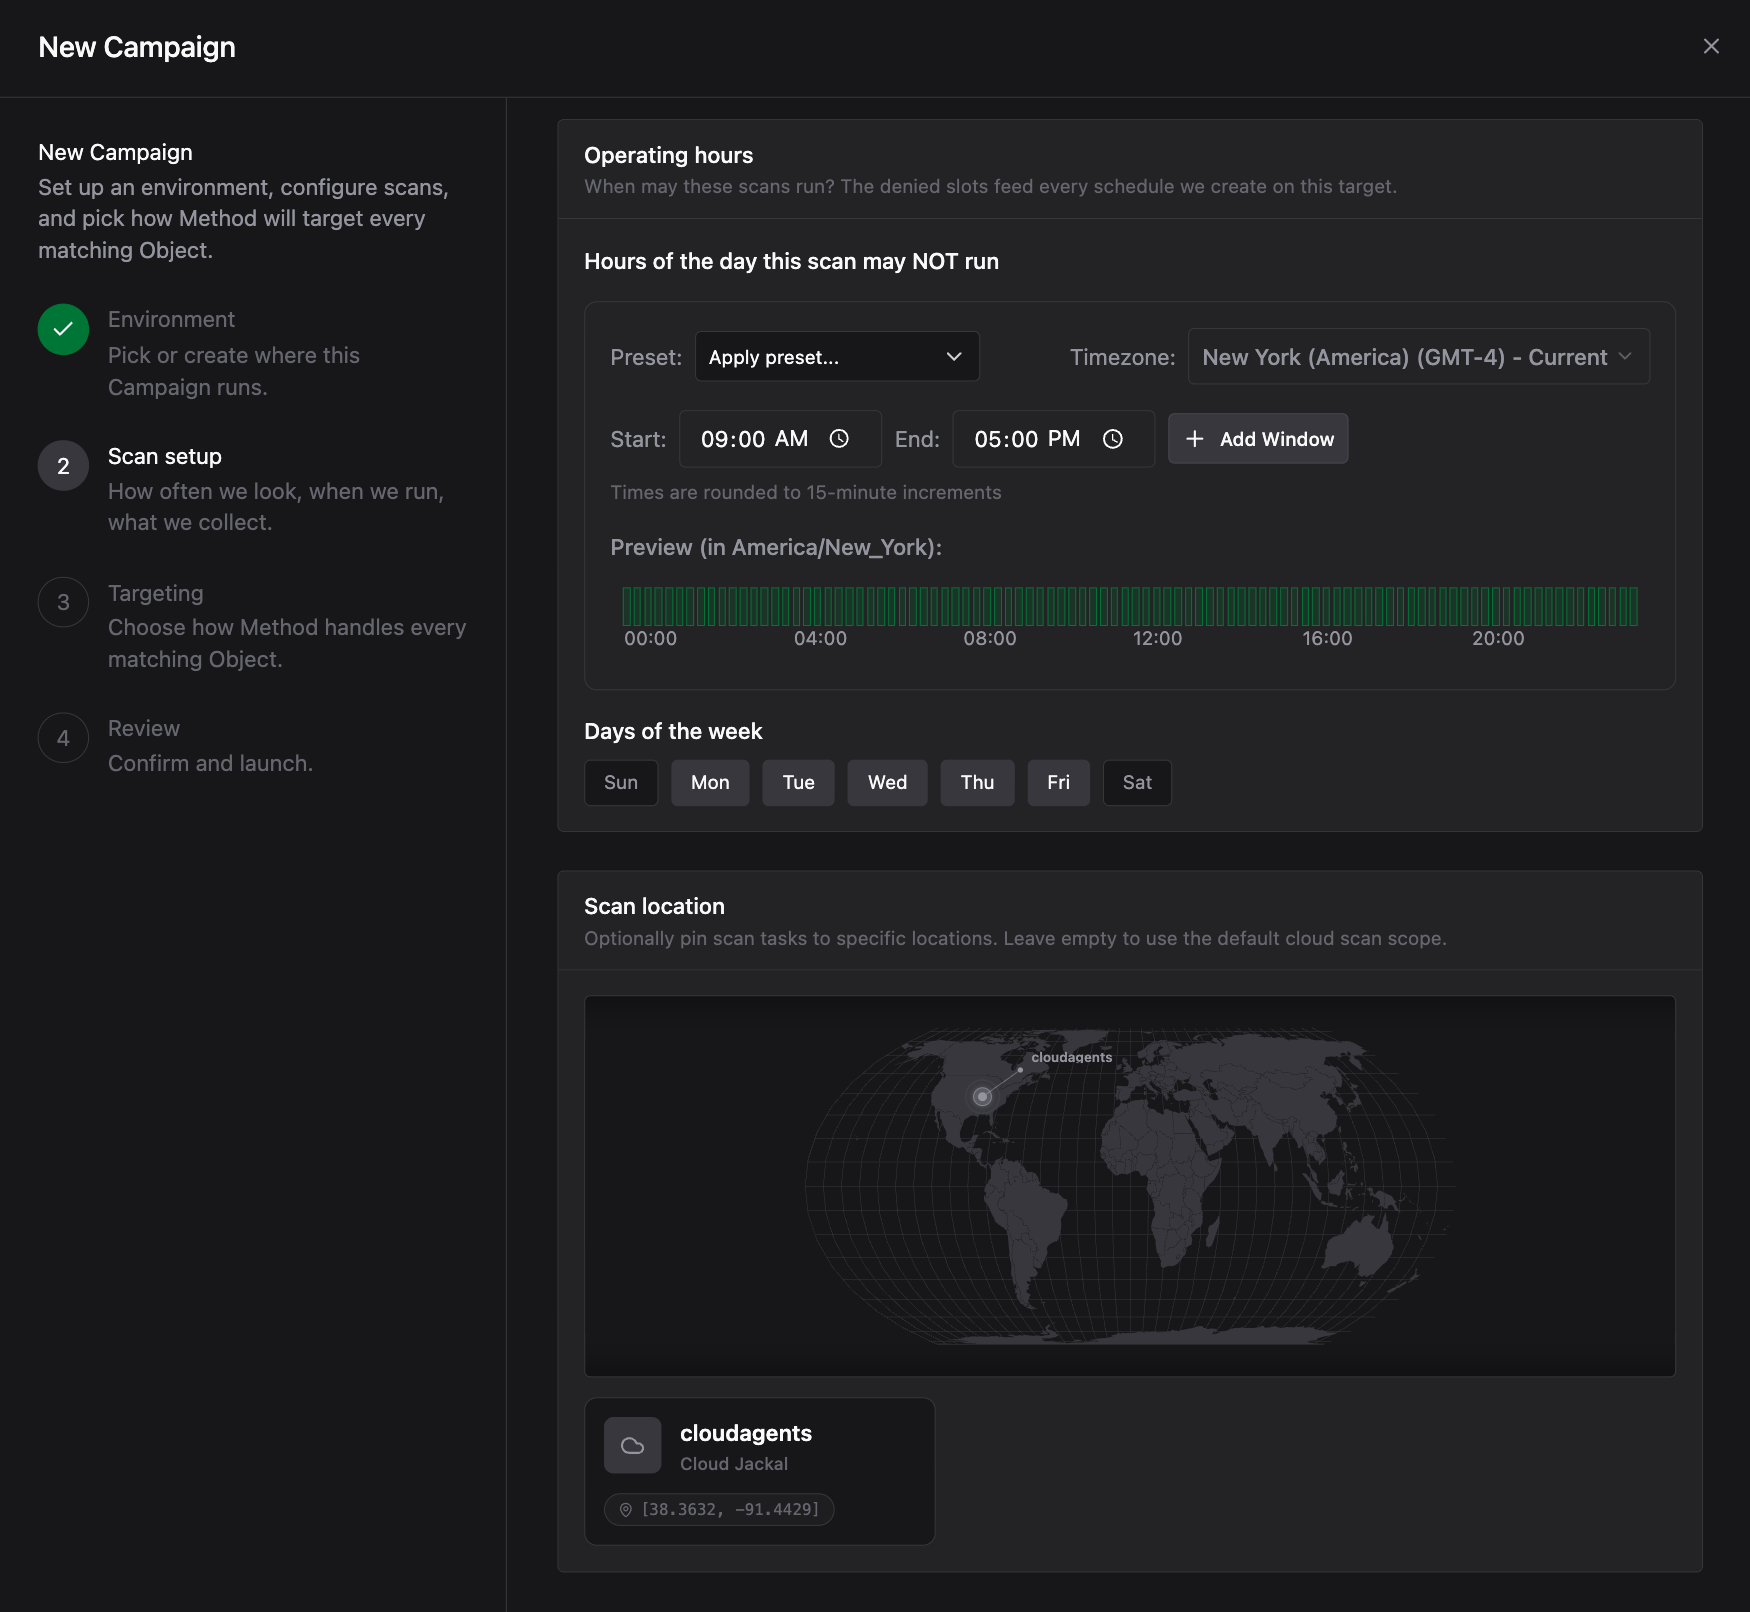
- Days of the week: toggle which days the scan may run.
- Scan location: optionally pin scan tasks to a specific Jackal. Leave empty to use the default cloud scan scope.
Select Targeting Packages
Choose how Method targets the Objects this Campaign discovers. Select from your existing Packages, or build a new one inline.
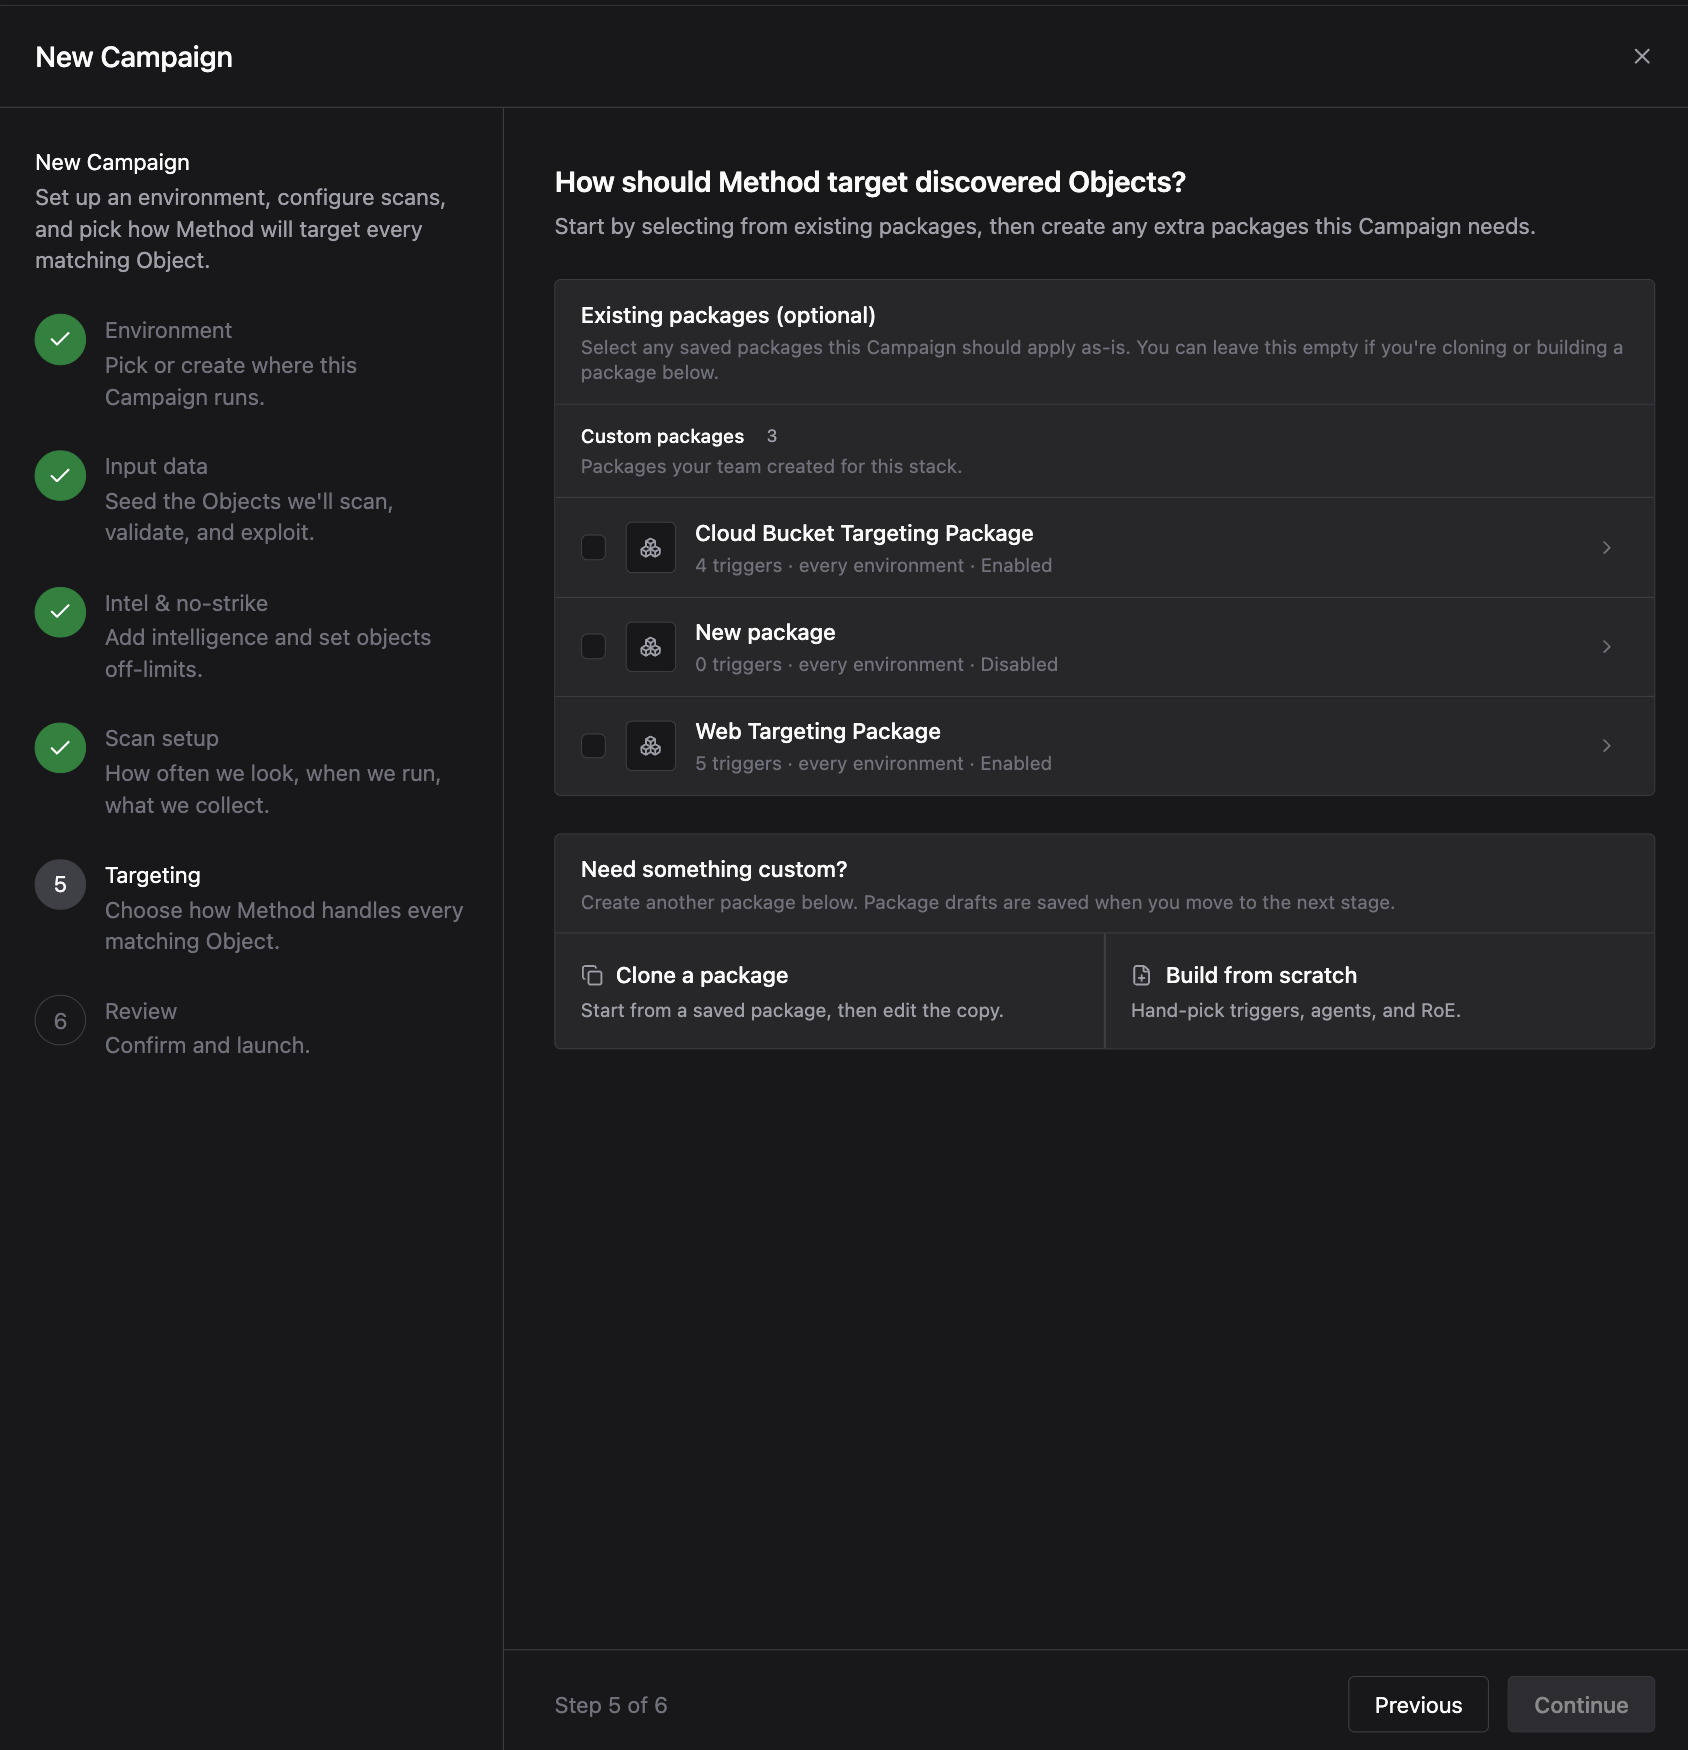
Select any saved Packages this Campaign should apply as-is. If you need something different, use Clone a package to start from an existing Package and edit the copy, or Build from scratch to hand-pick Triggers, Agents, and Rules of Engagement. For a full walkthrough on building a Package, see Build a custom Package.
Review and launch
Review your Campaign configuration: the Environment, scan setup, and Targeting configuration.
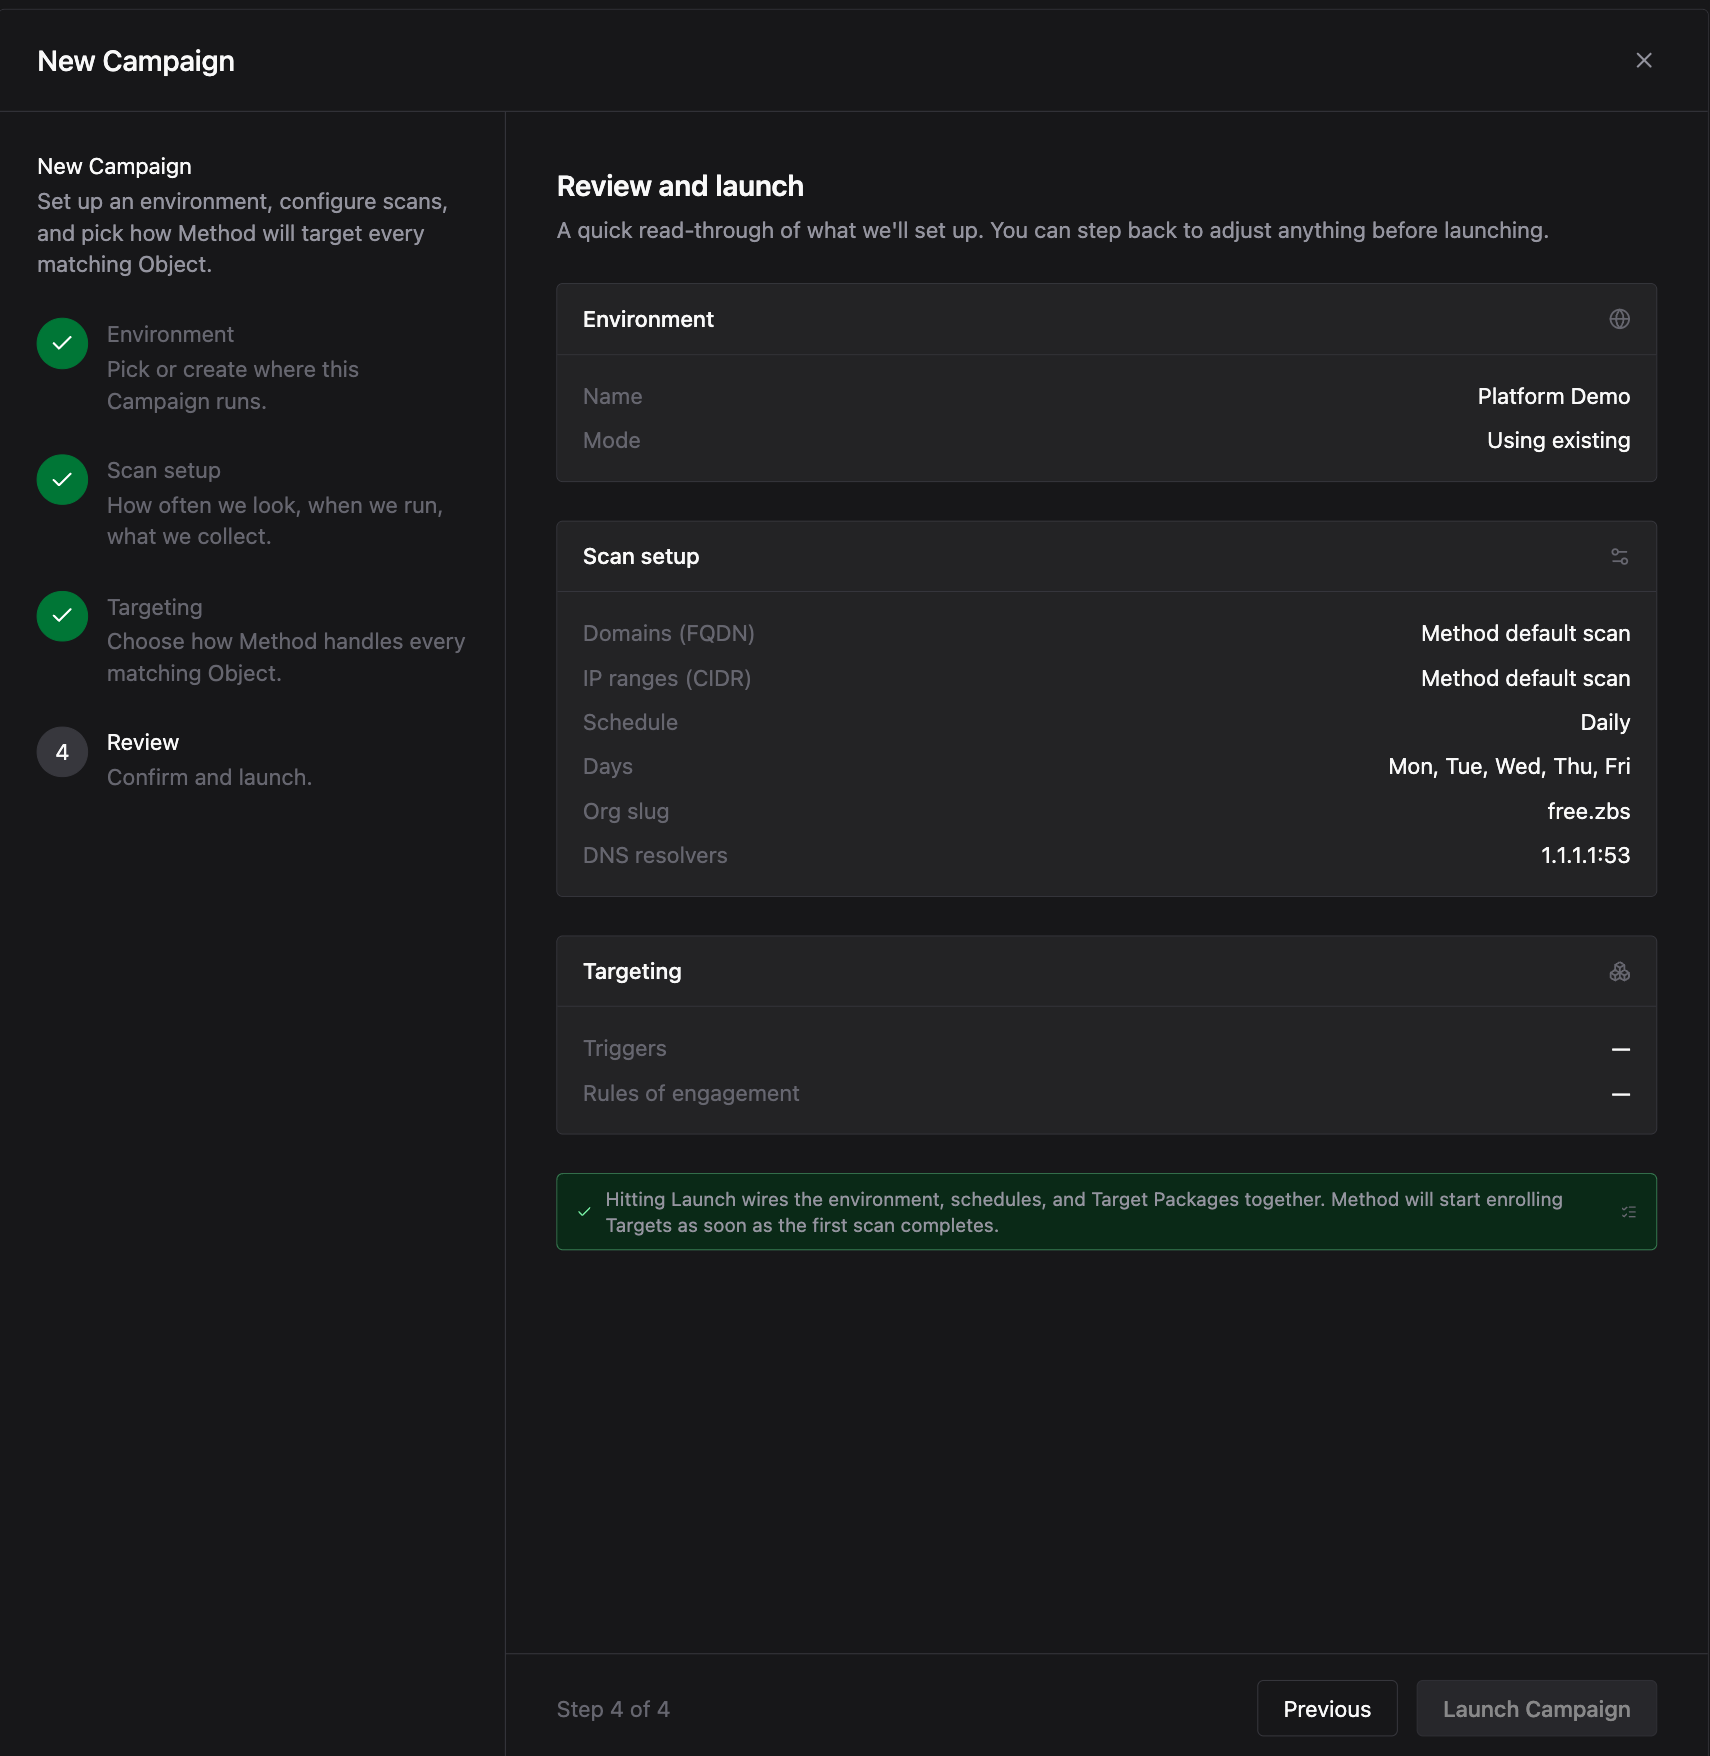
When everything looks correct, click Launch Campaign. Method wires the Environment, scan schedule, and Target Packages together and starts enrolling Targets as soon as the first scan completes.
What happens next
Once launched, your Packages run on the schedule you configured. Method evaluates Objects in the Environment against each Package’s Triggers, and matching Objects enter the Targeting funnel as Potential Targets. As Agents work through them, the Targeting and Priority tabs begin to populate.
Next steps
- Build a custom Package: define your own Triggers, Agents, and Rules of Engagement
- Review and act on Targets: triage funnel results and act on findings
- Targeting: understand funnel statuses and how Targets advance