

Review and act on Targets
Once a Campaign is running, the Target tab is where you track every entity in the Targeting funnel and act on the ones that need your attention.
For background on funnel statuses and how Targets advance, see Targeting.
Review and act on Targets
Open the Target tab
From the Targeting application, select the Target tab. The funnel at the top shows a live count of Targets at each status: Potential Targets, Targeted, Validated, Exploitable, Exploited, and Remediated.
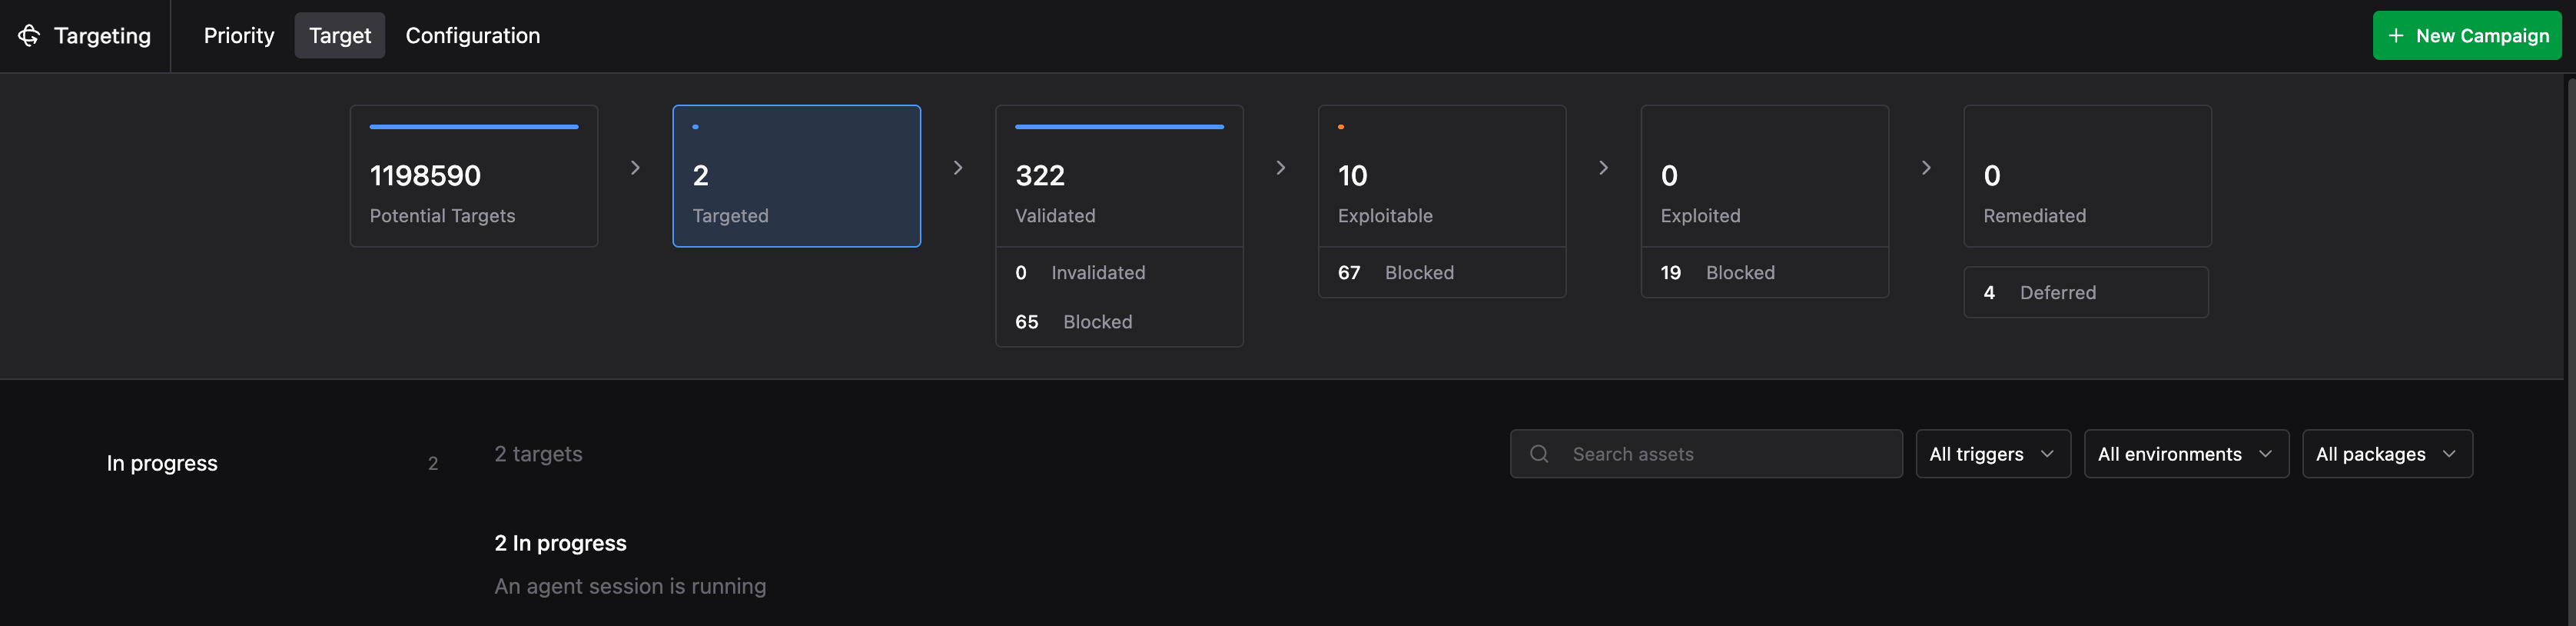
The count under Potential Targets reflects every asset that matched a Trigger across your active Packages. As Agents work through them, counts shift across the funnel in real time.
Open a Target and read the detail view
Click any status card to filter the list to Targets at that stage, then select a Target to open its detail view.
The top of the detail view shows a one-line status summary reflecting what the last Agent found. A confirmed finding reads as something like “[OUTCOME: SUCCESS] RDP vulnerability confirmed on port 3389.” An inconclusive one reads as “[OUTCOME: FAILURE] Inconclusive validation, no fresh RDP evidence found.”
In the top-right corner, four controls are available:
- Status dropdown: Change the Target’s current status manually without waiting for Agent work to complete.
- Send to Operator: Open the Target and its full context in an Operator session to investigate manually.
- Copy link: Copy a direct link to this Target to share with teammates or include in documentation.
- Pop out: Open the Target in a new tab.
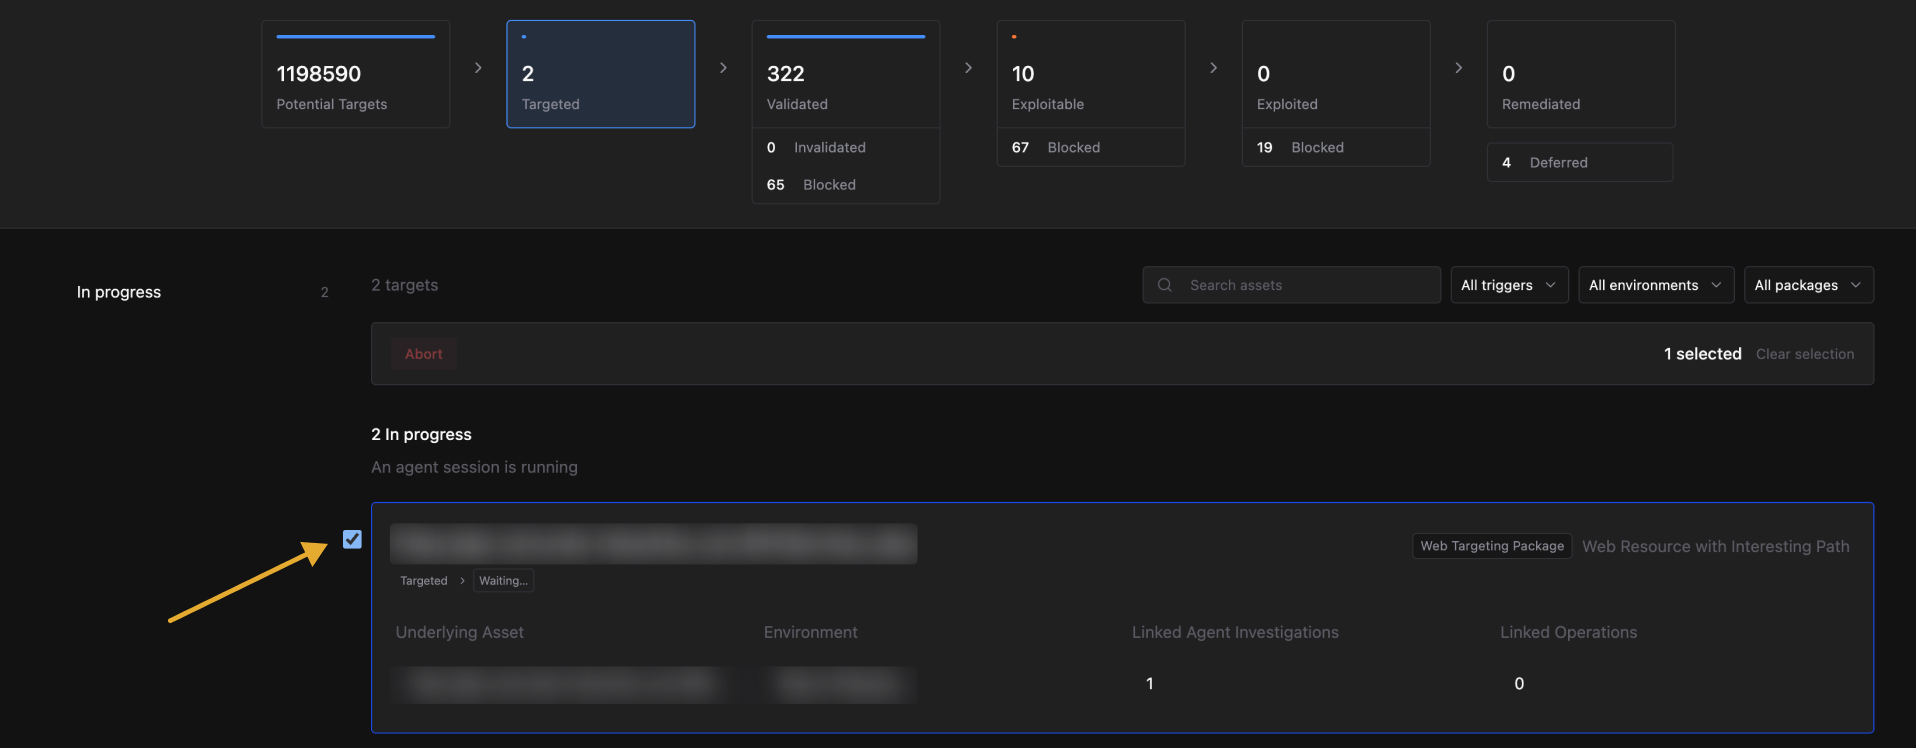
Below the header, the Process pipeline shows where the Target currently sits and what steps remain.
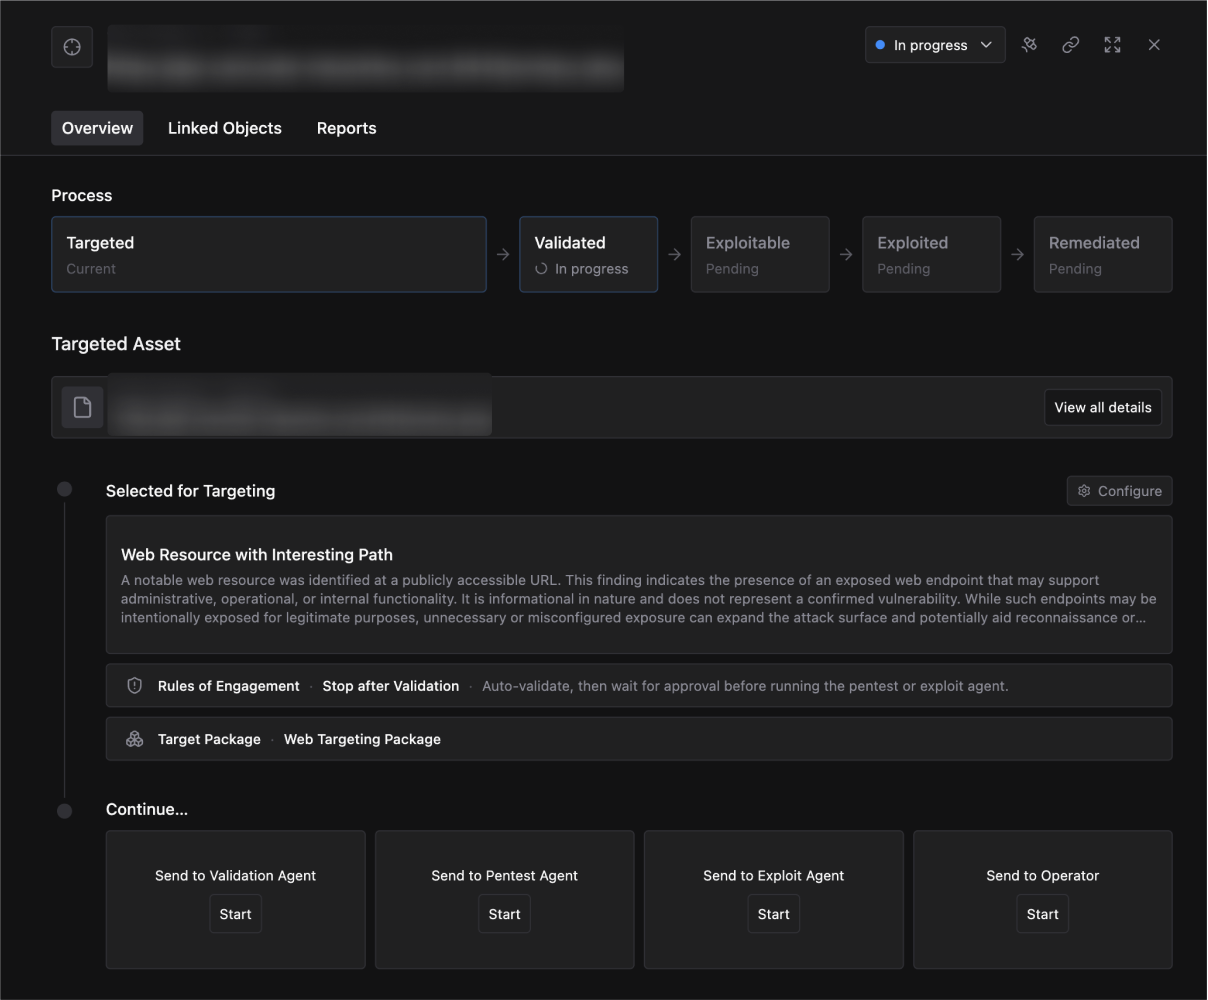
If an Agent session is currently running and you want to stop it, click Abort in the Target list.
Explore the Target's context
Below the Process pipeline, the detail view shows the targeted object and the context around it.
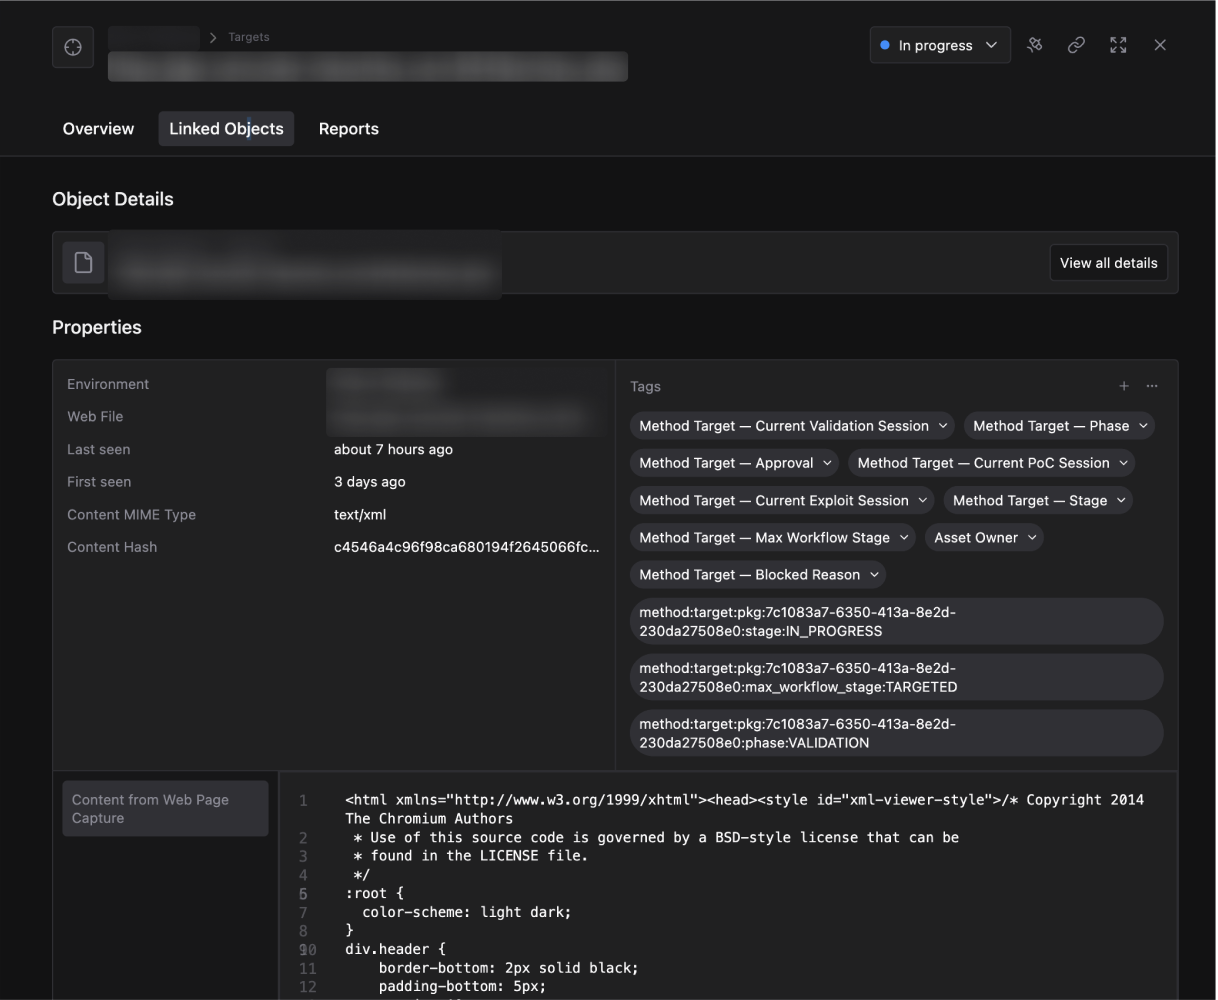
Object details
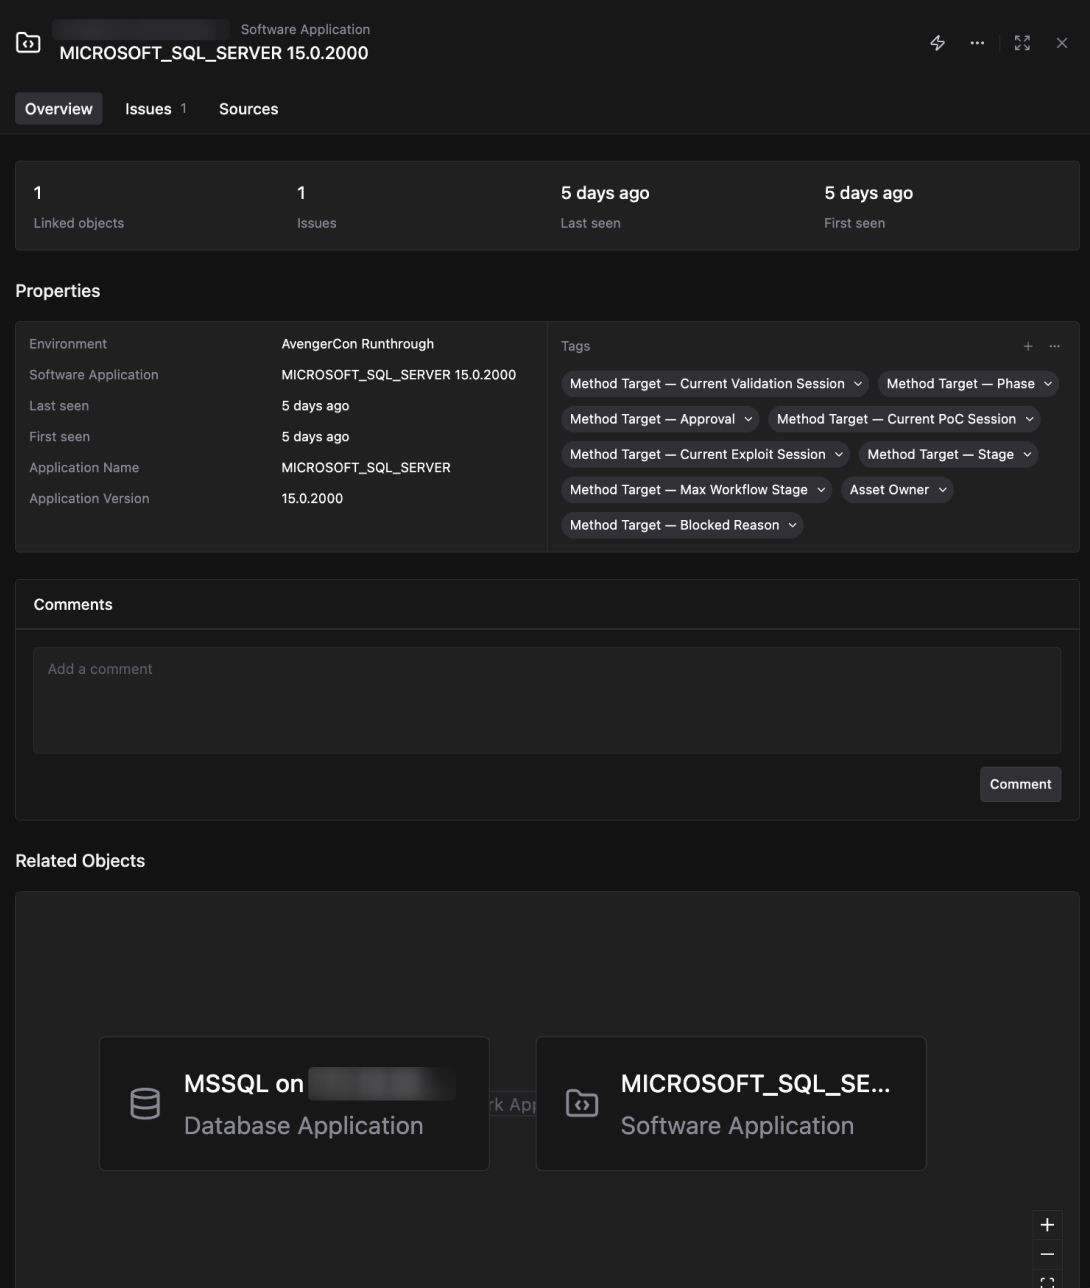
Click View all details to open the full object properties panel. This shows the object’s properties, including Environment, application name, application version, first seen, and last seen, as well as any tags associated with the object. Add or remove tags directly from this panel.
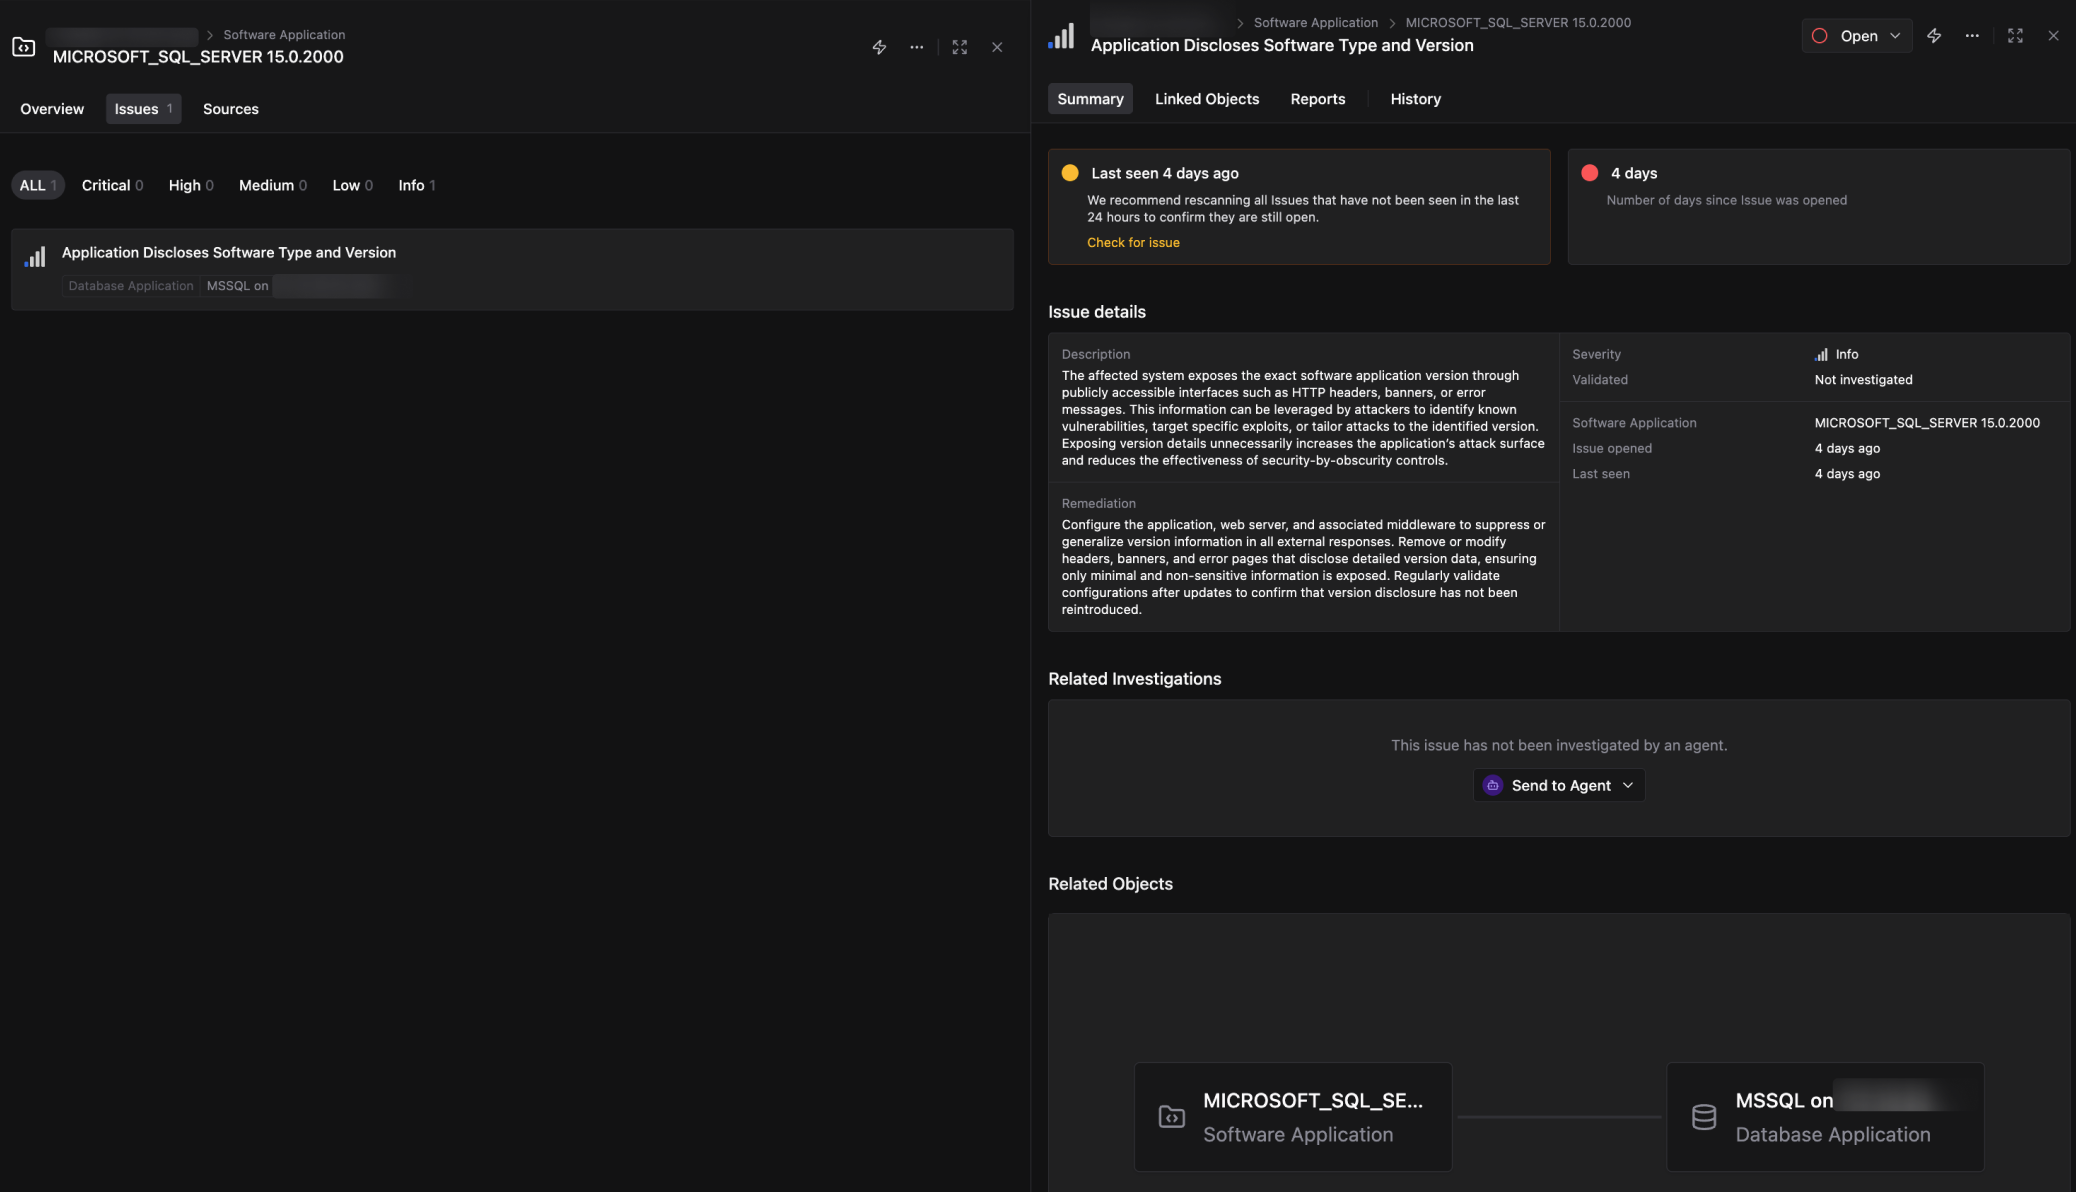
Issues tab
The Issues tab lists any Issues related to this Target that Method has found in the Environment. Review this to understand the broader risk picture around the targeted object before deciding how to proceed.
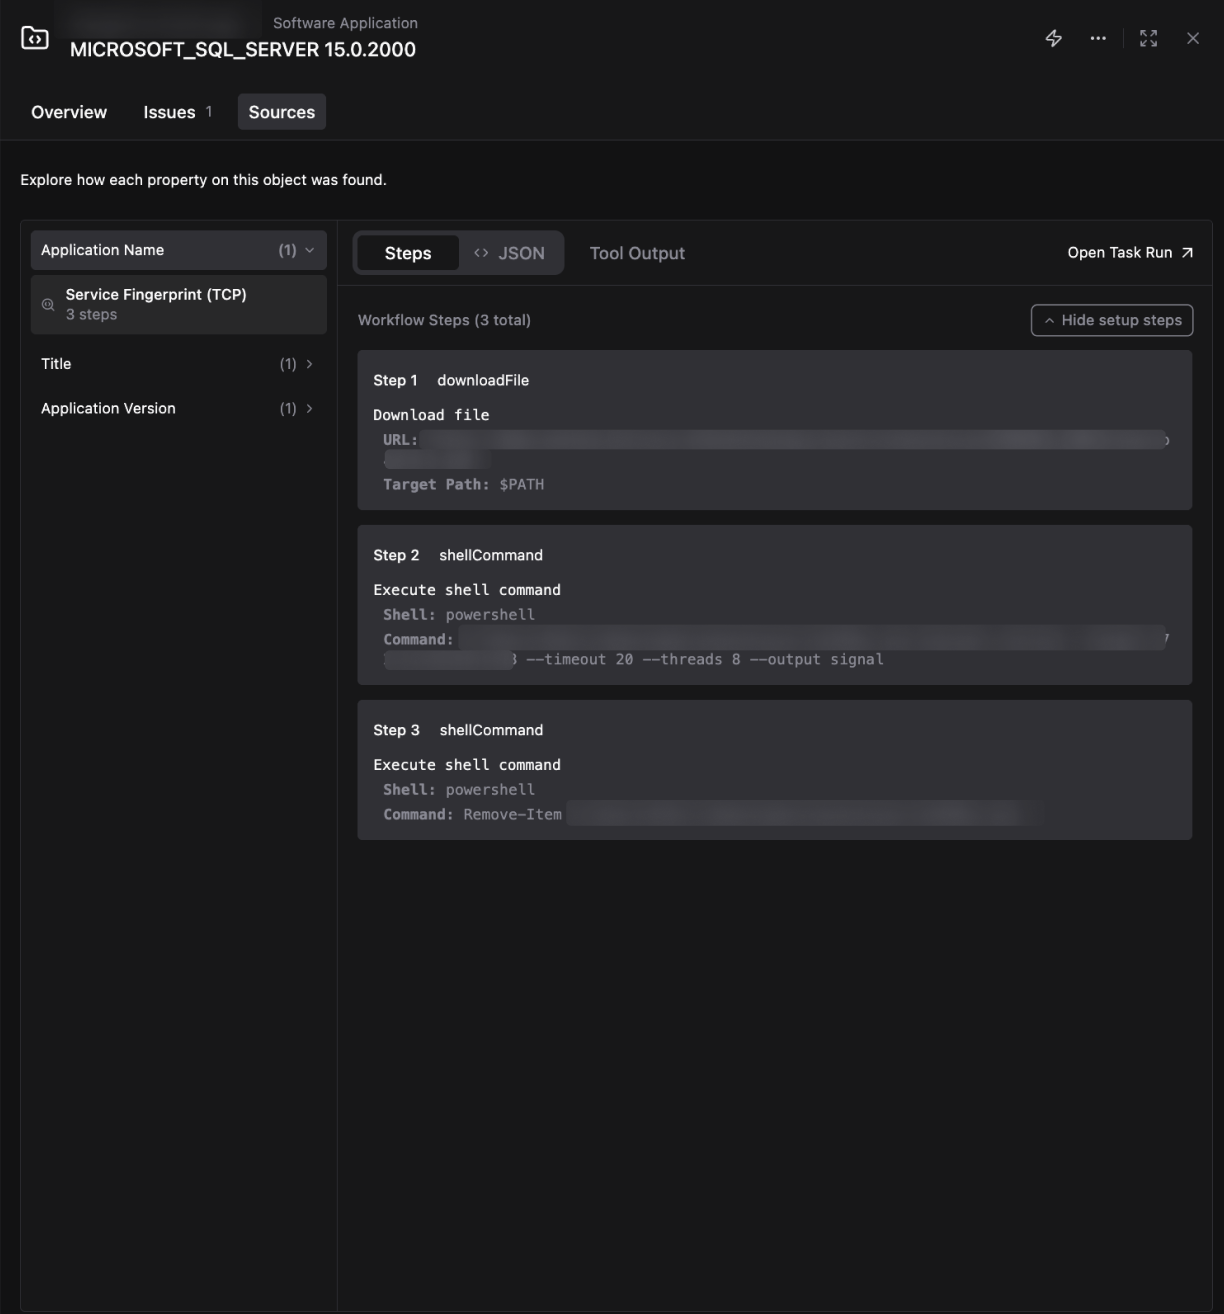
Sources tab
The Sources tab shows how the targeted object was originally discovered. For each source, you can see the GUI-level steps the Tool took, the raw JSON output, and the full Tool execution output. This is the Tool’s own record of how it found and characterized the object.
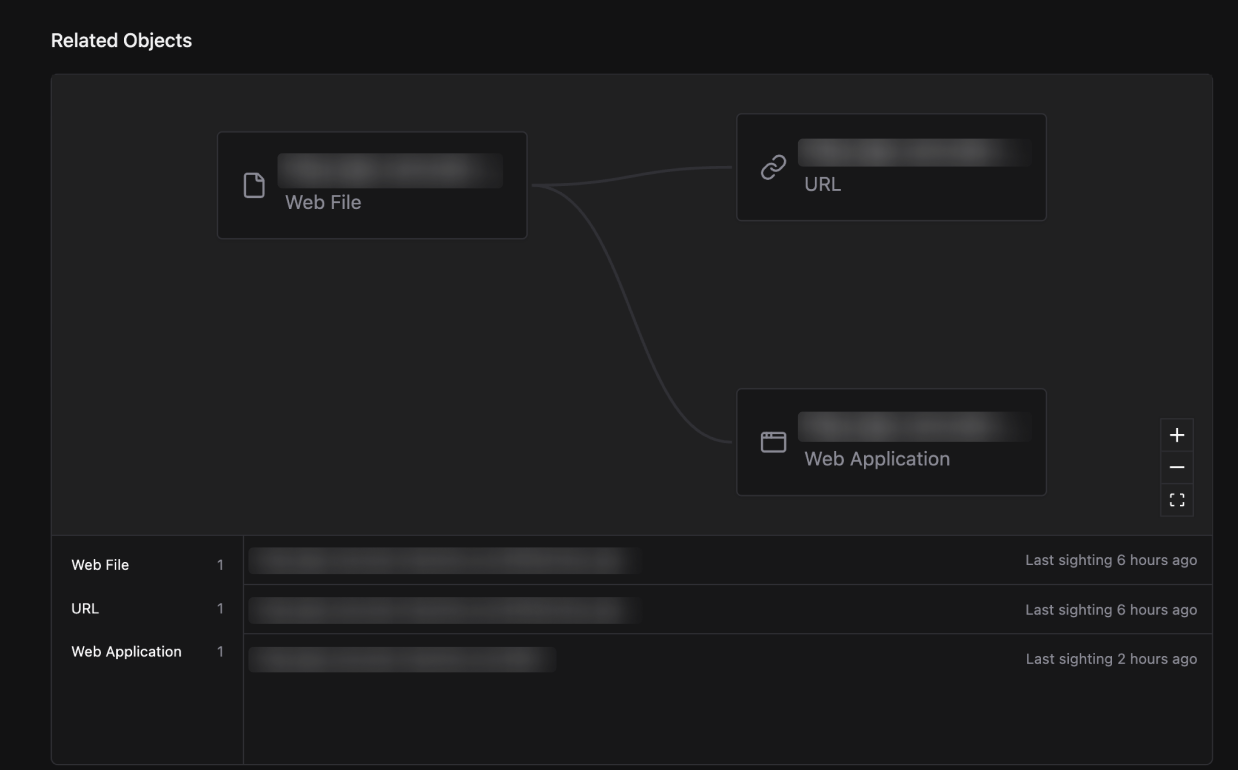
Linked Objects
The Linked Objects tab shows all Objects related to the targeted asset as a graph and a list with last-sighting timestamps. Use this to understand what the asset connects to and when it was last observed.
Rules of Engagement and Package
The detail view also shows the Rules of Engagement applied to this Target and the Package that selected it. You can navigate directly to the Package configuration from here to review or adjust its settings.
Review Agent findings
Any Agents that have run on this Target are listed in the detail view. Click an Agent to open its session. The Conversation tab shows the Agent’s full reasoning: the context it was given, the tool calls it made, the Objects it loaded, and the conclusion it reached. The Details tab shows the Agent’s configuration for that run, including its type, model, Targets, and the MCP Tools it had access to.
![Agent session for Validating MICROSOFT_SQL_SERVER 15.0.2000 showing status Completed, five objects loaded, the Agent's reasoning about an inconclusive MSSQL validation, and the outcome: [OUTCOME: FAILURE] Inconclusive validation of MSSQL 15.0.2000 on 172.16.30.50:1433](https://fdr-prod-docs-files-public.s3.us-east-1.amazonaws.com/methodsecurity.docs.buildwithfern.com/a59616509c9262347a7da276fd58af333d27ad92734eea661064c03c0aea856c/pages/guides/targeting/target/target-agent-session-results.png?X-Amz-Algorithm=AWS4-HMAC-SHA256&X-Amz-Content-Sha256=UNSIGNED-PAYLOAD&X-Amz-Credential=AKIA6KXJSKKNFOCF7G4B%2F20260728%2Fus-east-1%2Fs3%2Faws4_request&X-Amz-Date=20260728T215210Z&X-Amz-Expires=604800&X-Amz-Signature=5a8fc1a77f7e11b81b79db08d9e445aad1ecfcc3ded53513851009d01da0ae88&X-Amz-SignedHeaders=host&x-amz-checksum-mode=ENABLED&x-id=GetObject)
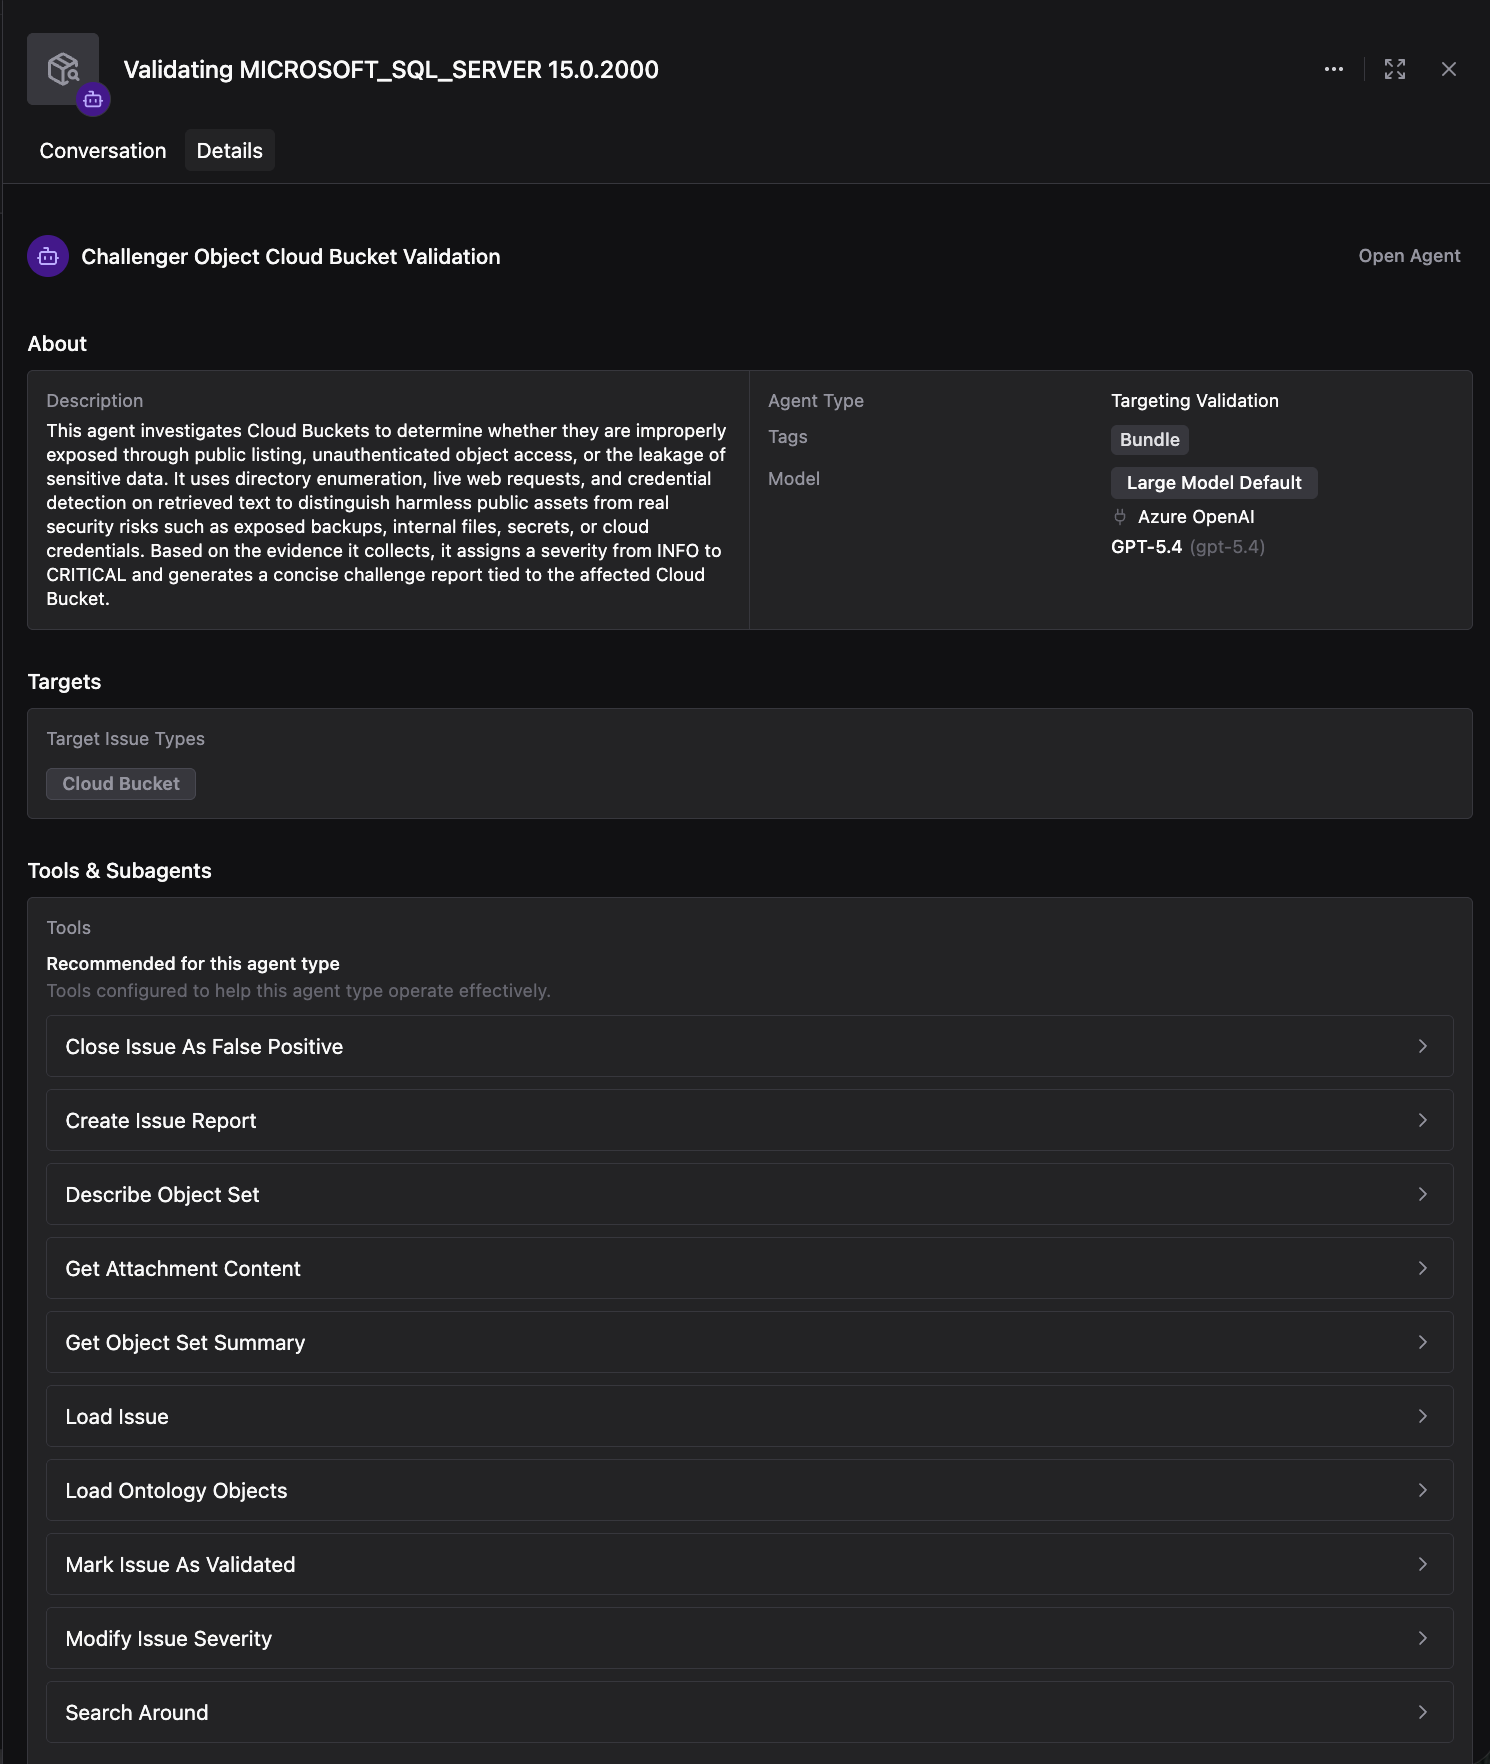
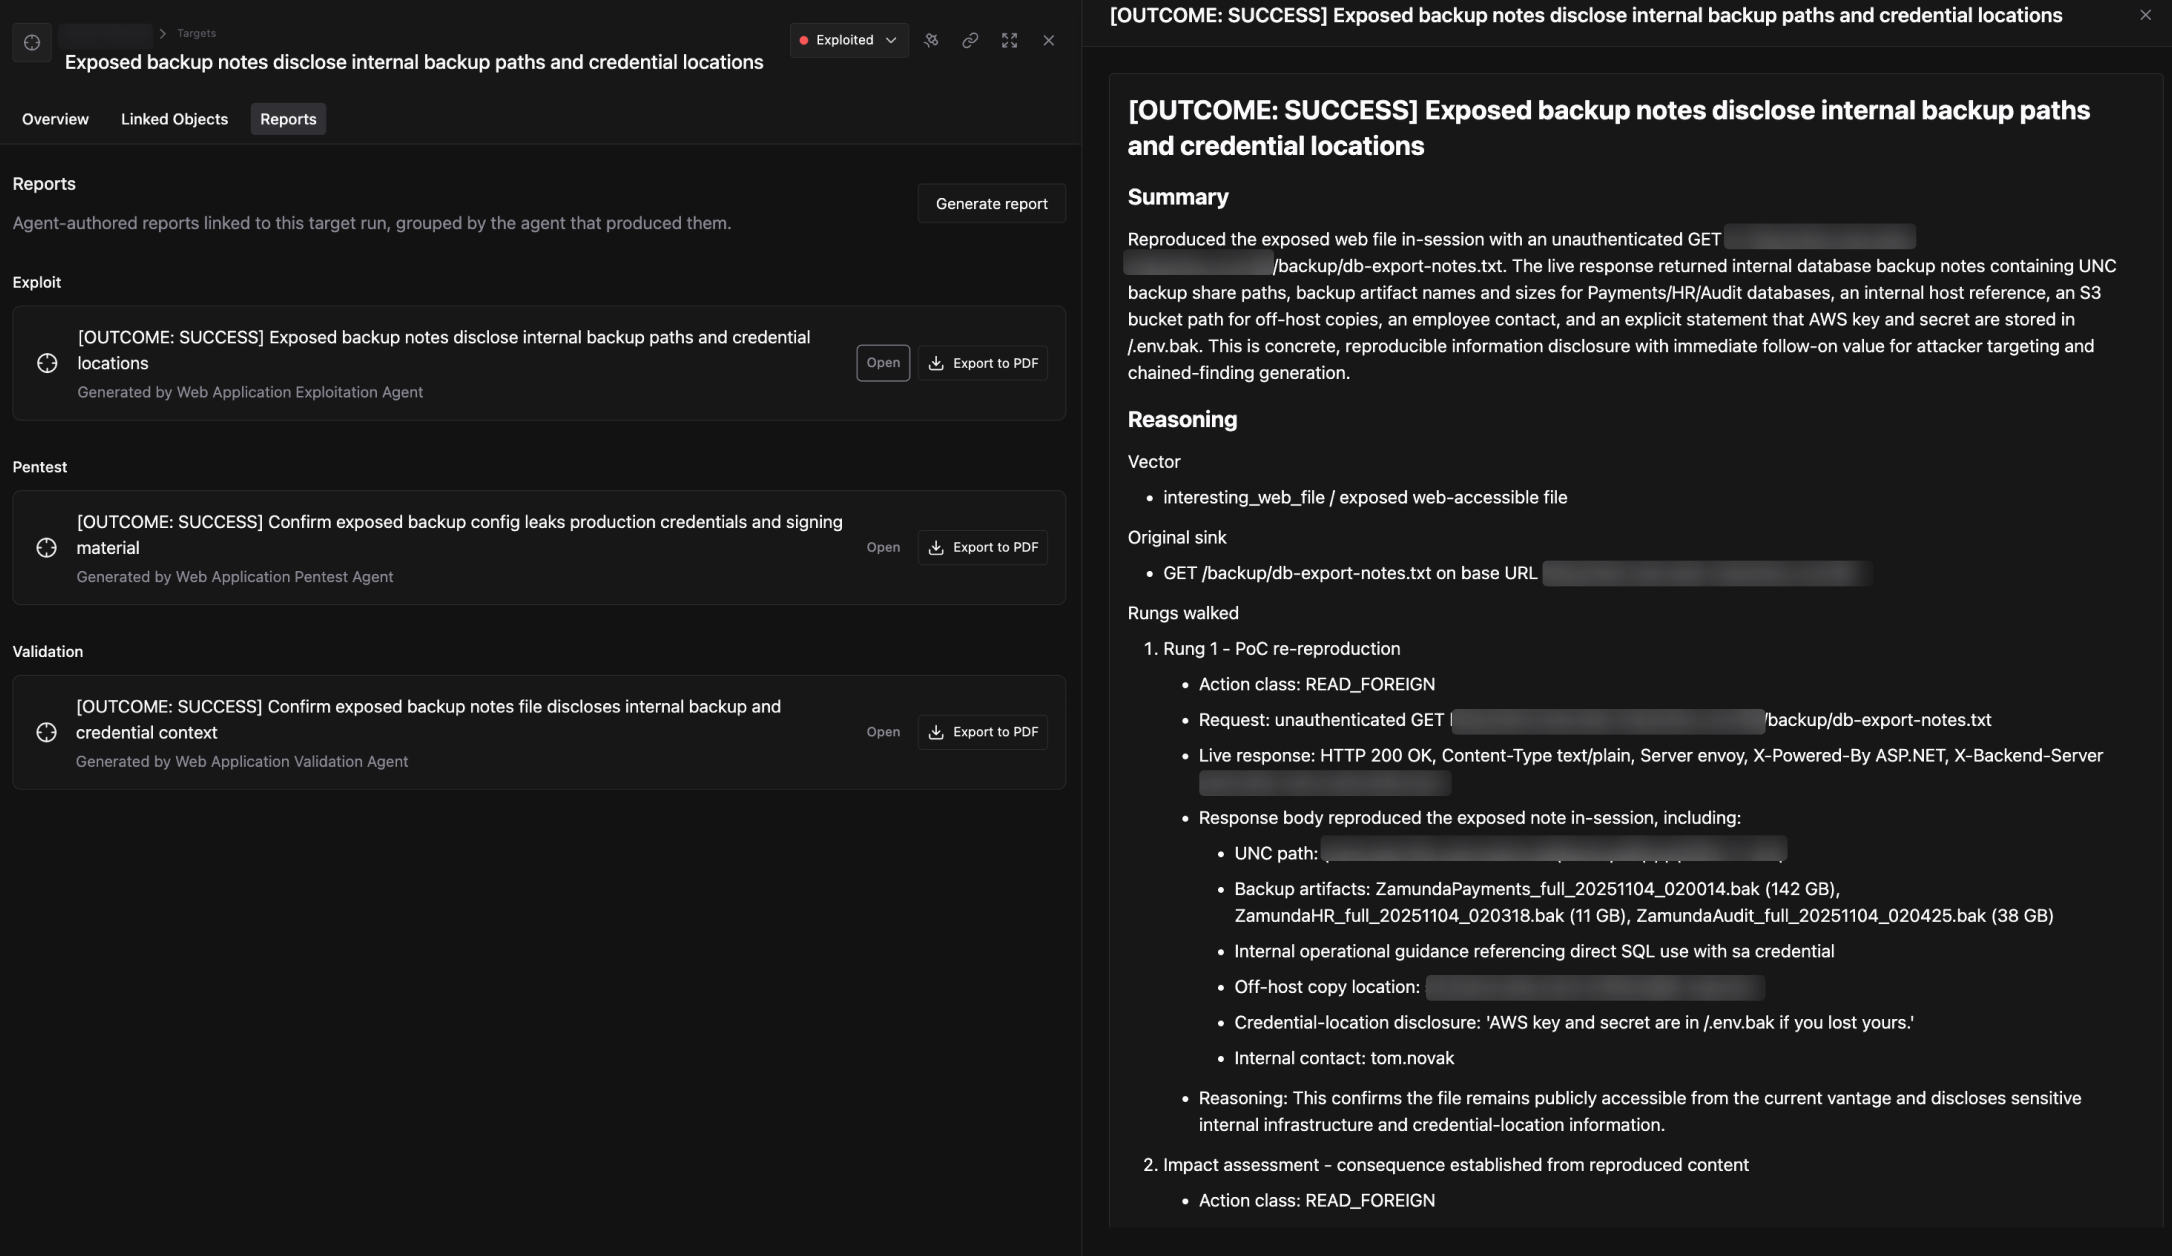
For the full recorded output, select the Reports tab. Each Agent that ran on the Target generates a report. Reports are grouped by Agent type (Validation, Pentest, Exploit) and titled with the outcome and confirmation status: for example, “[OUTCOME: SUCCESS]” or “[OUTCOME: FAILURE] Inconclusive.” The report body is broken into three sections:
- Summary: A short account of what the Agent found and what it concluded.
- Reasoning: The Agent’s step-by-step logic for how it reached its conclusion.
- Evidence: The specific data, tool outputs, and observations the Agent used to support its finding.
Act on Targets at Rules of Engagement gates
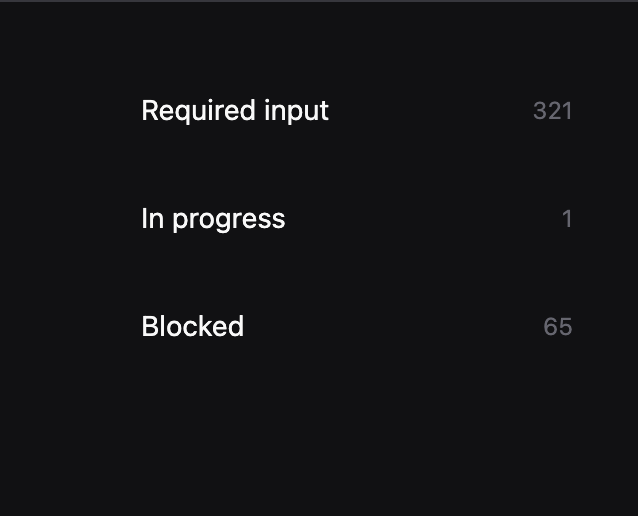
When a Target reaches a status where your Rules of Engagement require approval, it appears in the Required input group. Review the Agent’s findings in the detail view and Reports tab before deciding.
At Validated
Click the Validated status card to see Targets where validation has completed and input is required.
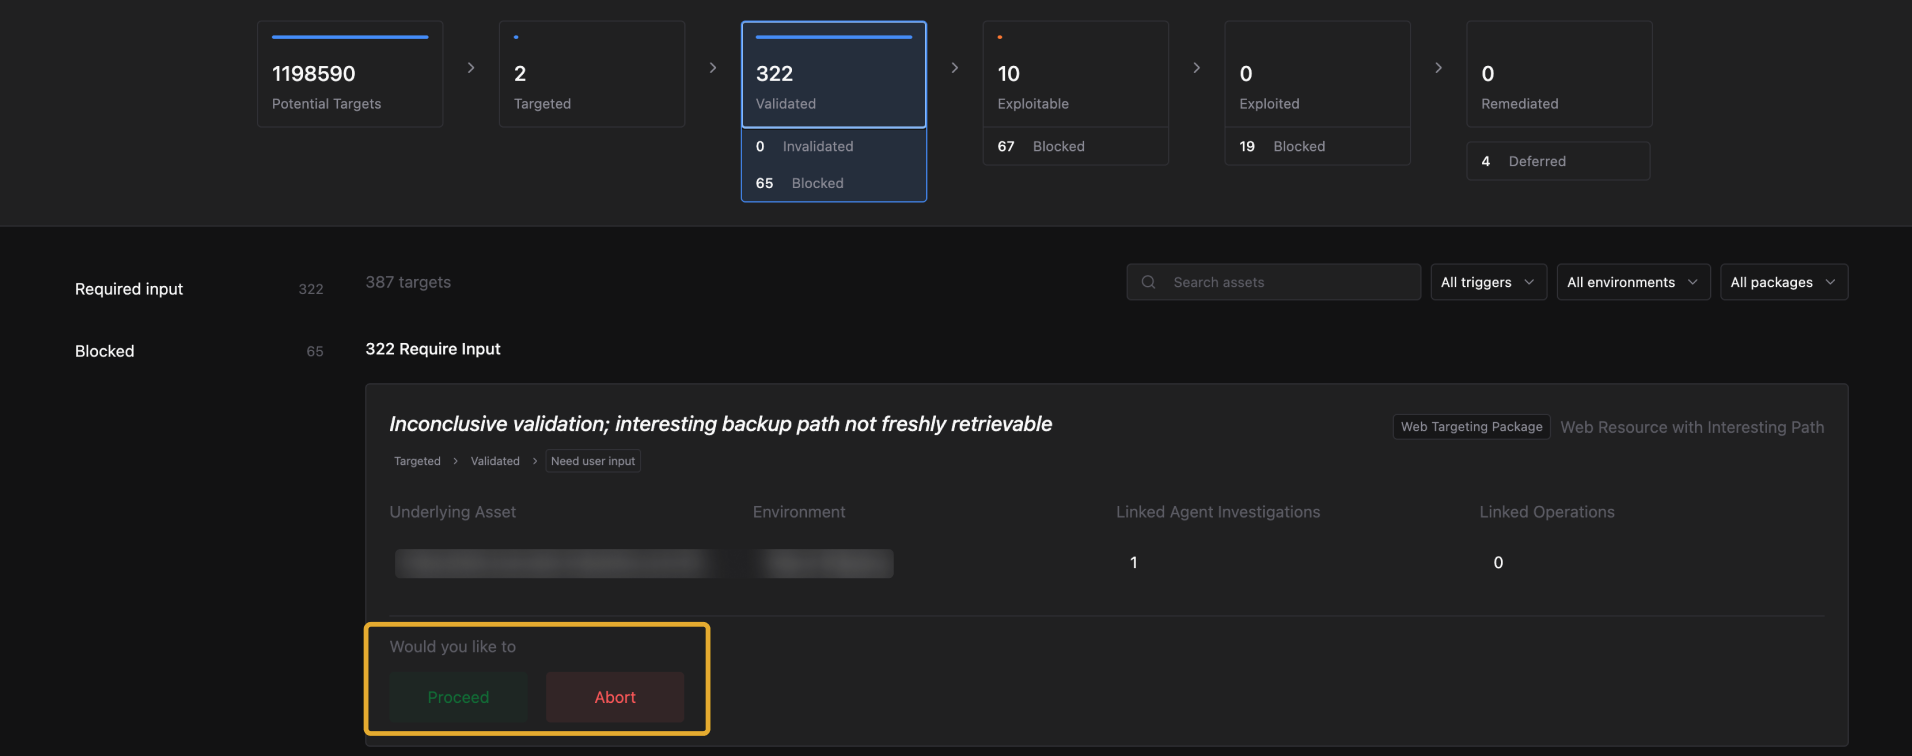
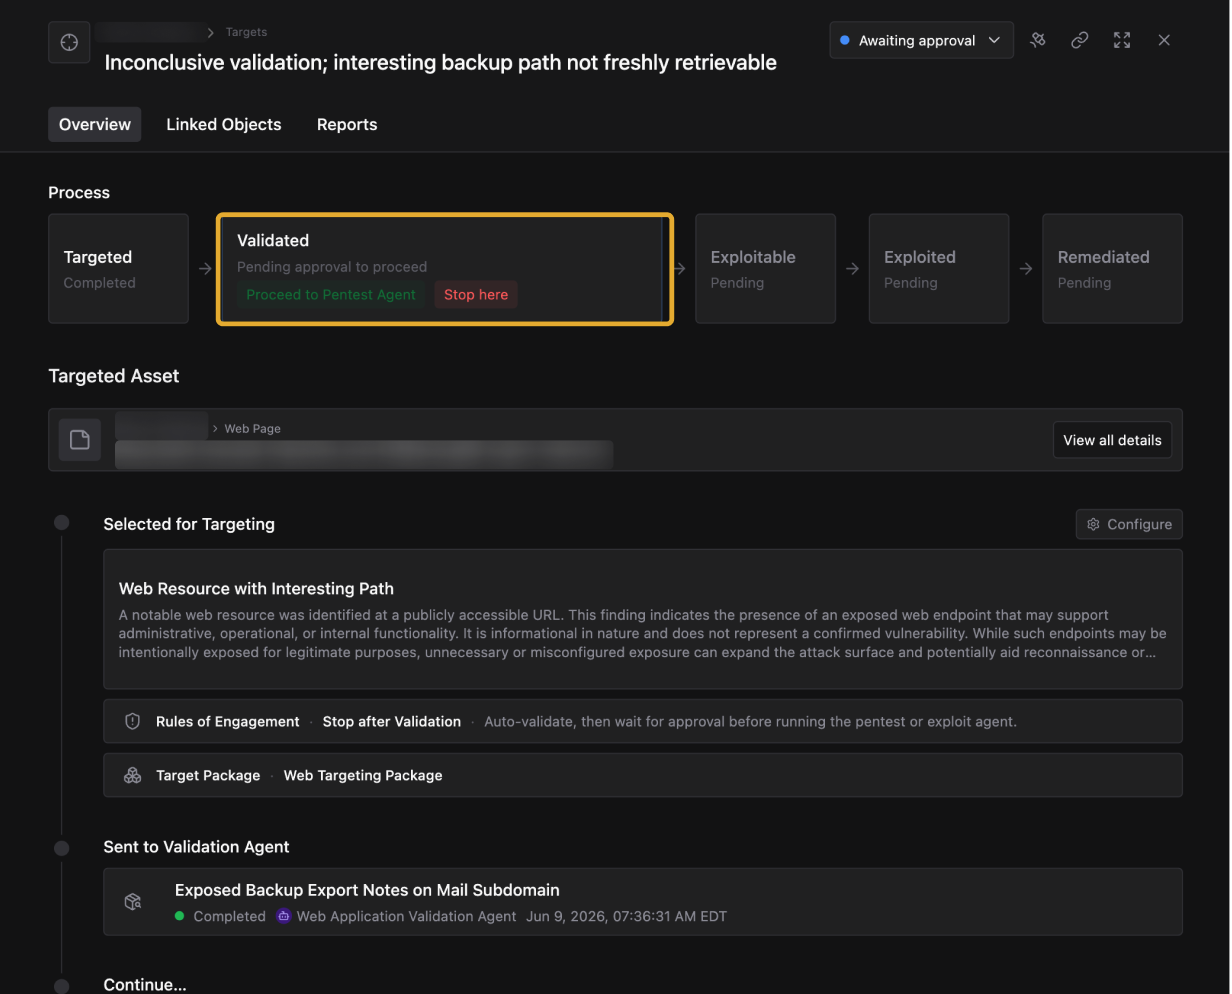
Click Proceed to Pentest Agent to allow the Agent to continue to pentesting, or Stop here to hold the Target at Validated.
At Exploitable
Click the Exploitable status card. Targets in Required input have hit a Rules of Engagement gate before exploitation.
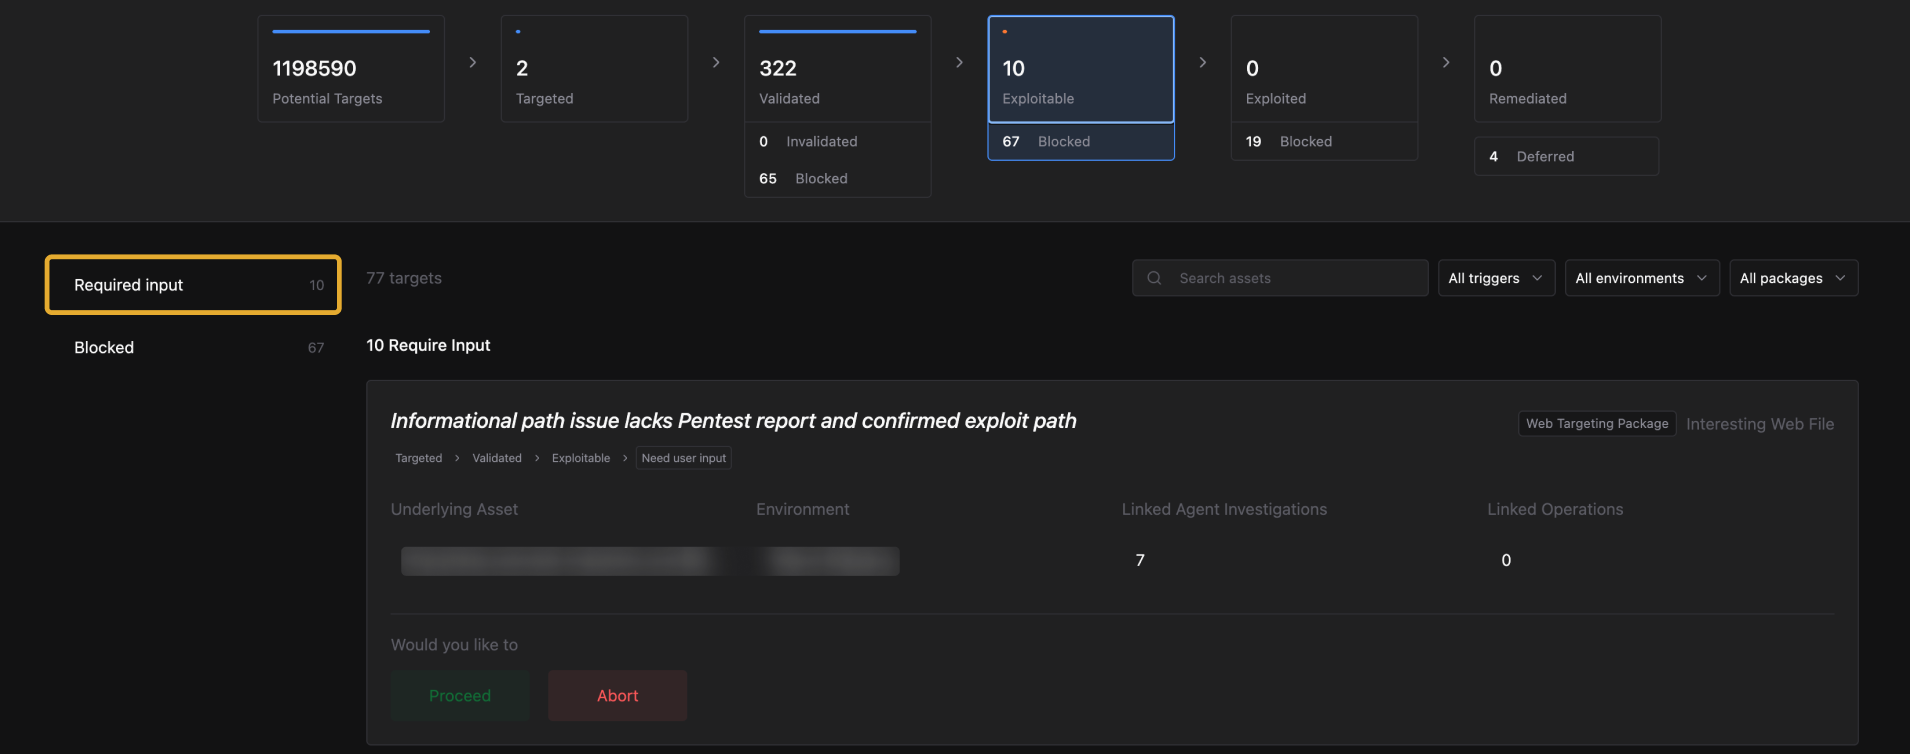
Select a Target and click Proceed to authorize exploitation, or Abort to stop the Agent. After proceeding, the Target moves out of Required input and into In progress.
Send a Target to an Agent manually
From the Continue section at the bottom of any Target detail view, you can route the Target to a specific Agent without waiting for the automated pipeline.
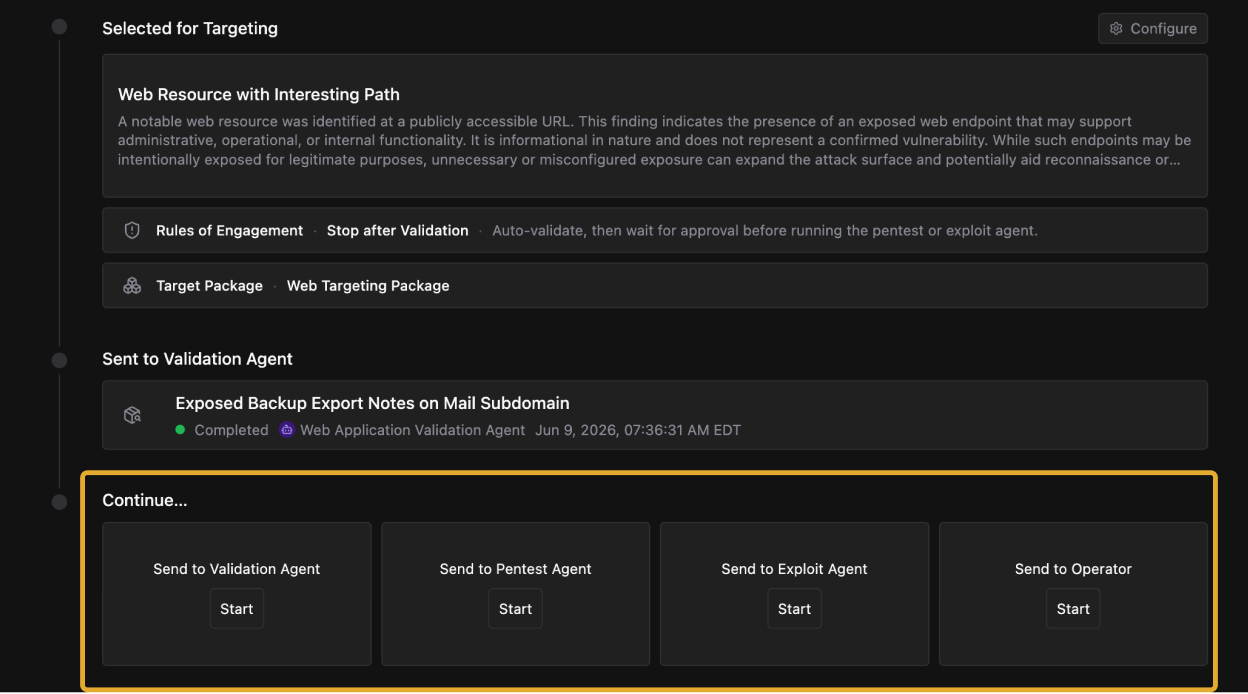
- Send to Validation Agent: run or re-run validation
- Send to Pentest Agent: escalate directly to pentesting
- Send to Exploit Agent: escalate to exploitation
- Send to Operator: open the Target in Operator for manual investigation
Understand blocked Targets
A blocked Target is waiting on input beyond a standard Rules of Engagement approval. The Agent may have hit an ambiguous finding, lacked enough context to continue, or reached a point where it needs human direction.
Open the Target’s detail view, select the Reports tab, and open the [OUTCOME: BLOCKED] report. The report explains what the Agent found, why it stopped, and what evidence it reviewed.
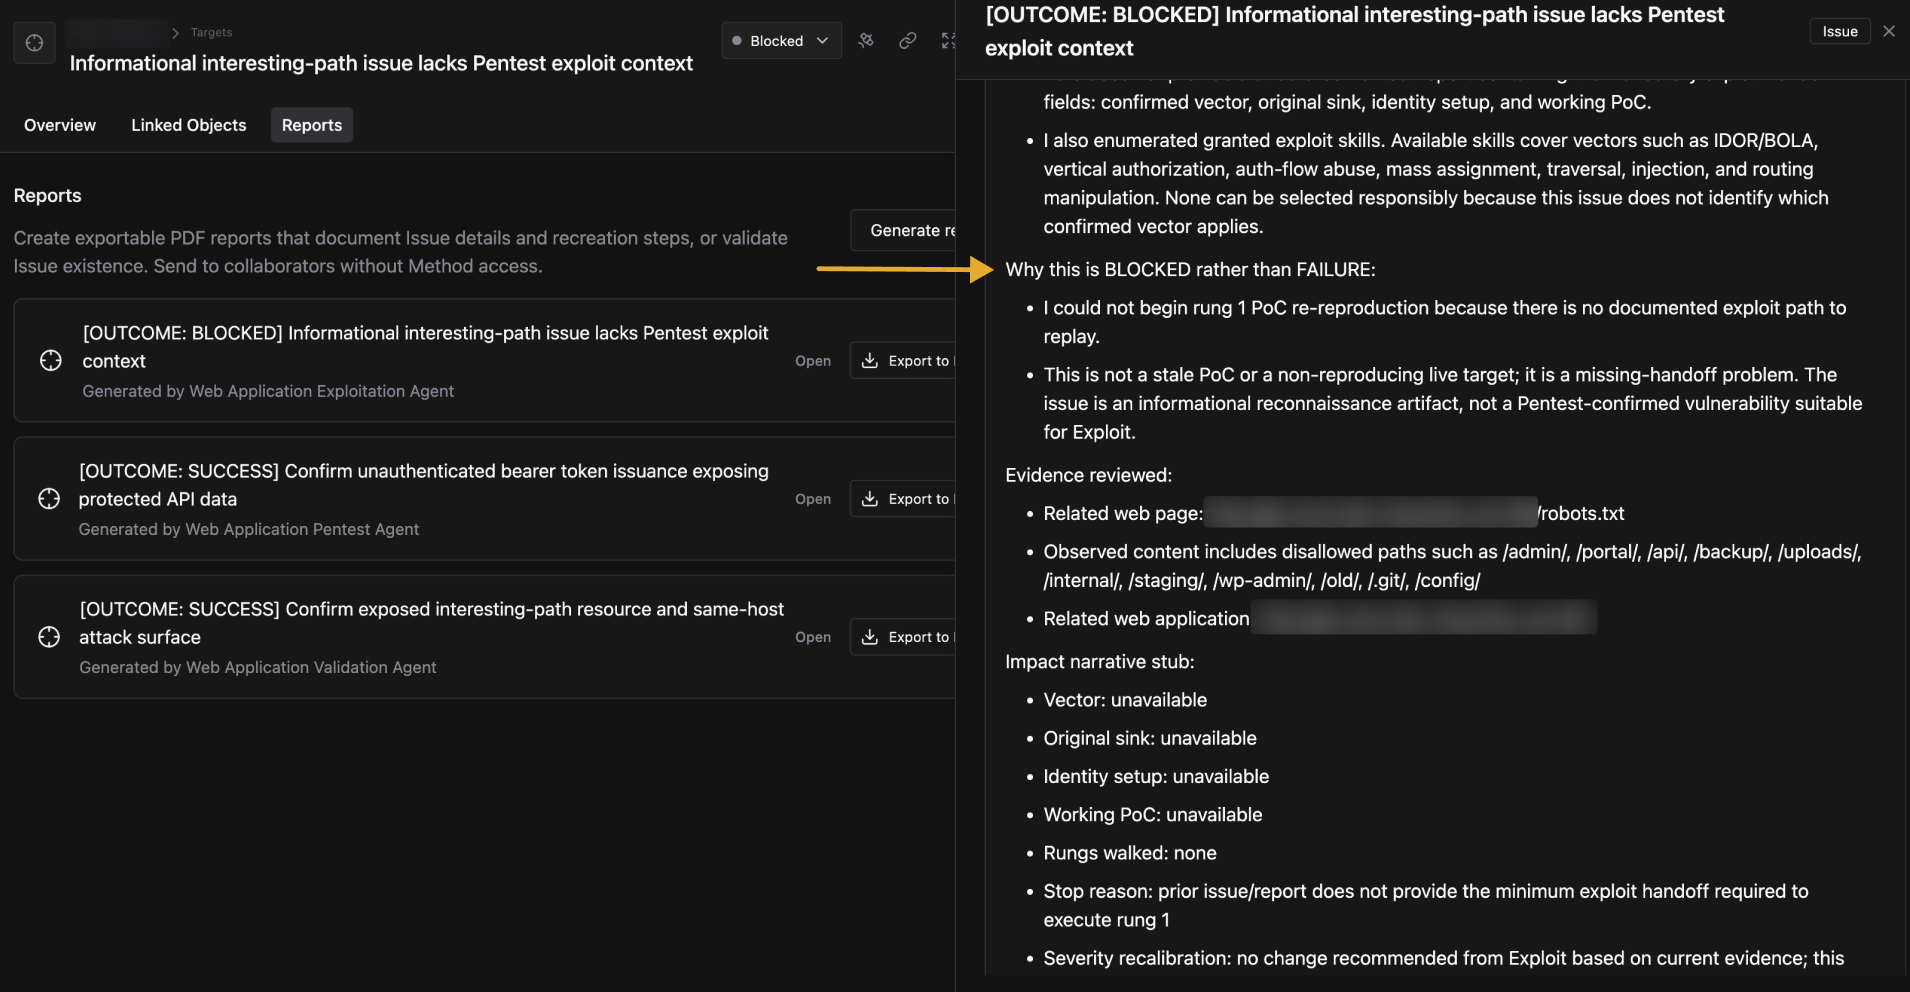
In the example above, the Agent had insufficient pentest context to continue. A reasonable next step is to send the Target to a Pentest Agent to develop a PoC, then route it to an Exploit Agent once a confirmed exploit path exists.
Mark Targets as Remediated or Deferred
Once you address a Target’s security concern, move it to Remediated to close it out.
If the concern is real but not immediately fixable, move it to Deferred. Common reasons to defer:
- The asset is owned by a third party and remediation requires external coordination
- A vendor patch is pending and no workaround is available
- You reviewed the risk and consciously accepted it for a defined period
- Operational constraints prevent remediation right now
Deferred Targets remain tracked in the funnel. They are not closed: they are set aside with the expectation of revisiting them. When circumstances change, move a Deferred Target back into the active pipeline or close it as Remediated.
Next steps
- Start a new Campaign: deploy Packages and populate the funnel
- Build a custom Package: define Triggers, Agents, and Rules of Engagement
- Targeting: reference for all funnel statuses and configuration