Build a custom Package
A Package bundles Triggers, Rules of Engagement, and Agents into a reusable Targeting configuration. Build one from scratch or clone an existing Package as a starting point.
For background on Packages and how they fit into Targeting, see Targeting.
Build a Package
Open the Packages tab
From the Targeting application, select the Configuration tab in the top navigation, then click Packages.

Create a new blank Package
Click the + New dropdown on the left side of the screen and select New blank package. Method creates the Package and adds it to your list.
To start from an existing configuration instead, select Clone an existing package and choose a Package to copy.
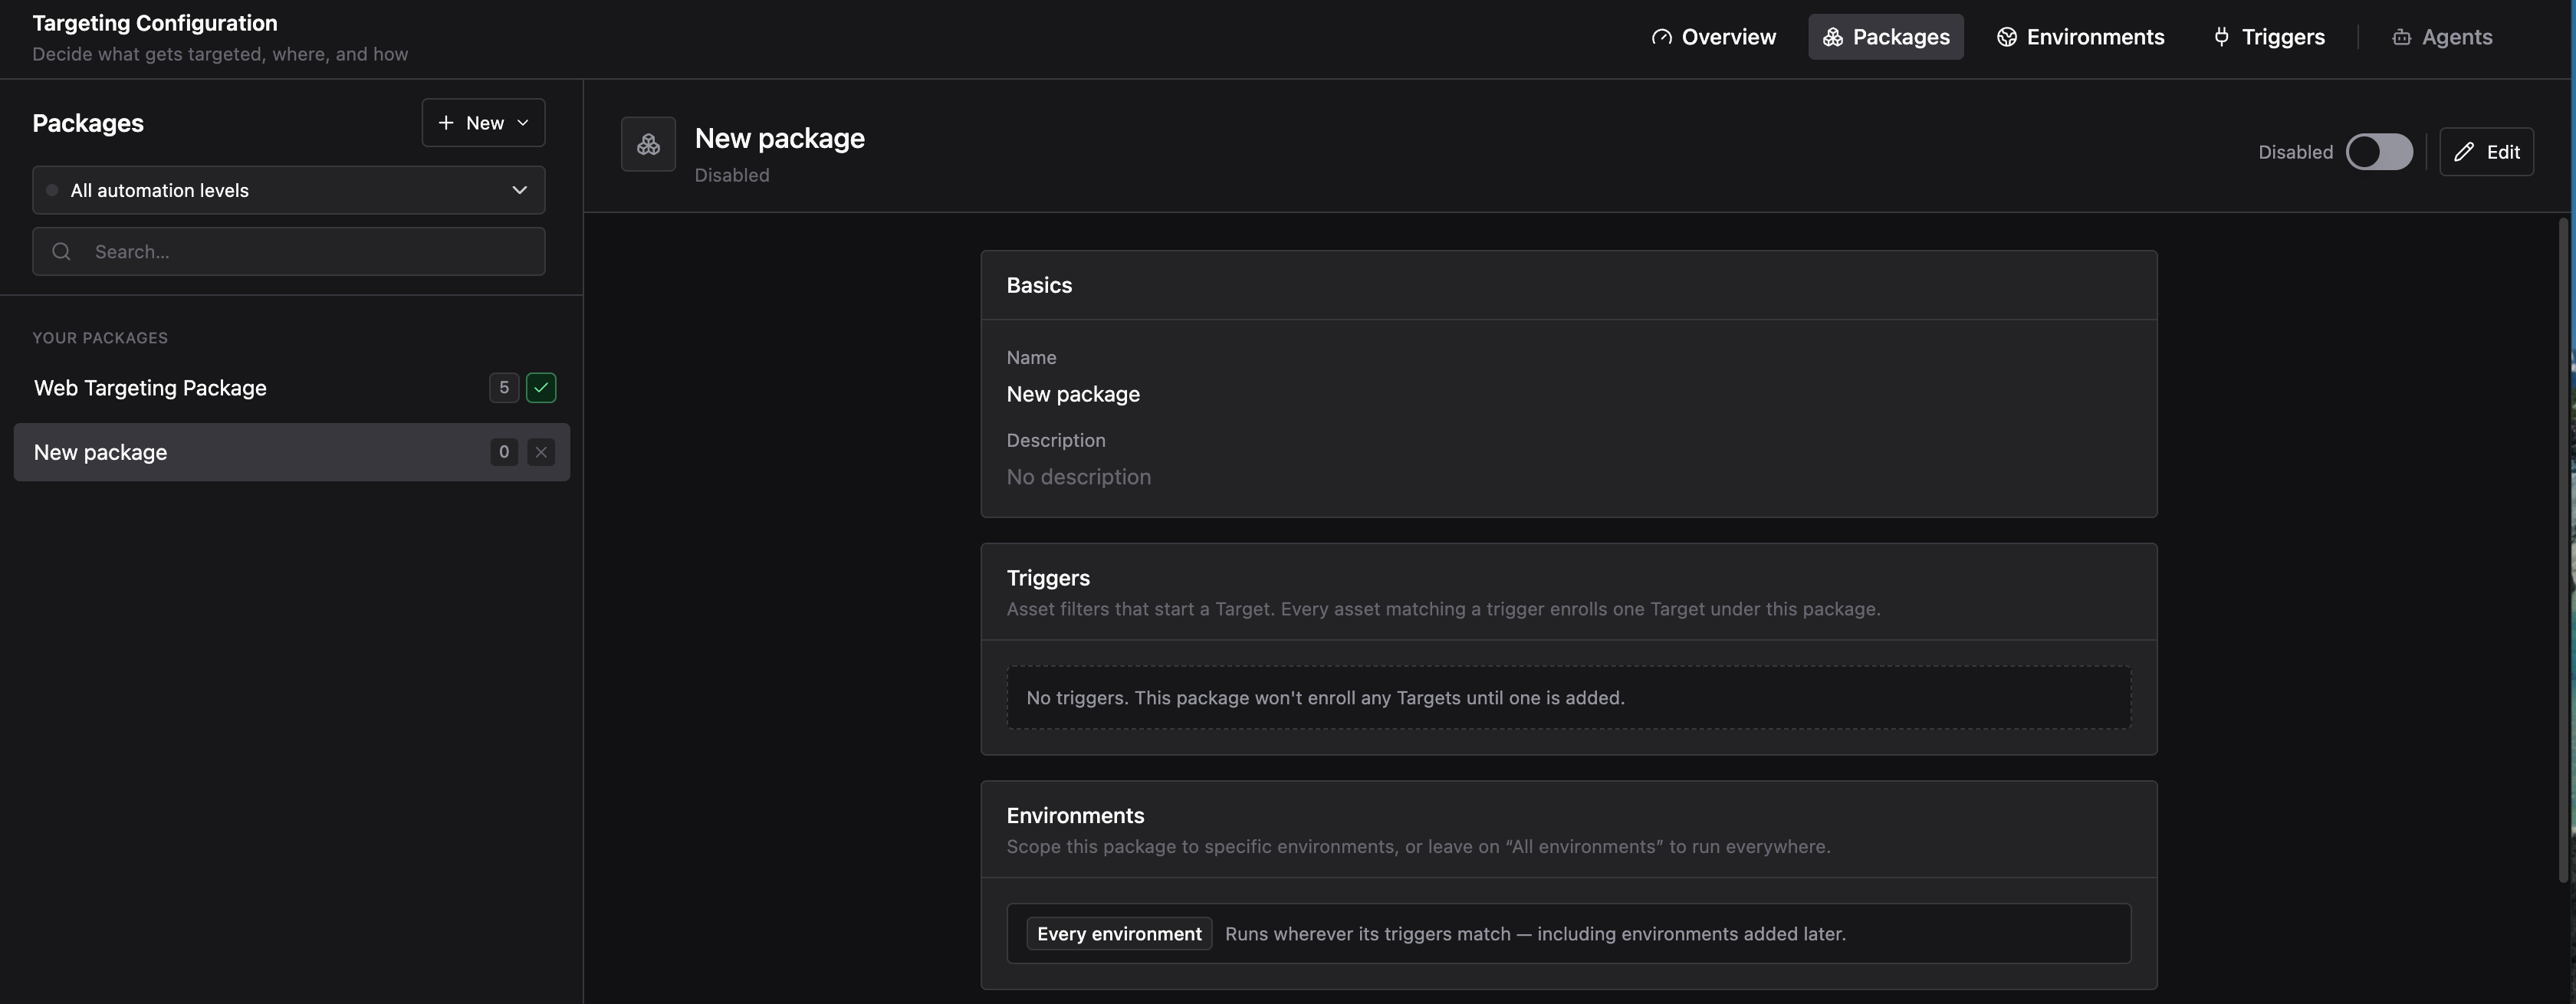
With the new Package selected, click the Edit button in the top-right corner to open the configuration form.
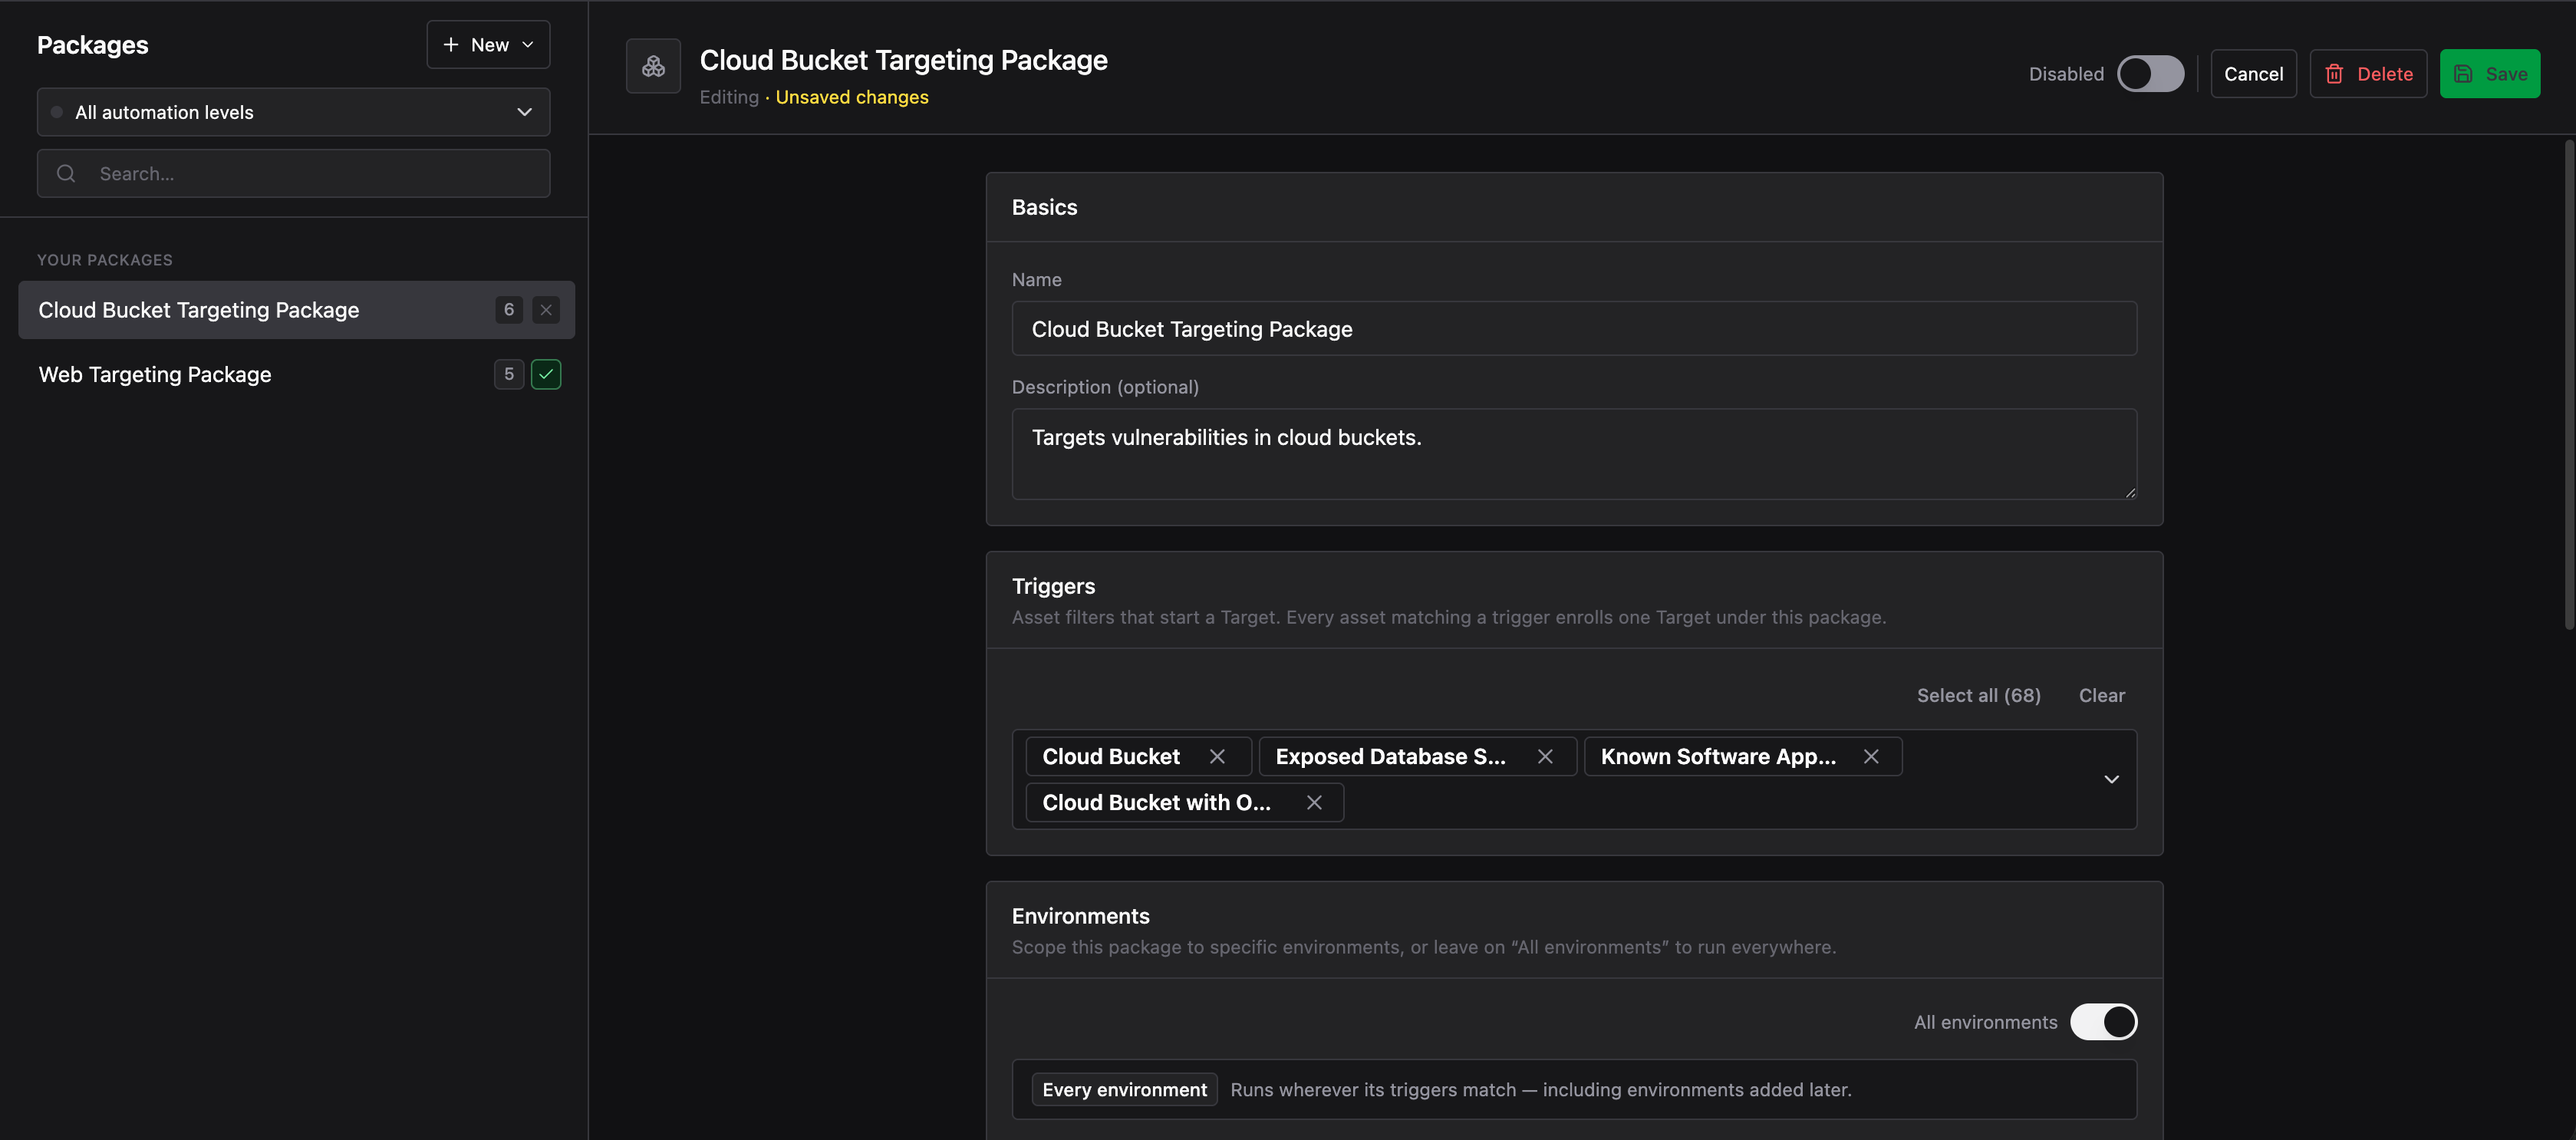
Name and describe the Package
Give the Package a clear name and an optional description that explains what it targets and why.
For this example:
- Name:
Cloud Bucket Targeting Package - Description:
Targets vulnerabilities in cloud buckets.
Select Triggers
Select one or more Triggers using the Select dropdown. Triggers are the filters that decide which assets this Package enrolls as Targets.
For this cloud bucket Package, select:
- Cloud Bucket: cloud storage buckets discovered in the Environment
- Exposed Database: databases with externally accessible interfaces
- Known Software Application: assets running software versions with known vulnerabilities
- Cloud Bucket with Open Access: cloud buckets with publicly accessible permissions
Trigger breadth and target volume
Triggers vary in how specifically they select assets. A broader Trigger (for example, “all web applications”) matches a large surface area and generates more Targets, but may include assets that need more filtering downstream. A more specific Trigger (for example, “web applications running a known vulnerable version”) produces a smaller, higher-confidence set.
The more Triggers a Package declares, the more Targets it generates. Each Trigger runs independently, so adding Triggers compounds target volume across every matching Environment.
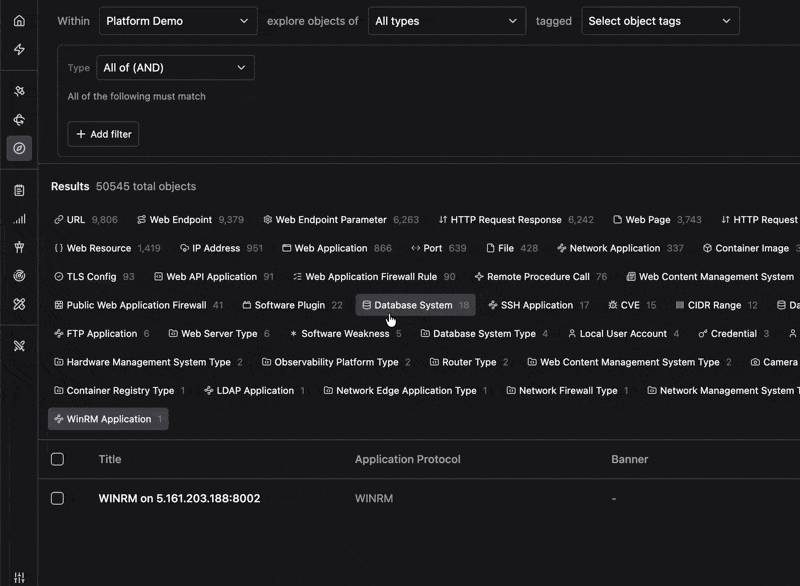
Before finalizing your Trigger selection, use Explorer to run queries against your Environment’s Objects and see how many assets a given condition would match. This gives you a concrete estimate of target volume before you commit. See Explorer for details.
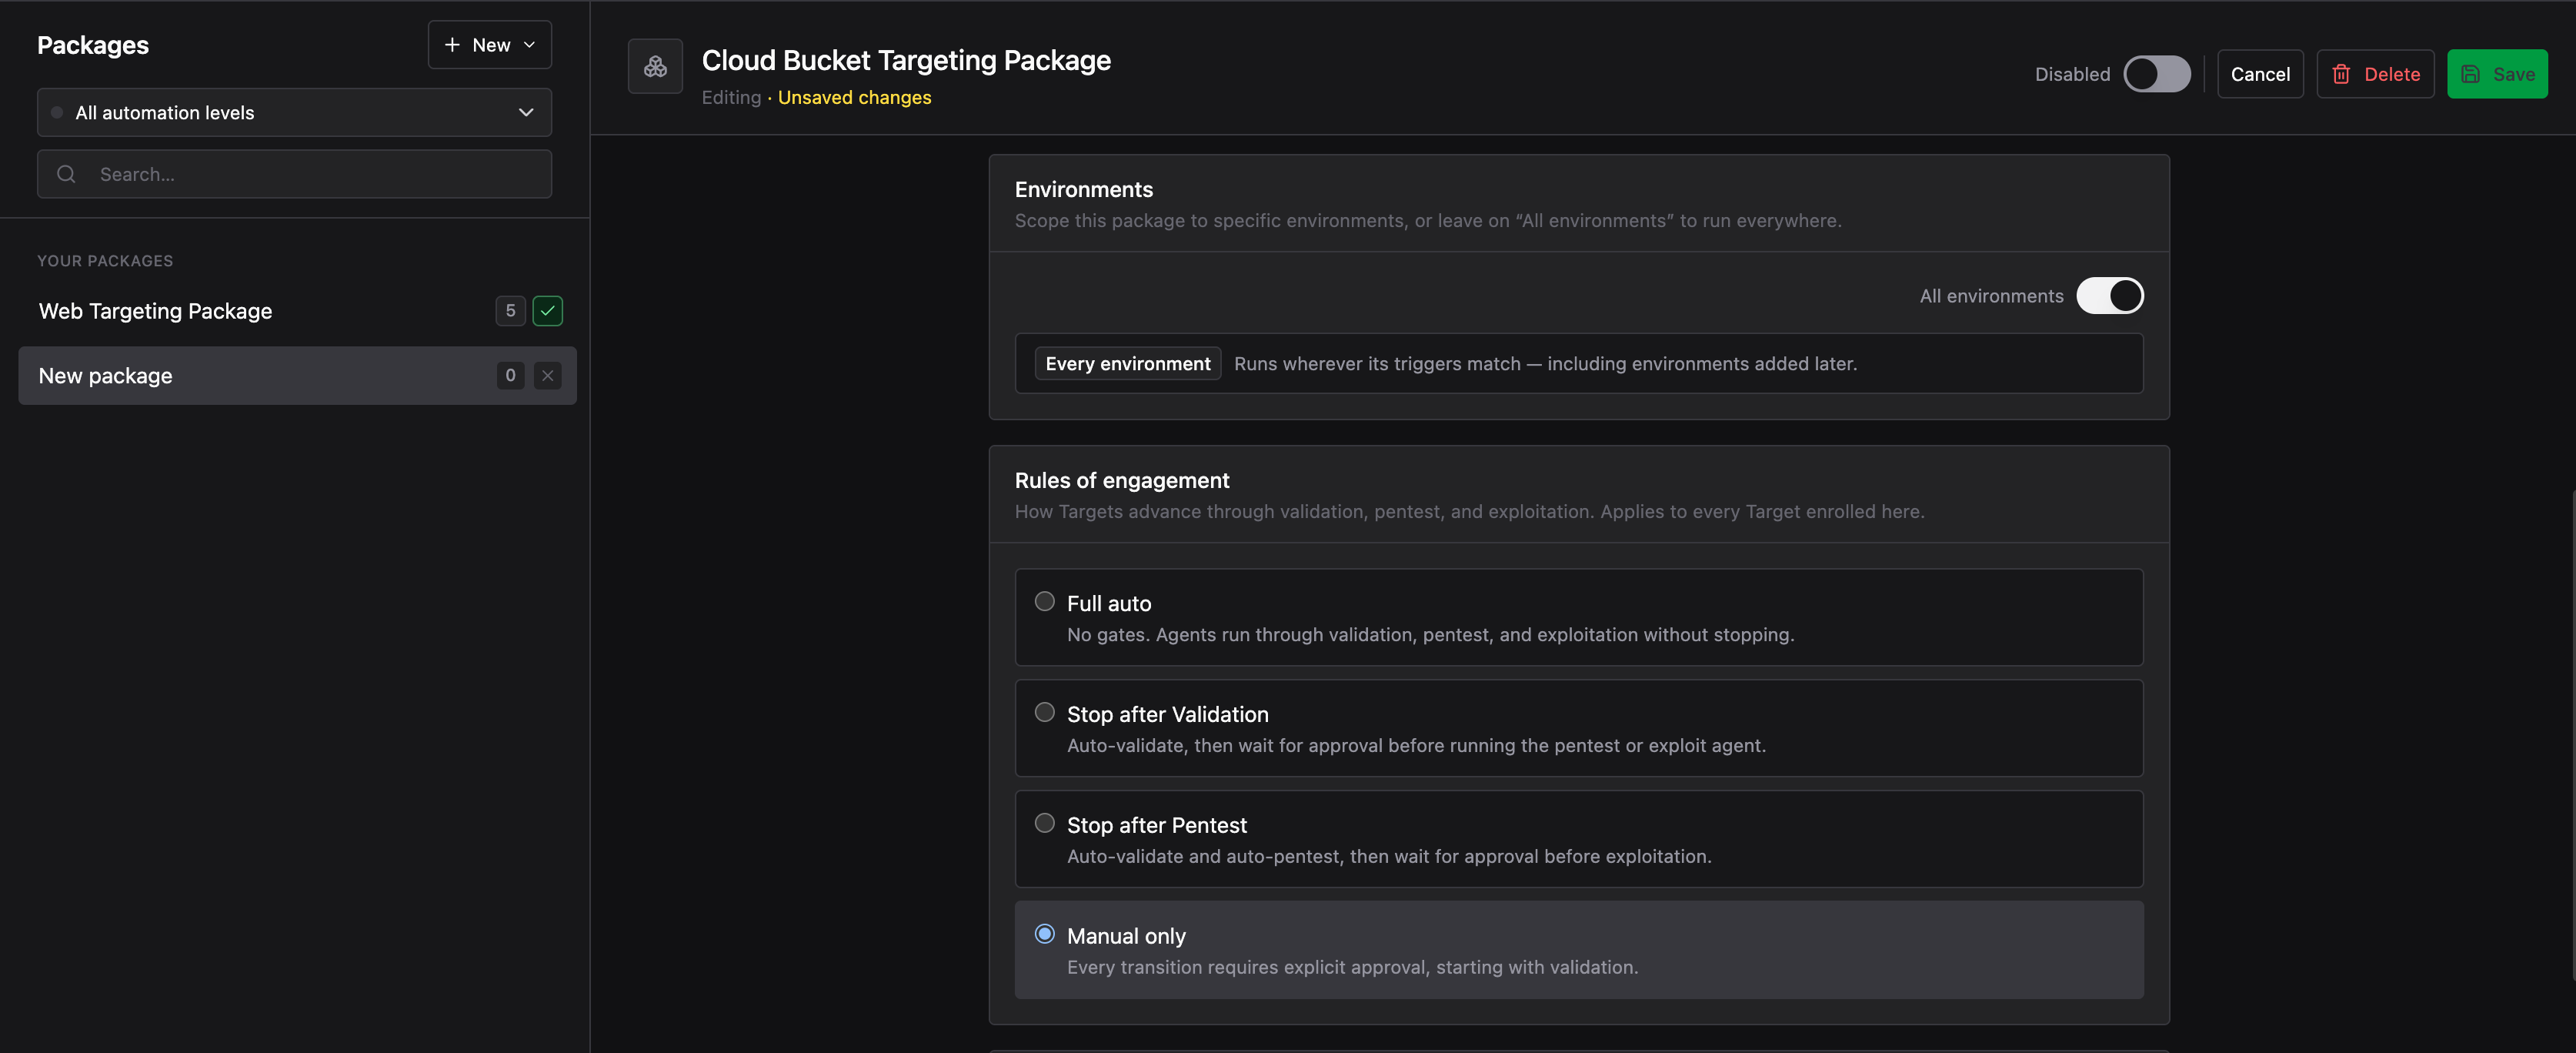
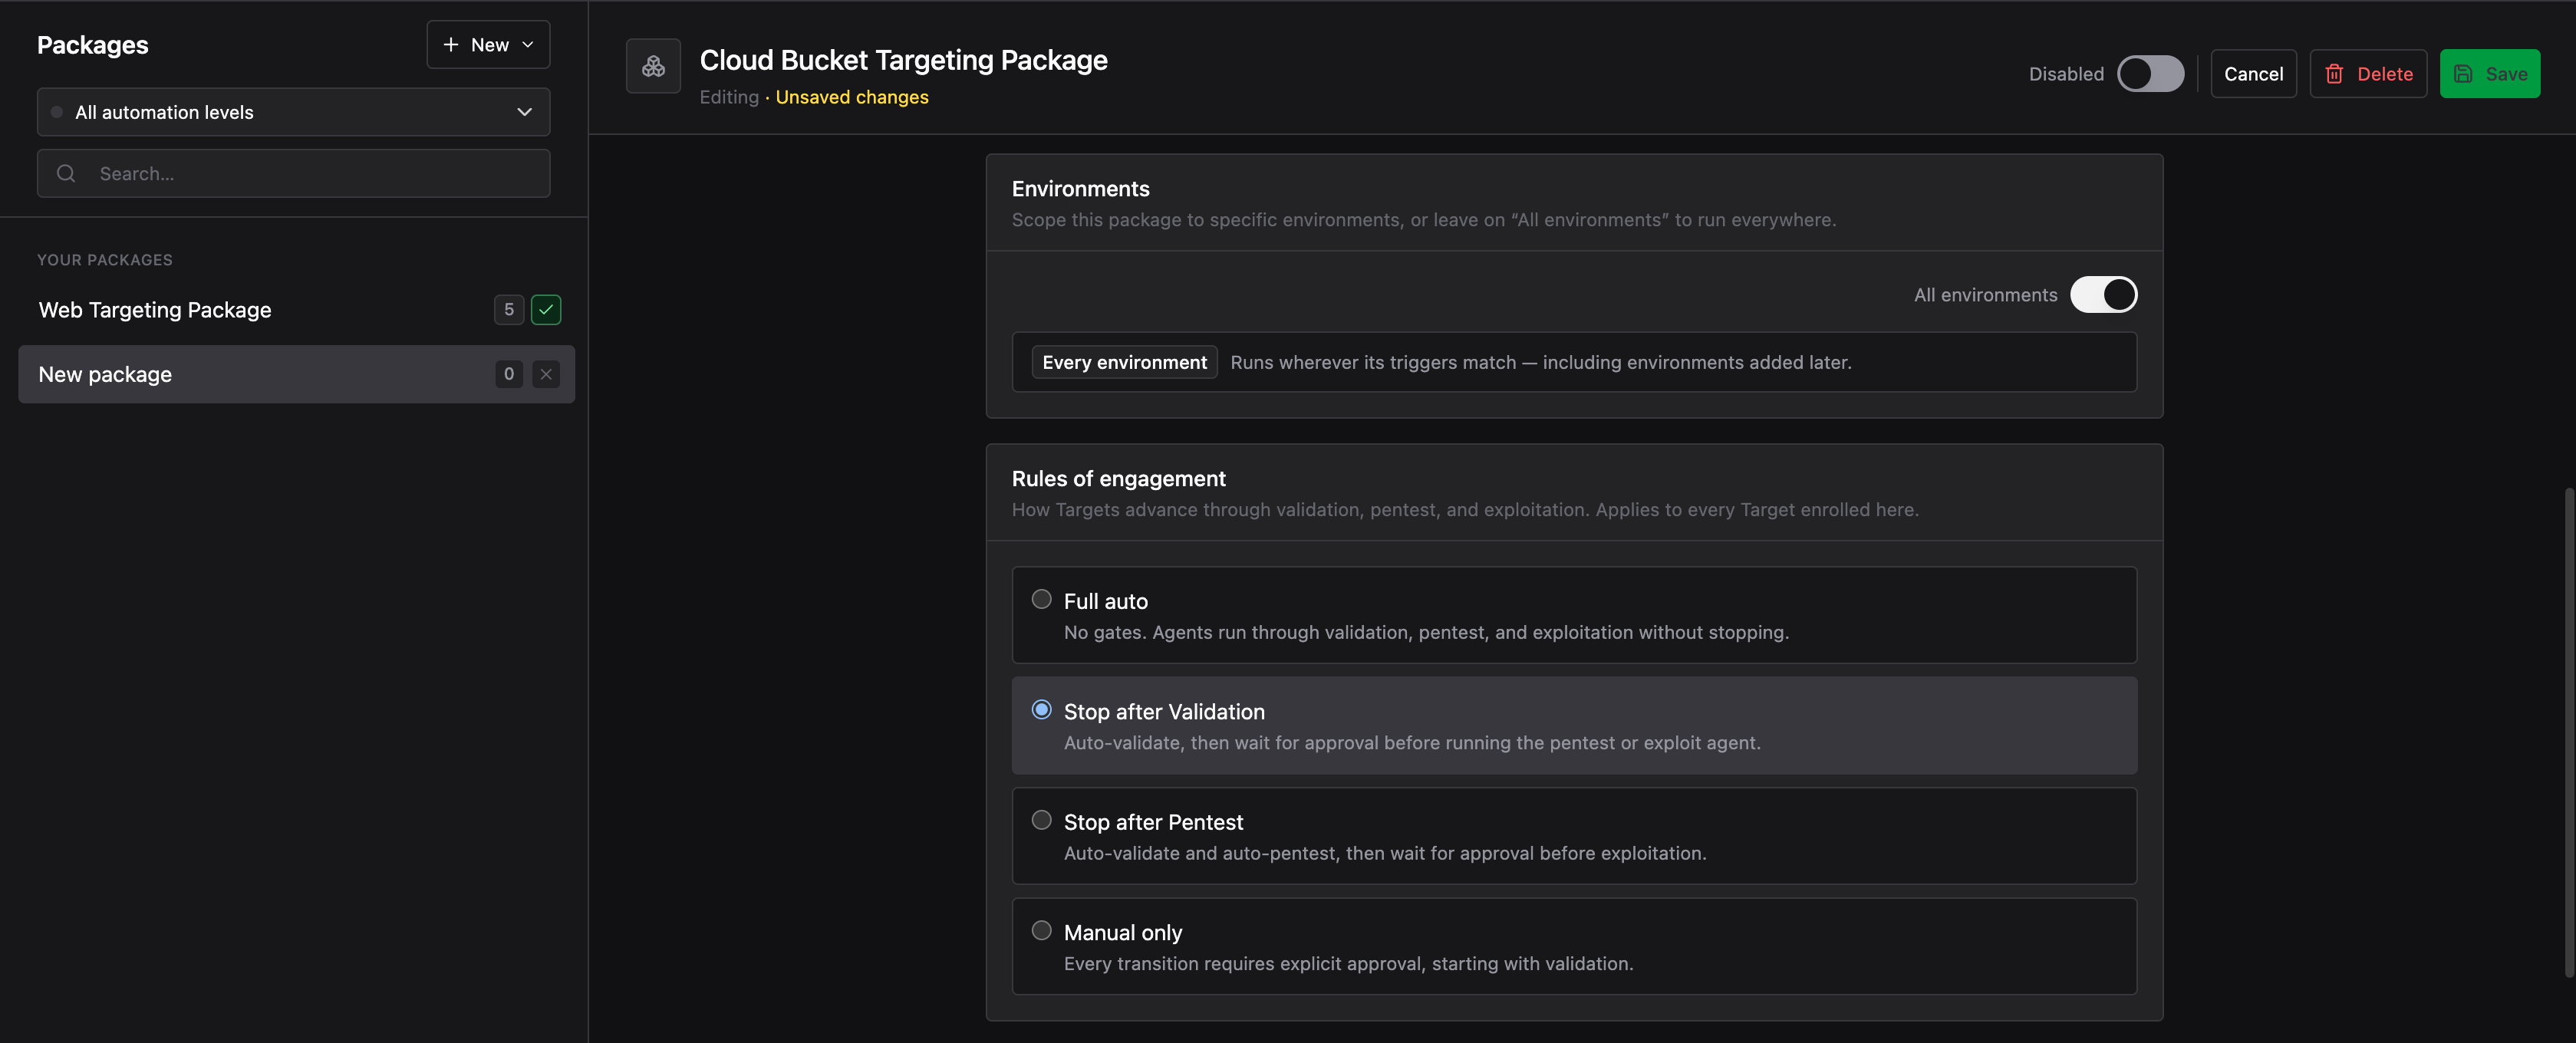
Set Environments and Rules of Engagement
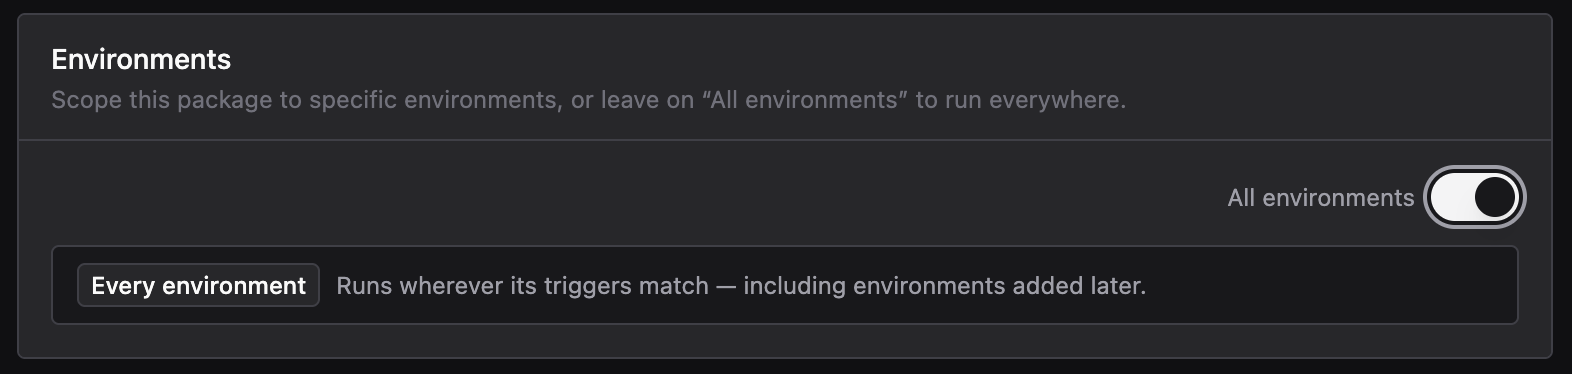
Environments
Set which Environments this Package runs against. Leave the All environments toggle on to apply the Package wherever its Triggers match, including Environments added later.
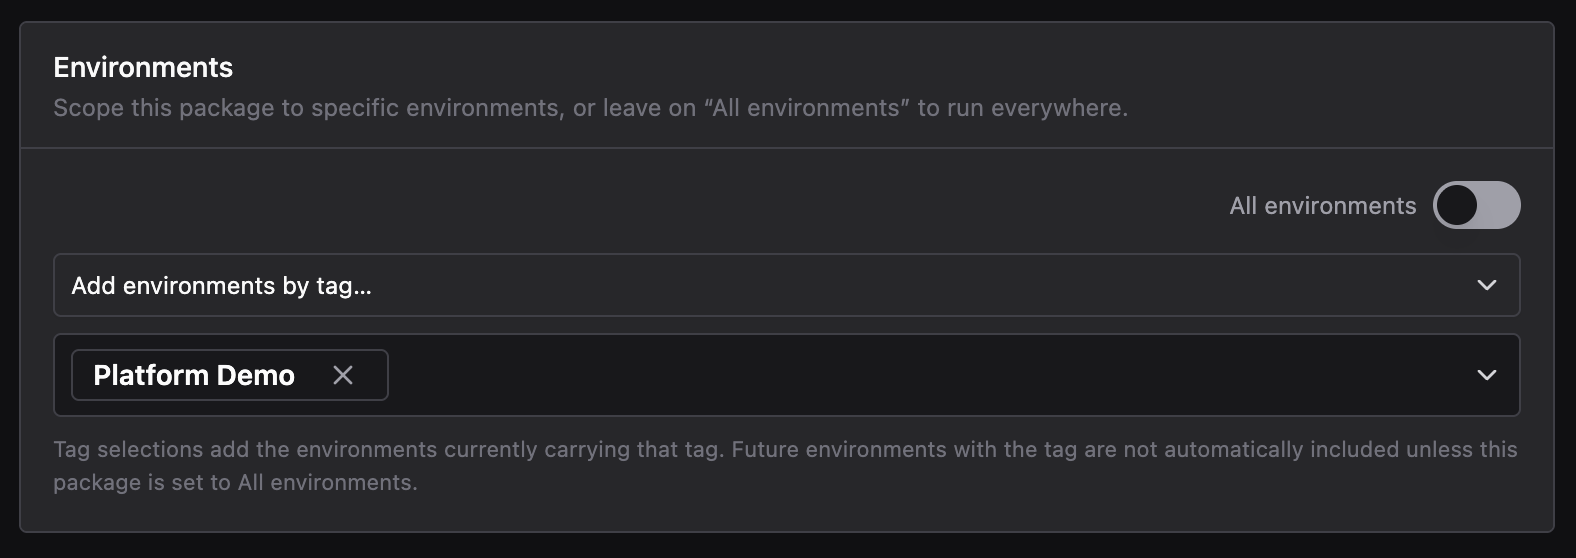
To focus the Package on a specific scope, turn off All environments and add Environments by tag. Tag selections add the Environments currently carrying that tag. Future Environments with the tag are not included unless you set the Package back to All environments.
The more Environments a Package covers, the more Targets it generates. A Package scoped to every Environment runs its Triggers against Objects across your entire attack surface. Scoping to a specific subset limits coverage to a defined business unit, account, or engagement.
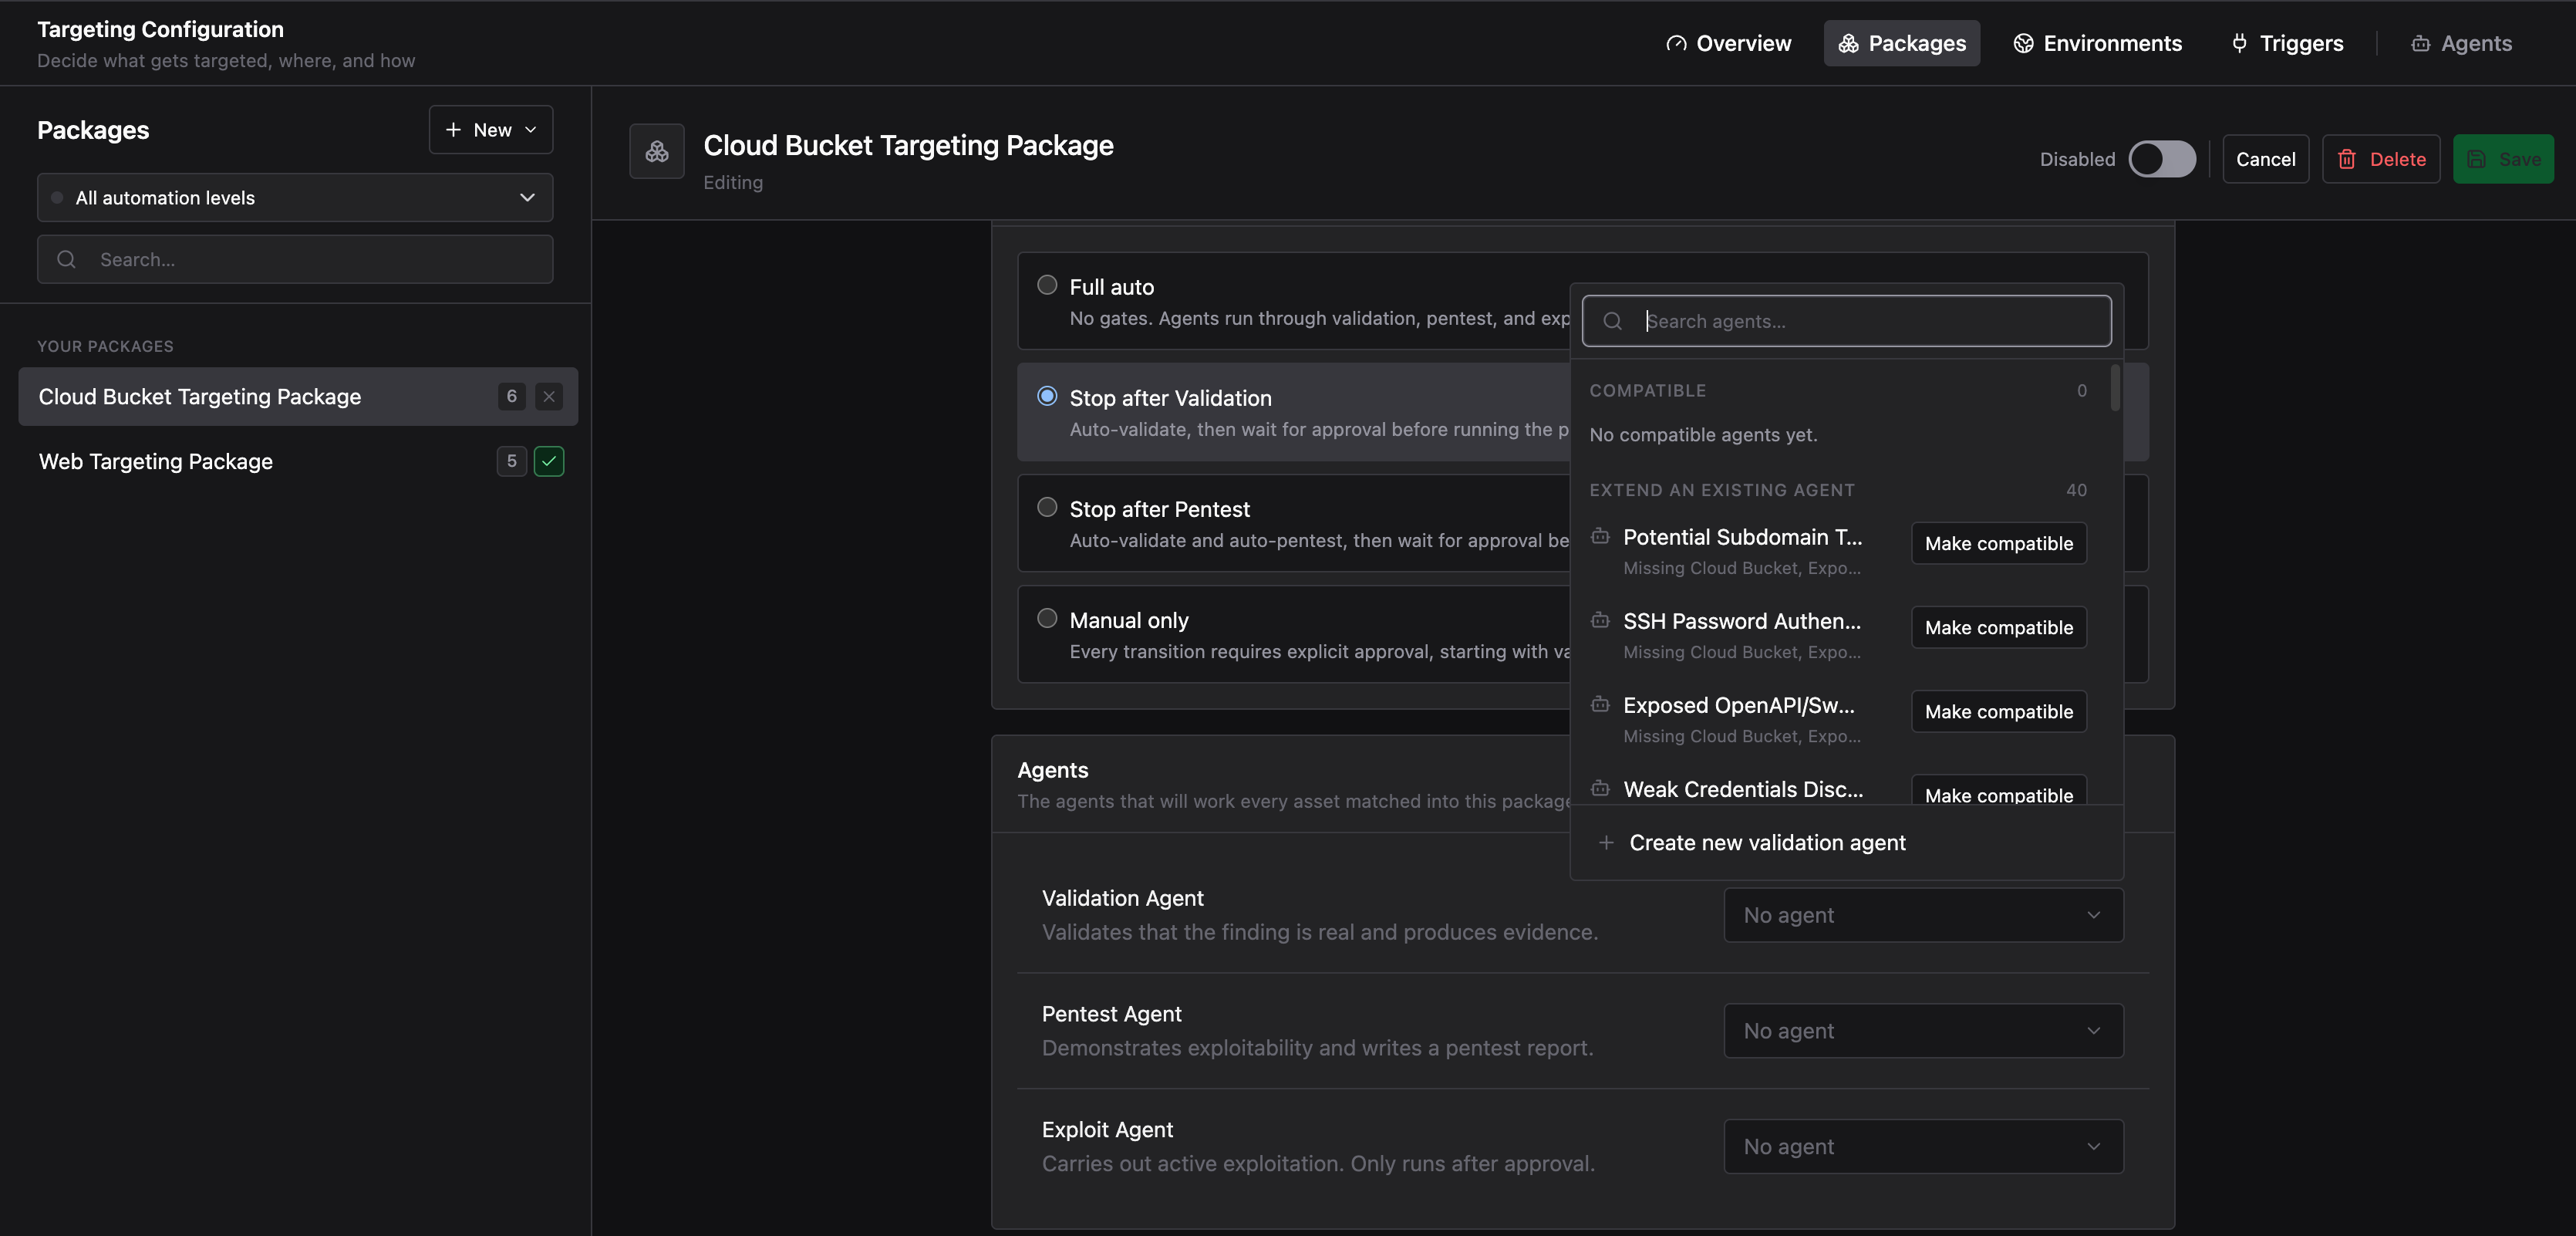
Rules of Engagement
Rules of Engagement (RoE) control how far automation proceeds before requiring your approval:
- Full auto: No gates. Agents run through validation, pentest, and exploitation without stopping.
- Stop after Validation: Auto-validate, then wait for your approval before the Pentest or Exploit Agent runs.
- Stop after Pentest: Auto-validate and auto-pentest, then wait for your approval before exploitation.
- Manual only: Every transition requires explicit approval, starting with validation.
The core trade-off is autonomy versus manual work. More automation means faster coverage and fewer decisions to make at each stage. Less automation means more control, but at high scale, requiring manual approval at every transition is not practical to maintain. For most programs, Stop after Validation is a reasonable starting point: validation runs automatically to filter false positives, and you review what remains before any pentest or exploit activity runs.
Rules of Engagement and Environment scope work together to bound blast radius. A permissive mode like Full auto lets Agents pentest and exploit without a gate, so the Environments a Package covers define where that activity is authorized to run. The more automation you grant, the more deliberate your Environment scope should be.
For this Package, select Stop after Validation. The Validation Agent runs automatically, and the funnel pauses for your approval before any pentest or exploit activity runs.
Assign Agents
Select the Agents that run against assets this Package enrolls as Targets. The Package has three slots: Validation Agent, Pentest Agent, and Exploit Agent. Each slot corresponds to a stage in the Targeting funnel and only runs if your Rules of Engagement allow it to proceed.
Method surfaces pre-built Agents in two categories when you open the Agent selector:
- Compatible: Agents built for the Trigger types this Package declares. Their tools, prompts, and context are already matched to the assets this Package targets. Start here.
- Extendable: Agents that can work with this Package’s Triggers but may need adjustment to be fully effective. Select one as a starting point and customize it, or use it as a reference when building your own.
For this Package, select Challenger Object Cloud Bucket Validation as the Validation Agent.
If no existing Agent fits your needs, build one that encodes your own tradecraft for this attack surface. See Create an Agent for a full walkthrough.
Next steps
- Start a new Campaign: deploy this Package against an Environment
- Review and act on Targets: triage funnel results once the Campaign is running
- Create an Agent: build a custom Agent to assign to this Package