Continuous External Challenge
This is the second stage of the Continuous Challenge maturity ladder. Black Box External Assessment produces a live inventory and a queue of validated Issues. This stage turns on the autonomous Targeting workflow that takes those Issues through PoC and exploitation, starting with a human in the loop and graduating to Full auto as you build trust.
Turning on Continuous External Challenge will give you:
- A daily queue of exploited or exploitable Targets that Method Agents have autonomously produced a working PoC for or exploited, ready for you to review.
- A funnel that tracks every validated Issue from Potential Target through Targeted, Validated, Exploitable, Exploited, and Remediated across every Environment.
- All while respecting the Rules of Engagement that you configure and control.
Targeting starts conservative, with a human in the loop on every exploitable Target. Over weeks, you tune the Rules of Engagement and graduate to Full auto on the surfaces as you build trust in the system.
Setup
The Targets app organizes Targeting into Packages. A Package bundles a set of Triggers (the Target Types Method should watch for), an Environment scope, the Rules of Engagement, and the three Agents that run each phase: a Validation Agent, a Pentest Agent, and an Exploit Agent. Method ships with pre-built Packages covering common surfaces: General, Web App, Network, Known Software, Cloud, and Identity.
Open a Method Package
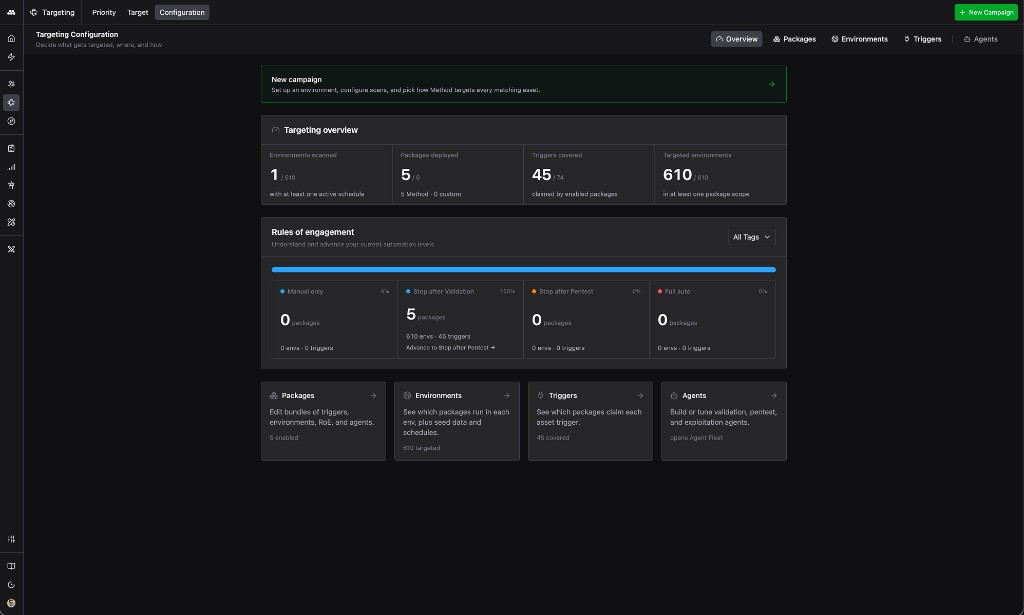
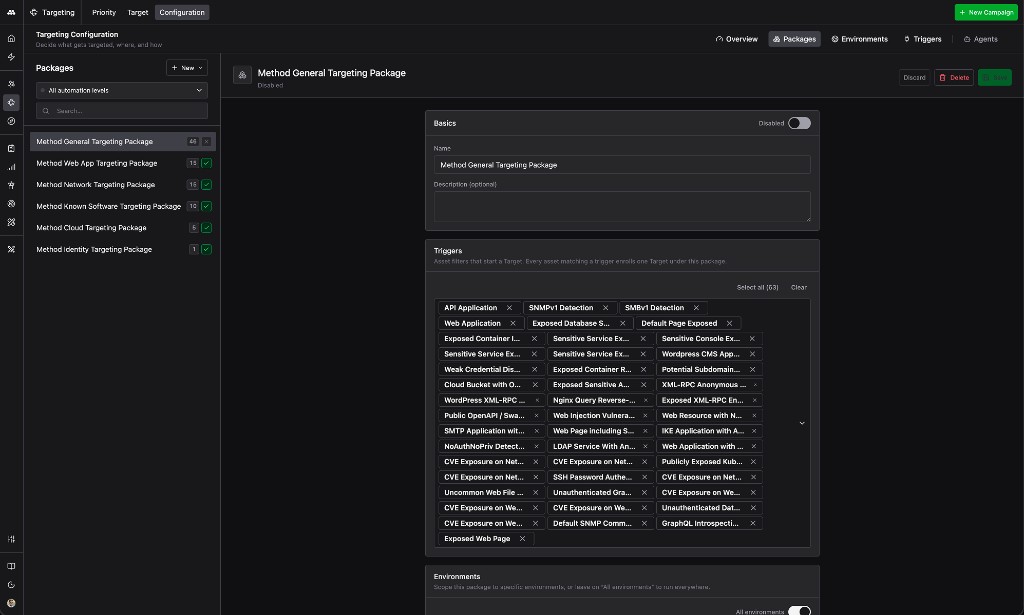
Go to Targeting > Configuration > Packages. You will see Method’s pre-built Packages listed with their current status and Trigger coverage.
Open the Method General Targeting Package first. It covers the broadest set of Triggers (API applications, exposed services, SNMP detections, and dozens more) and is the safest place to start. The Package configuration form has four sections: Basics, Triggers, Environments, Rules of engagement, and Agents.
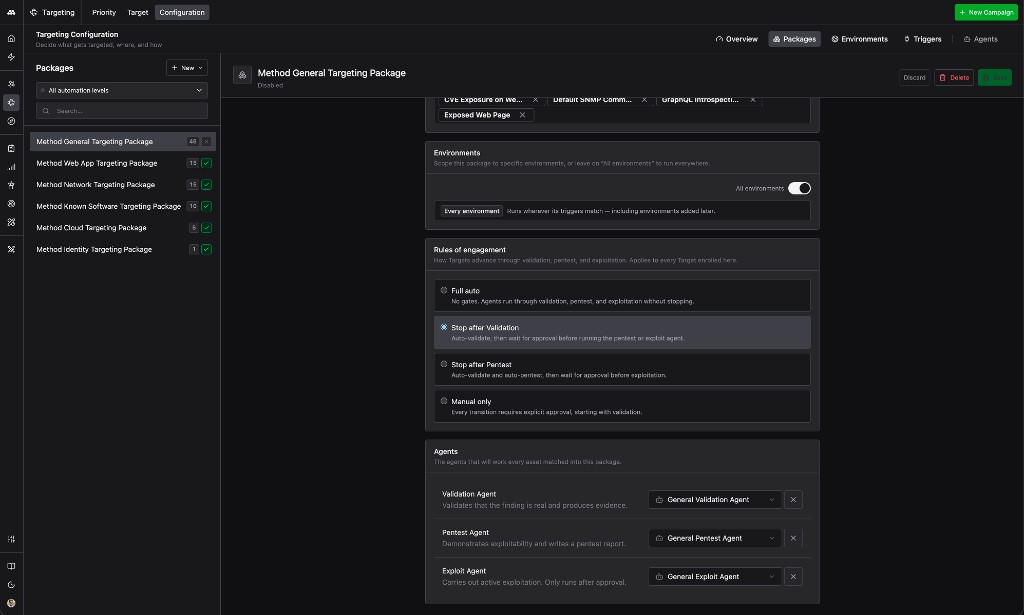
Set the Rules of engagement to Stop after Pentest
In the Rules of engagement section, select Stop after Pentest. Method will auto-validate matching Issues, auto-run the Pentest Agent to produce a PoC, then wait for human approval before any Exploit Agent runs.
This is the recommended starting point the first time you turn on a Package. You get the throughput of autonomous validation and PoC across every matching Issue, with a deliberate gate before exploitation.
Leave All environments toggled on unless you want to scope this Package to a subset.
Confirm the assigned Agents
Each Package has three Agents assigned by default. The Method General Targeting Package is wired to General Validation Agent, General Pentest Agent, and General Exploit Agent.
Open each Agent from the Agent Fleet to review its system prompt, MCP Tools, and Skills before you turn the Package on. Swap in a custom Agent here if you have built one for these Triggers.
Save the Package. Repeat for any other Method Packages you want to enable on day one.
Refine the guardrails further
Packages set the broad strokes, such enabling specific Triggers, which Environments are in scope, and where Method pauses for approval.
You also have additional levers to refine where and how Method operates: an exclusion list per Environment, customizations to the validation Agents, and per-Target Type Rules of Engagement on top of the per-Package RoE.
Each step below is optional, and they can be completed in any order.
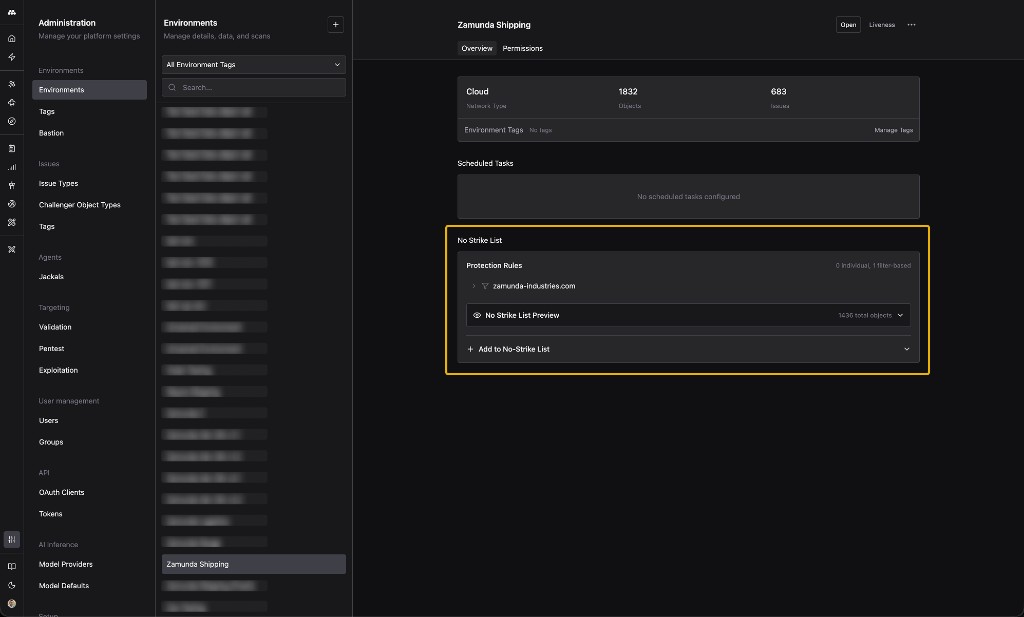
Define No Strike Lists for each Environment
No Strike Lists keep critical or out-of-scope Objects off Method’s target list. They apply to every scan, Operation, and Targeting workflow in the Environment.
Open the Administration app, select an Environment, and find the No Strike List section on the Overview tab. Add Protection Rules by filter (such as a domain pattern) or by individual Object. The No Strike List Preview counter shows how many Objects fall under your rules.
Common cases for No Strike entries:
- Assets your organization does not own
- Customer-facing systems where active probing carries unacceptable risk
- Anything explicitly out of scope for an engagement
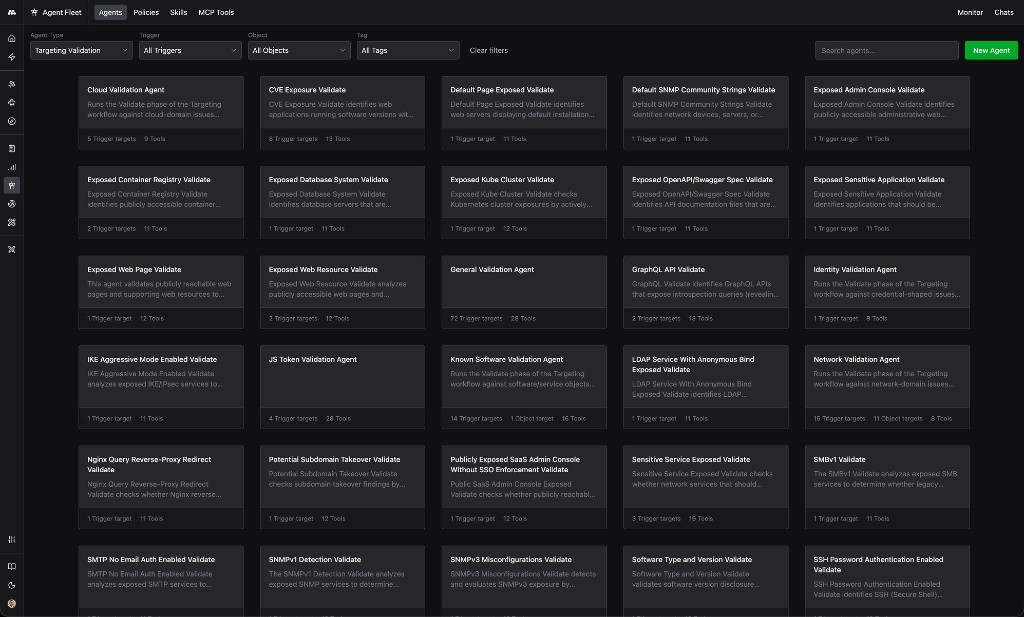
Review the Agents in Agent Fleet and add skills
Every Target Type has one or more validation Agents that probe matching Issues to confirm exploitability. Method ships with a starter Fleet covering common exposures across cloud, identity, network, and application surfaces.
Open the Agent Fleet and filter Agent Type to Targeting Validation. Open any Agent to inspect its system prompt, model, attached MCP Tools, and trigger criteria. Duplicate an Agent to fork it for customization, or click New Agent to author one from scratch. Encode your team’s tradecraft through the system prompt, the MCP Tools you give the Agent, and SKILL.md files you publish in the Skills tab.
Govern the Fleet with Policies to enforce approve, deny, and require-approval rules across Agents, Environments, and MCP Tools. The same review applies to the Pentest and Exploit Agents wired to each Package.
For background on Agents and Policies, see AI Agents. For a walkthrough on creating Policies, see Create a Policy.
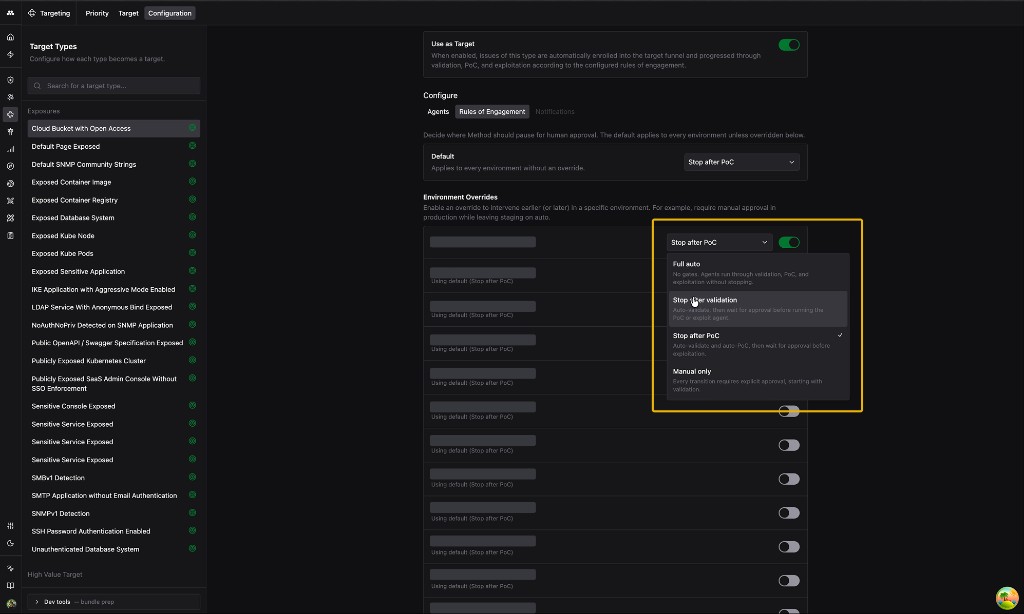
Set Rules of Engagement per Target Type
Package-level RoE applies uniformly to every Trigger inside a Package. Per-Target Type RoE adds a finer matrix on top: lock a specific Target Type to a more conservative posture (or relax it) regardless of which Package selects it.
Open Targeting, go to Configuration, and select a Target Type from the left rail. On the Rules of Engagement tab, set the Default RoE. Use Environment Overrides to relax automation in lower environments while keeping production conservative. At the top, the Use as Target toggle gates whether Issues of this type enter the Targeting funnel at all.
What this changes when Method runs
The Issues funnel from earlier stages continues to populate. Issues that match an enabled Package’s Triggers now enter the Targeting workflow.
Issues become Targets
When a new Issue matches an enabled Package’s Triggers, Method opens a Target for it. The Target carries the Issue context, the affected Objects, and the Package that selected it. Targets are visible on the Target tab and progress through the funnel: Potential Targets, Targeted, Validated, Exploitable, Exploited, Remediated.
The Pentest Agent runs automatically
For any Package set to Stop after Pentest, the Pentest Agent runs as soon as the Validation Agent confirms exploitability. It develops a working PoC against the validated exposure and attaches it to the Target. Targets with a completed PoC land in the Exploitable stage of the funnel.
Exploitable Targets queue for approval
The Exploit Agent does not run until you press Proceed on a Target. Each exploitable Target arrives in the queue with the Validation Agent’s reasoning and the Pentest Agent’s PoC attached, so you have what you need to make the call.
No Strike Lists exclude protected Objects
Method skips any Object that matches an Environment’s No Strike List. Skipped Objects are recorded with the rule that excluded them, so audits and exception reviews have a trail.
Validation Agents apply your customizations and Policies
Issues route to the validation Agent that matches their Target Type. The Agent runs under its current system prompt, MCP Tools, and Skills, inside the guardrails of the Policies governing the Fleet. Customizations you make in the Fleet take effect on the next matching Issue.
Build trust, then graduate to Full auto
We recommend starting the Targeting machine by enabling autonomous Validation and PoC development, followed by manual approval for Exploit agents to take over. However, over days or weeks of running and reviewing manually, you can tune the RoE per Package and move to Full auto where the Agents have earned trust.
Week one.
- Leave every enabled Package at Stop after Pentest.
- Check the Target queue daily.
- For each exploitable Target, read the Validation Agent’s reasoning and the Pentest Agent’s PoC, then press Proceed or Abort.
- Note which Triggers consistently produce clean validations and PoCs.
Adjust RoE per Package.
- A Package whose Triggers cleanly validate and PoC across the board is a candidate to graduate.
- A Package producing noisy or risky PoCs is a candidate to drop back to Stop after Validation while you tune the Agents in the Agent Fleet or tighten the per-Target Type RoE.
Graduate to Full auto.
- When a Package has earned trust, set its RoE to Full auto.
- The Exploit Agent runs on every Validated, Exploitable Target without waiting for approval.
- You can still review what was exploited after the fact, but the daily queue shrinks to the Packages you have not yet graduated.
Manual only as a safety valve. Drop a Package to Manual only if you ever want to investigate any Agent behavior or Environment particulars. In Manual mode, every phase, including validation, waits for explicit approval. Use this as a temporary brake while you investigate, not a steady state.
Day-to-day usage
The Targets app’s Priority tab shows Exploitable and Exploited Targets for your review, and the Target tab shows the entire funnel.
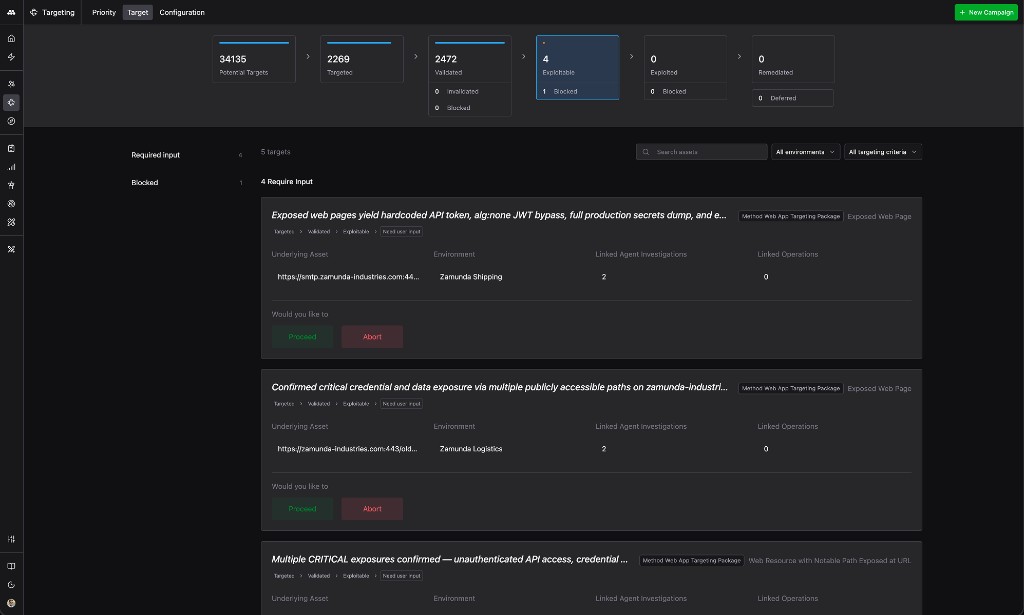
- Work the queue. Targets in Exploitable that require input list at the top of the tab. Open a Target to see the Validation Agent’s findings, the Pentest Agent’s PoC, and the affected Objects before pressing Proceed or Abort.
- Watch the funnel. The counts at the top show how many Potential Targets are in scope, how many became Targeted, and how many reached each downstream stage. The Blocked count surfaces RoE conflicts and No Strike List matches worth reviewing.
- Pivot into Operations. When an exploitable Target needs a deeper look, jump into Operator. Method seeds the Operation with the Target’s context, the Pentest PoC, and the underlying Objects, so you land ready to work.
- Track remediation. Once the underlying Issue is closed, the associated Target moves to Remediated. The Target page becomes a record of what was found, exploited, and resolved over time.