Create a Task
Build a Task in the Automator app to chain Tools into a repeatable workflow.
Open the Create Task form
-
From the left sidebar, navigate to the Automator app.
-
In the top-right corner, click New Task.
The Create Task form opens as a single page. Fill in the metadata at the top, declare any input parameters the user should provide at run time, and build the execution Plan in the canvas at the bottom. When everything looks right, click Create Task in the top-right corner to save.
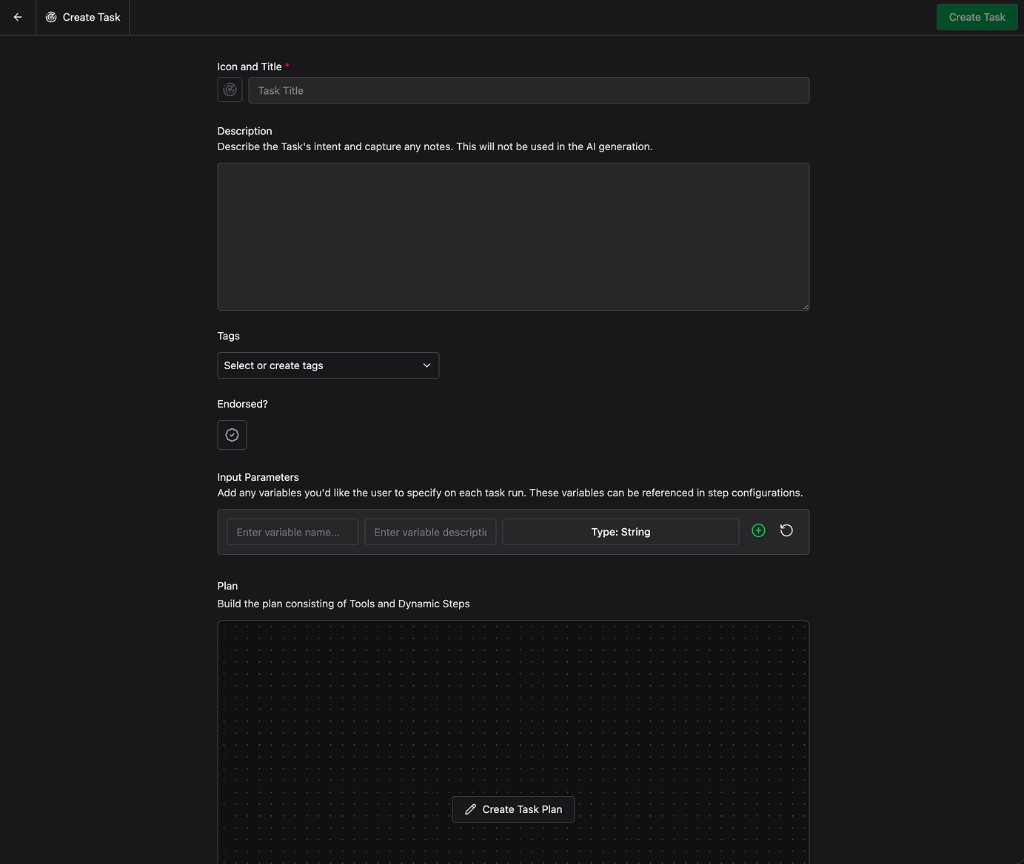
Add metadata
Use the metadata fields at the top of the form to describe what the Task does so it’s easy to find and understand later.
- Icon and Title: Pick an icon and give the Task a short, unique title so it’s easy to recognize when it appears elsewhere on the platform.
- Description: A long-form explanation of the Task’s intent and any operator notes. This is metadata for humans only and is not used in AI generation.
- Tags: Optional labels that make Tasks easier to filter and group later.
- Endorsed?: Toggle on to mark the Task as endorsed for others to rely on. Leave it off if you’re unsure.
Declare input parameters
Use the Input Parameters section to define any variables the user must supply each time the Task runs. Each variable has a name, a description, and a type, and can be referenced inside the Plan to feed values into individual steps.
If you aren’t sure what variables you need yet, leave this blank for now. Once you’ve laid out the Plan, you’ll see exactly which steps need user input and you can come back here to declare the matching variables.
Build the Plan
The Plan defines the execution graph for your Task: which steps run, in what order, and how Objects flow between them.
In the Plan section of the form, click Create Task Plan to open the full-page Plan editor.
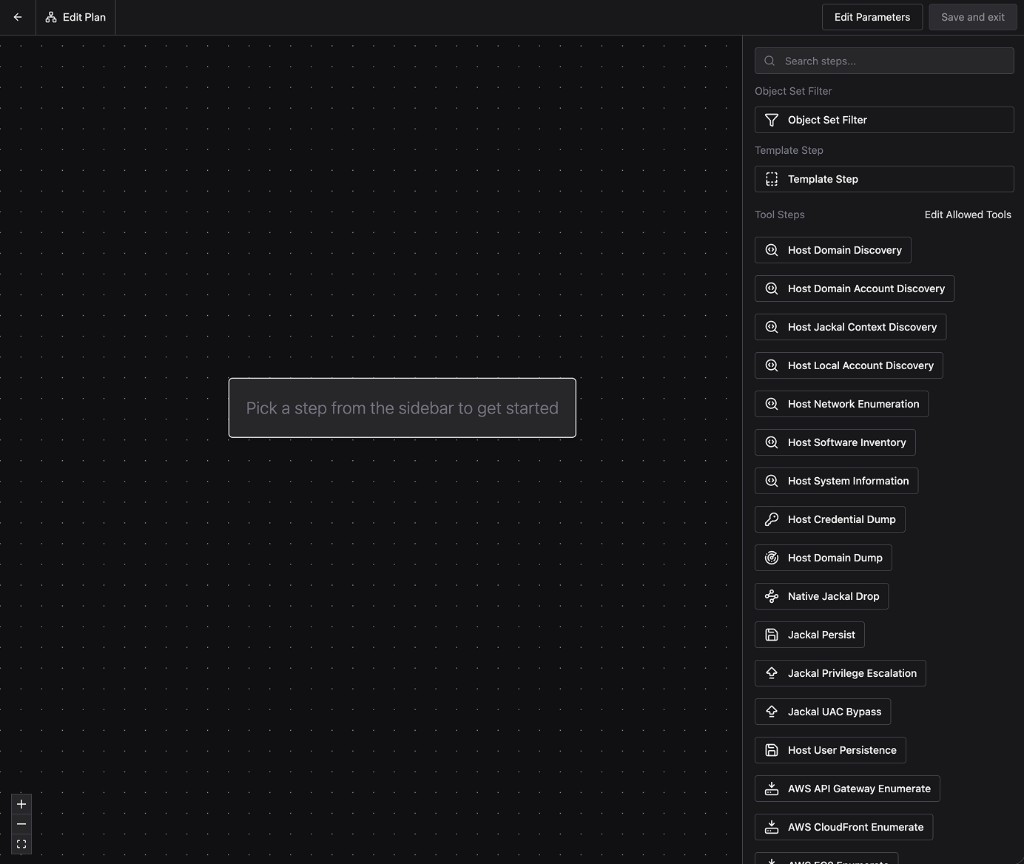
The editor has a large canvas in the middle and a sidebar on the right where you can pick from three kinds of steps:
- Object Set Filter: Filter the Objects flowing into the Plan against a saved Object Set.
- Template Step: A reusable Plan fragment you can embed inside this Task. Templates make it easy to share logic across Tasks without rebuilding it from scratch.
- Tool Steps: Individual Tools the Task can run. Use Edit Allowed Tools in the sidebar to scope which Tools are available in this Task.
Pick a step from the sidebar to add it to the canvas. The step’s configuration panel opens on the right.
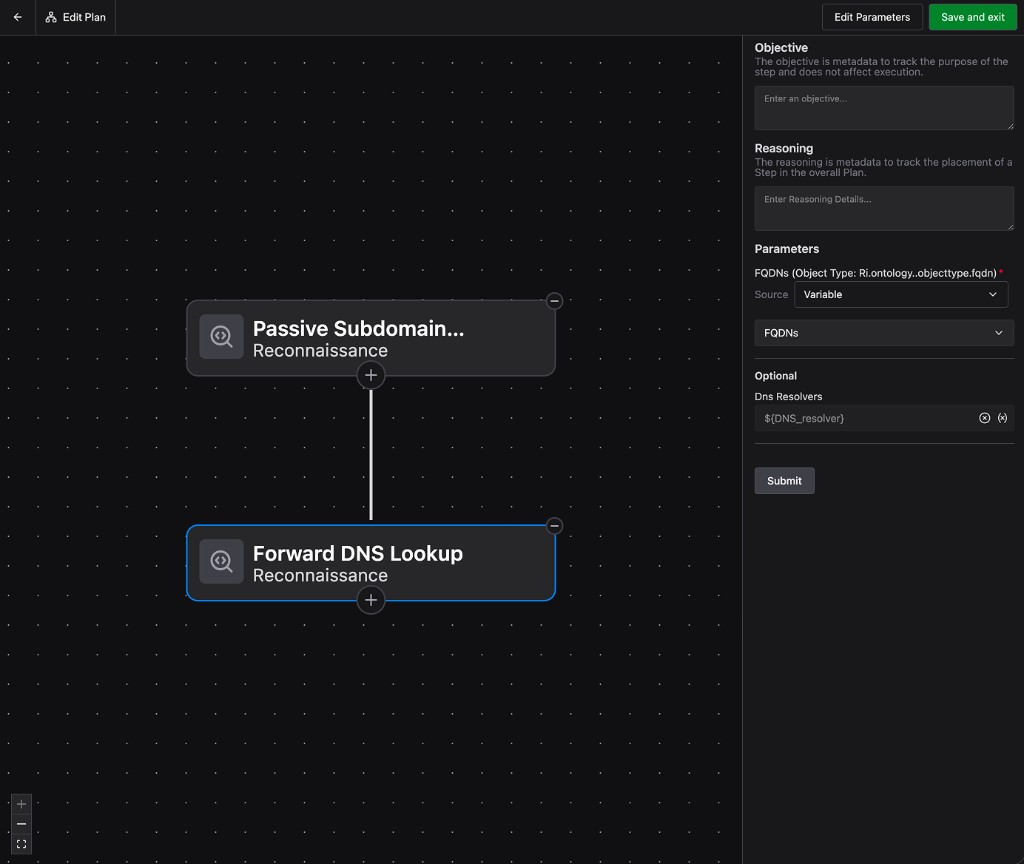
For each step, configure:
- Objective and Reasoning: Optional metadata that captures why the step is in the Plan. Neither field affects execution.
- Parameters: The inputs the step needs to run. Each parameter has a Source dropdown that controls where its value comes from. For example, choose Variable to pull from an Input Parameter you declared on the form, or pick a graph-based source to pull Objects from earlier steps in the Plan.
- Optional: Any non-required parameters the step exposes. Leave them blank to use the step’s defaults.
Click Submit to confirm the step’s configuration. To add the next step in the chain, click the + icon at the bottom of an existing node and pick another step from the sidebar.
Repeat the pattern — add a step, configure it, set the Source for each parameter — until the graph reflects the workflow you want.
When you’re done, click Save and exit in the top-right to return to the Create Task form. Back on the form, click Create Task to save the Task.
With your Task built, see Run a Task for how to execute it on demand or on a schedule.